With only four sleeps till Christmas, it’s quite likely your holiday traditions are looking a little different this year. We’re not all gathering at grandma’s house or having a gaggle of cousins over for a raucous Christmas morning. And if you’re like me, this means we can’t rely on our family members to deliver the traditional Christmas morning treats. Thankfully, I was recently introduced to Ali Stafford and her new cookbook, Bread, Toast, Crumbs. You might know Ali from her blog, Alexandra’s Kitchen – she’s got a list of 25 Christmas Cookies I’m currently drooling over.

But for now I’m focused on creating a special memory for Christmas morning – preferably one that doesn’t take days of advanced preparation or a mountain of baking skills as I do not have them.

Thankfully, that is what Ali is best known for – creating recipes real people can actually replicate! I immediately honed in on her Cinnamon Sugar Monkey Bread. My son loves all things cinnamon so I know this recipe be a winner, but it is a little less of a sugar bomb than cinnamon rolls, which I appreciate. I’ll have enough mega-five-year-old energy as it is. No additional assistance is necessary.

While so many of our traditions are flipped on their heads, I’m actually excited to take the opportunity to create new memories that could turn into new traditions for years to come.

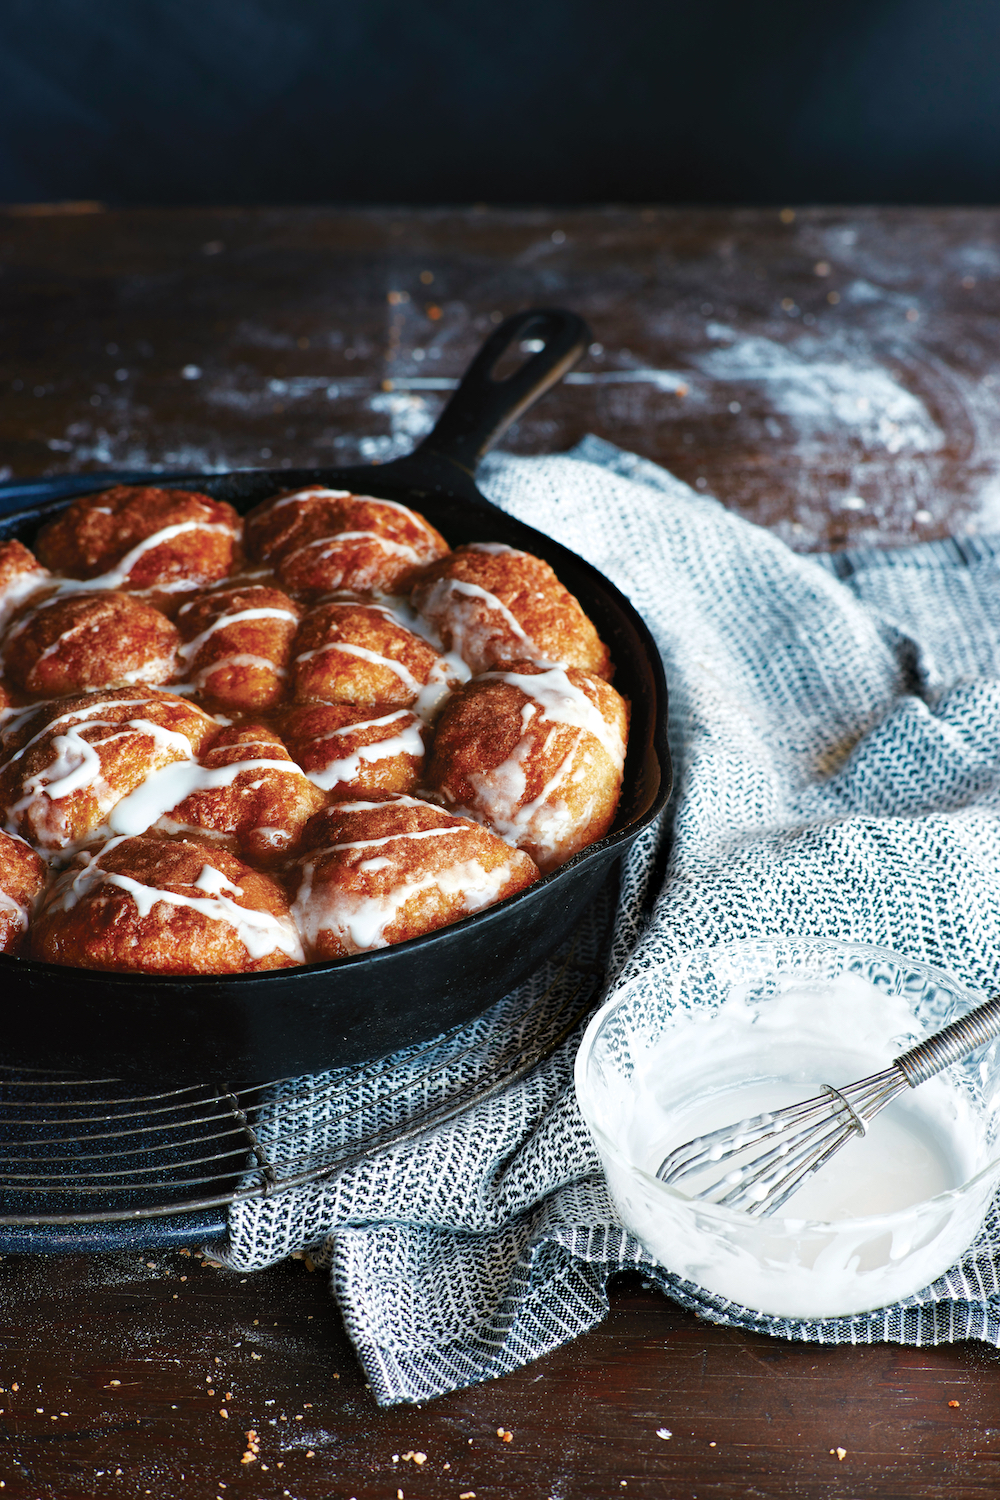
RECIPE: Cinnamon Sugar Monkey Bread (serves 4)

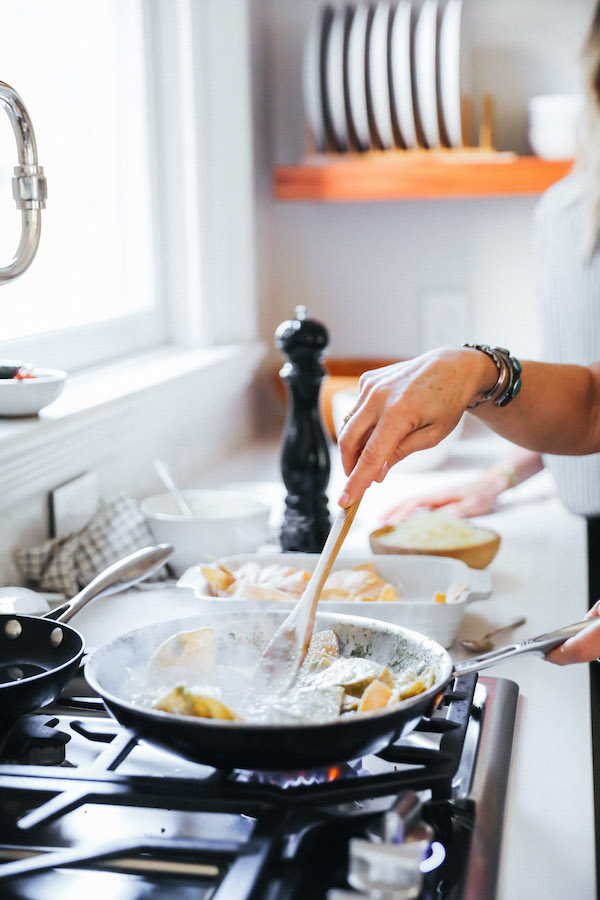
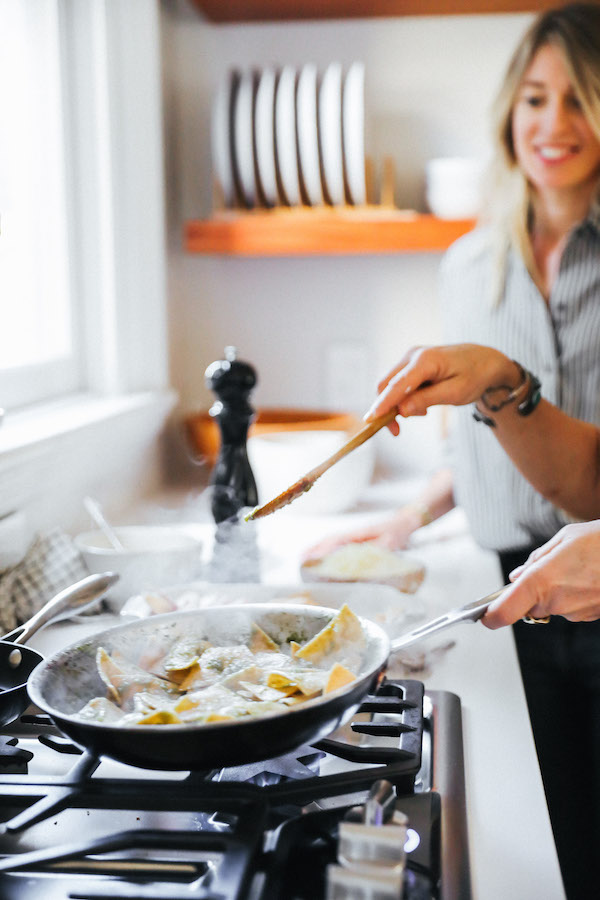
The key to making monkey bread, sweet or savory, is to handle the dough as minimally as possible. Don’t get hung up on forming perfect balls- irregularity is part of the charm of this communal breakfast or dessert. As the portions of the dough rise, their imperfections dissolve into a cobble of cinnamon-sugar encrusted puffs. The glaze is optional, though a drizzle just before the mass is pulled to pieces makes for a pretty presentation.

Ingredients

2 cups (255 g) unbleached all-purpose flour, plus ¼ cup (32 g) for dusting
1 teaspoon kosher salt
1 teaspoon plus ¼ cup (55 g) granulated sugar
1 teaspoon instant yeast
1 cup lukewarm water
Softened unsalted butter, for greasing
1 teaspoon cinnamon
4 tablespoons (½ stick) unsalted butter, melted
½ cup confectioners’ sugar
2 teaspoons milk, plus more as needed

Directions

In a medium bowl, whisk together 2 cups flour, salt, 1 teaspoon granulated sugar, and instant yeast. Add the water. Using a rubber spatula, mix until the liquid is absorbed and the ingredients form a sticky dough ball. Cover the bowl with a damp tea towel or plastic wrap and set aside in a warm spot to rise for 1 to 1 ½ hours, until the dough has doubled in bulk.

Set a rack in the middle of the oven and preheat it to 375F. Grease an 8-or 9-inch cast-iron skillet or circular or square baking pan with the softened butter. In a small bowl, stir together the cinnamon and remaining ¼ cup granulated sugar. Sprinkle 1 tablespoon of the mixture over the bottom of the prepared skillet.

Spread ¼ cup flour over a clean surface. Using two forks, deflate the dough by releasing it from the sides of the bowl and pulling it toward the center. Rotate the bowl quarter turns as you deflate, turning the mass into a rough ball. Use the forks to lift the dough onto the prepared clean surface. Using as much flour as necessary from the surface, dust your hands and the exterior of the dough, then shape the mass as best you can into the ball. Using a bench scraper or a knife, divide the mass into twelve to fourteen equal-size pieces, each 1 to 2 inches in diameter.

Using as much flour as needed to prevent sticking, shape each piece into a rough ball and immediately transfer them into the greased pan, evenly spaced. Let rise for 20 to 25 minutes. The balls may not rise to fill the skillet entirely, but they will puff when they bake.

Brush each ball with some melted butter, then pour over the remainder. Sprinkle with the remaining cinnamon-sugar mixture. Transfer the skillet to the oven and bake for 20 to 25 minutes, until golden.

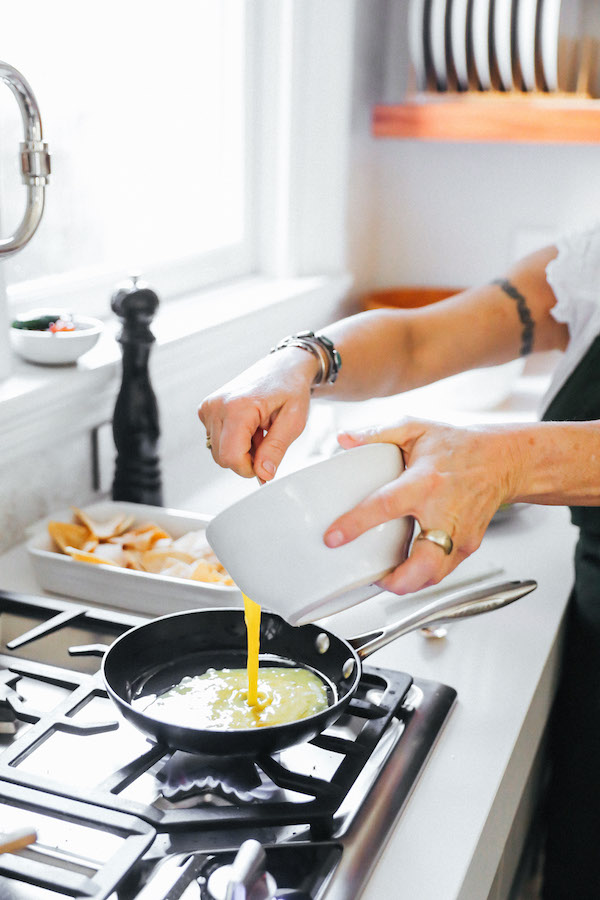
Meanwhile, make the glaze: Whisk together the confectioners’ sugar and milk in a small bowl until it reaches a pourable consistency, adding more milk as needed. Remove the monkey bread from the oven and let it cool for 5 minutes in the pan before inverting the pan onto a plate, then invert it again onto a serving platter. Drizzle with glaze. Serve immediately.


For more of my favorite holiday recipes CLICK HERE.


Monkey Bread Photo Credit: Reprinted from Bread Toast Crumbs. Copyright © 2017 by Alexandra Stafford. Photographs by Eva Kolenko. Published by Clarkson Potter/Publishers, an imprint of Penguin Random House, LLC.

I have never been much of a baker – sorry no sourdough or banana bread is happening around here right now – and I wouldn’t even say I have much of a sweet tooth, but quartine starts to get to you after a while.

When I saw this cake by my friend and wonderful chef Amanda Frederickson, I knew I had to give it a go. She’s just come out with a fantastic cookbook called Simple Beautiful Food filled with gorgeous but most importantly easy-to-make dishes that you can whip up quickly.

This beauty of a cake’s primary ingredient is olive oil, but the addition of orange adds a lovely subtle flavor. This is the kind of cake you can eat for breakfast. Trust me, I tried it and I think you should too. Continue to scroll for the complete recipe.

orange cake recipe on apartment 34

Orange Olive Oil Cake with Mascarpone Whipped Cream
adapted from Food 52 recipe 

For the cake:
• 2 cups all-purpose flour
• 1 3/4 cups sugar
• 1 1/2 tsp. kosher salt
• 1/2 tsp. baking soda
• 1/2 tsp. baking powder
• 1 1/3 cups extra-virgin olive oil
• 3 large eggs, separated
• 1 1/2 Tbs. orange zest
• 1 1/4 cups whole milk
• 1/4 cup fresh orange juice
• 1/4 cup Grand Marnier

For the topping:
• 1 cup heavy whipping cream
• 2 Tbs. sugar
• 8 oz. mascarpone cheese, cold

Pre-heat oven to 350°F. Line a 9″ cake pan with parchment paper and spray with non-stick spray.

In a large bowl, whisk combine the flour, sugar, salt, baking soda, and baking powder.
In another bowl, combine the olive oil and egg yolks. Whisk well until creamy and emulsified, about 1 to 2 minutes. Add the egg whites, milk, orange zest, orange juice and Grand Marnier and whisk to combine.

Add the dry ingredients to the wet ingredients and mix until just combined. Pour the batter into the prepared cake pan and bake the cake for about 1 hour or until a toothpick comes out clean when inserted into the middle. (Cover the top of the cake if it starts to become too brown).
Let the cake cool to room temperature.

When ready to serve the cake, make the mascarpone whipped cream by whipping the cream and sugar (either by hand or using a mixer) until soft peaks form. Add the mascarpone cheese and whip until just combined. Place a couple of large dollops of the whipped cream on the center of the cake and garnish with orange zest.
Serve immediately.

Makes 8 to 10 servings.

For our entire recipe archive, CLICK HERE. You can see everything I’ve been cooking in quarantine right here.

cake image and recipe courtesy of amanda frederickson, cake slice by moi

If, like me, you’re feeling a little behind the Easter eight ball, (yeah it’s coming up this weekend – I forgot too), you still have time to whip up a fun bunny-fest.

While I wasn’t really planning on doing much for Easter, my girl Cassandra’s Easter tabletop has me inspired to get my act together. This lovely little roasted carrot recipe also looks like it could be a real crowd pleaser.

A Tasty Easter Carrot Dish for Your Little Bunnies on apartment 34

RECIPE: BURNT CARROTS
(recipe from Simple Fare by Karen Mordechai)

Ingredients
2.5T olive oil
2.5T maple syrup
pinch of sea salt
6 bunches of baby carrots (about 30 small), scrubbed
25g parsley leaves
Labneh
Pistachio dukkah

Directions
Preheat the oven to 260C. Line a baking sheet with parchment paper.
In a large bowl, stir together the olive oil, maple syrup and salt. 
Add the carrots and toss to coat. Spread the carrots in a single layer on the prepared baking sheet, top with half of the parsley and bake for 10-12 minutes, watching to ensure that the carrots char but do not burn too much.

Spread the labneh on a platter using the back of a spoon. Rest the carrots atop the labneh and top with dukkah and remaining parsley. Sprinkle with pinch of black salt.

Labneh
2 ts fine salt
900ml full fat plain goats milk yogurt

Set super fine strainer over a bowl and line with double layer of cheesecloth. Stir the salt into the yogurt and scrap it to prepared strainer. Cover and refrigerate for 24h or until the labneh has reached the desired consistency.

Add a good spring cocktail,a classic deviled egg and maybe our most popular dessert of all time and I’ll call that a good party!

imagery and recipe adaptation by sanda vuckovic

Has the thought of hosting a holiday party ever left you stressing? Same. It can be hard to figure out a good menu, a theme or have something to entertain guests.

Enter fondue! While it might feel like a 70’s throwback, fondue is actually a really fun party activity – and bonus for being ridiculously delicious. But the best part about fondue is its ease. All you need is that tasty cheese, accompanying nibbles, a glass (or two!) of wine and all your friends.

A Holiday Party Made Easy with Fondue on apartment 34

But let’s start at the beginning. The makings of a stunning holiday fondue party are in fact, incredibly simple.

A Holiday Party Made Easy with Fondue on apartment 34A Holiday Party Made Easy with Fondue on apartment 34A Holiday Party Made Easy with Fondue on apartment 34

It all begins with ready-made fondue from Emmi USA. I used their classic original fondue. Everything to make the perfect fondue is in the box – traditional Swiss cheeses, white wine and Kirsch brandy. Just open the pouch inside, heat and serve!

You can even save and reheat any leftover fondue, but if your party is anything like mine, there won’t be a drop to spare. In fact, ours went so quickly we didn’t even have to use our fondue burner, but if you plan to linger, you definitely want to keep the cheese warmed.

A Holiday Party Made Easy with Fondue on apartment 34

Next let’s talk about your dippers. Creating dipping boards was almost more fun than my usual cheese and charcuterie boards.

You can get really creative with what dippers you offer. From classic fruits like apples and pears to all kinds of veggies; carrots, broccoli, cauliflower, tomatoes, radishes (with the greens left on for natural dipping handle!), even some frisée. It all tastes great coated in gooey cheese.

A Holiday Party Made Easy with Fondue on apartment 34A Holiday Party Made Easy with Fondue on apartment 34

I also like to offer a variety of breads. A good country rustic loaf, pretzel rolls and breadsticks are all fun and offer different textures. To up the protein factor, I also mixed in prosciutto and salami – they both go great with cheese so why not just dip it in some!

A Holiday Party Made Easy with Fondue on apartment 34A Holiday Party Made Easy with Fondue on apartment 34A Holiday Party Made Easy with Fondue on apartment 34A Holiday Party Made Easy with Fondue on apartment 34

Some fresh citrus, grapes and herbed nuts are good additional nibbles. Their light and bright notes counter the richness of the cheese. Similarly, a good white wine (I love a vermentino or a dry riesling) but any light white or even a rosé’s acids, will help cut through the yummy cheese.

A Holiday Party Made Easy with Fondue on apartment 34

There are a few pieces of key fondue etiquette. Your dipper of choice should go into the pot and then actually onto your plate before eating. Your skewer is not your fork. Double dipping is a big no no. And apparently if you lose something in the fondue pot you’ve got to kiss your neighbor!

A Holiday Party Made Easy with Fondue on apartment 34A Holiday Party Made Easy with Fondue on apartment 34

But really, the best part about a fondue party is how interactive and joyful it can be. The holiday season brings enough stress. It’s good to have a night for pure, delicious fun. Emmi Fondu can be found in the deli cheese area at your local grocer or specialty cheese shop. Find it near you at emmiusa.com/locator.

For more holiday recipes & party ideas, CLICK HERE.


original photography for apartment 34 by leslie santarina

This post is in partnership with Emmi USA. All thoughts and opinions are 100% my own. Thanks for supporting collaborations we’re excited about and that have kept apartment 34’s doors open.

Hello there, summertime. I’ve missed you and love you oh so much. Sunshine, beach time, warm night. But actually one of my favorite things about this time of year is the food! I count down the months until peaches, berries, watermelon and cherries pack the market shelves. So today, I’m celebrating the season delicious summer-inspired smoothies. You know the smoothies I’m talking about. The ones filled with fresh produce from the farmer’s market—so fresh you can taste it in every slurp of the straw. Is there any better way to enjoy  summer? I think not. (And there’s also no better way to detox after an over indulgent fourth of July week! I’m talkin’ more about the cleanse I’m currently trying on Insta-stories right now btw).

To make sure you’re armed with the best smoothies fruit (and in some cases, veggies) can make, I rounded up five of the most delicious—not to mention beautiful—recipes the great interwebs have to offer.

5 smoothies to jumpstart your day on apartment 34

I have a major crush on blood orange everything. Every time I see the item included in the recipe, I’m instantly attracted, and this Blood Orange, Berry and Spinach smoothie is no exception. Filled to the brim with citrusy goodness and superfoods like chia and hemp seeds, your day will be off to an amazing start with this in your to-go mug.

5 smoothies to jumpstart your day on apartment 34

Ah, the classic green smoothie. In this case, the Green Goddess smoothie. It’s loaded with all the goods—spinach, apple, banana, chia seeds, almond milk and for an extra creamy twist, avocado. Your belly will be nourished and full for hours.

5 smoothies to jumpstart your day on apartment 34

This Wild Blueberry Zucchini smoothie is, first of all, a very pretty color. Second, it’s extremely intriguing because I’ve never thought of zucchini as a smoothie veggie. But if this thing tastes even half as good as it looks, I’m sold.

5 smoothies to jumpstart your day on apartment 34

I feel like a good strawberry smoothie is a cult classic as far as blended fruit goes, but this one is actually a Strawberry & Mango Coconut Water smoothie. I love a good coconut essence, so this is one I’m definitely going to add to my weekly rotation. Plus, there’s also a handful of spinach mixed and I always appreciate a little hidden green.

5 smoothies to jumpstart your day on apartment 34

I never thought I’d be one to add whole nuts to a smoothie, but this Mango, Banana & Cashew smoothie recipe has me rethinking everything. Turns out when you soak or boil and then blend cashews, they’re marvelously creamy. Not to mention a healthy dose of good-for-you fats.

If you weren’t a smoothie drinker before, I bet you are now, yes? These all look so mouth-watering. Prefer to chew rather than sip your breakfast? Then you might enjoy our equally healthy and rather gorgeous smoothie bowl recipe. Smoothie lovers, this one is dang good too.

If you’re looking for something a little stronger than a smoothie, find all the margarita recipes you’ll ever need right here. Cheers!

recipe 1 / 2 / 3 / 4 / 5

I know St. Patrick’s day is just days away, but I’m not really a beer drinker (mama likes wine), nor am I a huge fan of soda bread, corned beef or shepherd’s pie. But that doesn’t mean I don’t want to be able to cook some crowd-pleasing celebratory food! I just choose to get a little more multi-cultural with it. Case in point, my love of all cuisines Mexican. Mexico has a special place in my heart – I travel there frequently and was married there. Living in San Francisco, I indulge in good Mexican food on the regular. But when cooking at home, I rarely branch out from a taco. So when Dona – of my favorite restaurant Dona Tomas fame – offered to teach me of few of her amazing Mexican recipes, I jumped at the chance to learn. And I’ve got a guaranteed crowd pleaser for you today.

making mexican recipes at home on apartment34

Dona has taken culinary journeys through multiple regions of Mexico over the last 20 years, gathering inspiration and insights from the wide variety of local cuisines. She’s also worked with a variety of chefs like Rick Bayless among others, but when she asked what I wanted to learn to make I went with my gut – and it said Chilaquiles.

making mexican recipes at home on apartment34

(ps, welcome to my kitchen!)

making mexican recipes at home on apartment34 making mexican recipes at home on apartment34

Now Chilaquiles certainly isn’t a fancy dish. Its origins basically come from having grabbed whatever was available in the cupboards and whipping up a meal – as it is with a many a provincial dish. Chilaquiles is also often considered hangover food (and it is rurl good for that). But really good Chilaquiles is a meal I’d happily eat for breakfast, lunch or dinner. It’s just so satisfying and when done right, extremely flavorful. As I learned from Dona – the secret is all in the sauce.

making mexican recipes at home on apartment34 making mexican recipes at home on apartment34

To make Chilaquiles Verde, the key is making the perfect Verde sauce. The ingredients are few: tomatillos, white onion, garlic, jalapeno chiles, cilantro and salt. But the key is soaking the tomatillos overnight to release their skins and their flavor. Then you want to cook the sauce down to get all the flavors to meld before you blend it smooth.

making mexican recipes at home on apartment34 making mexican recipes at home on apartment34

Dona shared a few secrets to making the perfect scrambled egg. She oils her pan with a high-heat oil (grapeseed is great) does not add water or milk and simply keeps the eggs moving in the hot pan. Dona’s number 1 tip: do not overcook the eggs! They should be a little underdone as they’ll keep cooking even out of the pan. Keep scrolling for the complete Chilaquiles Verde how-to below.

making mexican recipes at home on apartment34 making mexican recipes at home on apartment34 making mexican recipes at home on apartment34

DONA TOMAS’ CHILAQUILES VERDE 
Sautéed tortilla chips in tomatillo sauce with eggs and cheese
Serves 4

making mexican recipes at home on apartment34

Ingredients
3 cups tomatillos
1/2 white onion sliced
2 cloves garlic
1 to 1 1/2  jalapeno chiles, stemmed and halved
1/2 bunch of cilantro, roughly chopped
1 T salt
10-14 oz tortilla chips
1 cup shredded mild white Mexican cheese
2 T butter
8 eggs beaten (scramble after you prepare the chilaquiles)
kosher salt

making mexican recipes at home on apartment34

Garnishes
1/4 cup thinly sliced white onion
1/4 cup crumbled queso fresco
1/4 cup chopped cilantro
1/4 sour cream or creme fraiché ( thin it with a little milk so you can drizzle it)

To make the sauce:

Combine tomatillos, onion, garlic and chiles in a saucepan and cover with water, bring to a simmer and cook until just softened ( about 15 min). Strain the solids but save the cooking liquid. Puree the solids in a blender with the raw cilantro and then add some of the (1 to 1 1/2 cups) liquid to thin it so it is pourable but not watery. Salt to taste.
Cool.

To prepare the chilaquiles:

Place a large skillet with about 2 cups of the tomatillo sauce and heat it, then add the chips and sauté for about 3 minutes or until they are coated in sauce. Add more sauce if they are too dry and cook a little longer. Then add the shredded cheese, stir and gently mix them. The chips should be slightly crisp but tender, and not soggy.

Remove from heat and divide the mixture onto four small plates. Scramble the 8 beaten eggs with the 2 T of butter. Salt to taste. Add the scrambled eggs to each plate and sprinkle with the onion, queso fresco, cilantro and drizzle with creme fraiché. Serve immediately.

This dish, while relatively easy, definitely gives me a little swagger in the kitchen. I can whip it up for my family (or finally have friends over!) and know I can makes some truly delicious and enjoy the process while I do it. If I close my eyes real tight I could also be on a beach somewhere in Baja.

And be sure to check back. Next up will be one of Dona’s famed cocktails.

For the rest of my favorite recipes, CLICK HERE.

original photography for apartment 34 by andrea posadas

This time of year it’s way too easy to overindulge on the daily. Holiday parties, cocktails, and heavy dishes are everywhere. I’m looking for ways to eat light, fresh and most importantly quickly as there are just too many things to get done every day! That’s why I’m obsessed with this simple but delicious crostini recipe made with Alouette Garlic & Herbs Soft Spreadable Cheese. It’s the perfect for a quick and easy lunch, but you could also whip up a batch to serve at brunch or even bring as your contribution to a holiday party. Scroll below for the full recipe!

simply delicious crostini recipe on apartment 34

Zucchini Toast with Alouette Garlic & Herbs Soft Spreadable Cheese  

Ingredients

1 zucchini sliced
1 slice rustic bread
1 watermelon radish sliced
Alouette Garlic & Herbs Soft Spreadable Cheese
Coarse Sea Salt
Fresh chopped parsley

Directions

Preheat oven to 400 degrees. Place zucchini slices on a cookie tray, brush zucchini slices with olive oil, and roast until edges brown 5-8 mins. Toast your bread (I like to grill mine on the stove with butter!). Cover bread with a generous amount of Alouette Garlic & Herbs Soft Spreadable Cheese. Layer on roasted zucchini & freshly sliced watermelon radish. Top with coarse sea salt & chopped parsley. Enjoy!

This recipe was so much fun to make that we actually made a video demonstration of it! Check out Instagram later today for the exclusive.

For our entire recipe archive CLICK HERE.

This post is in partnership with Alouette Garlic & Herbs Soft Spreadable Cheese. All thoughts and opinions are 100% my own. Thanks for supporting collaborations that we’re excited about and that have kept Apt34’s doors open.

What’s better than tomorrow being a Friday? It being Cinco de Mayo! Only a tequila lover’s favorite day of the year. Did you catch my post about the Patrón TikiRita a couple of weeks back? It was in the running to be selected as the Margarita of the Year. Sadly, it did not win, but I’m the first to agree that the winner is indeed quite deserving. Keep scrolling for the margarita recipe that is going to take your Cinco de Mayo to the next level.

Celebrate Cinco de Mayo with the Margarita of the Year on Apartment 34

The winning Margarita of the Year, the Coralina, was created by Riesler Morale, a mixologist from Mexico City. The recipe combines two of my favorite things: tequila and….wait for it….wine! Yes, I realize it sounds a touch crazy, but the result is stunning.

Celebrate Cinco de Mayo with the Margarita of the Year on Apartment 34
Celebrate Cinco de Mayo with the Margarita of the Year on Apartment 34Celebrate Cinco de Mayo with the Margarita of the Year on Apartment 34apt34xpatronEDITS (3 of 4)apt34-cinco-de-mayo

For this Cinco de Mayo party, I combined the Coralina with a tasty elevated version of the street taco. I snagged the recipe from the Bay Area grocery delivery service Good Eggs. I had the Mushroom & Potato Adobe Tacos in one of Good Egg’s new dinner kits and even though the taco is vegetarian, it makes a hearty meal. The spiciness of the adobo sauce also pairs perfectly with the salty-sweetness of the Coralina. They’re both total crowd pleasers.

Celebrate Cinco de Mayo with the Margarita of the Year on Apartment 34Celebrate Cinco de Mayo with the Margarita of the Year on Apartment 34

So tomorrow, ditch the pitchers and chips and sip a margarita that has some serious style.

Patrón Margarita of the Year Recipe: the Coralina

Ingredients

1.75 oz Patrón Reposado
.75 oz Patrón Citrónge Orange
1 oz Fresh lime juice
.75 oz Simple syrup
.5 oz Red Wine (Mexican, or other. I used a red blend by Tank called All or Nothing)
+ Sugar-salt rim*

Method

1. Combine Patrón Reposado, Patrón Citrónge Orange, simple syrup and lime juice in a shaker tin; add ice and shake vigorously.

2. Strain into a chilled cocktail coupe rimmed with sugar-salt rim.*

3. Carefully float red wine on the surface of the cocktail. Note: floating the wine into the margarita isn’t the easiest of things. Google searches say slowly pouring the wine over the back of a cocktail spoon will help keep the liquors from combining. You also want your wine to be nice and chilled. But should they happen to mix, no worries. The drink tastes just as good!

* Sugar-salt rim:
Pulverize .25 cup dried hibiscus in a spice grinder. Add .25 cup sugar and .25 cup kosher salt and pulse until combined.

And Patrón is offering an awesome way to elevate your Cinco de Mayo celebrations tomorrow. Tweet #PatronMyCinco to purchase a bottle of Patrón Silver delivered within an hour. Added bonus: readers in Chicago and New York City (21+) who tweet #PatronMyCinco can purchase a Patrón Party in A Box for delivery within 1 hour as part of their new on-demand delivery. The box will include all the ingredients for the Margarita of the Year (the Coralina Margarita) along with some Cinco deMayo swag. Consider your Cinco de Mayo taken care of!

Salud!


For all of my favorite margarita recipes, CLICK HERE


original photography for apartment 34 by andrea posadas / food styling by tracy shutterbean / tableware c/o elsie green

This post is in partnership with Patrón. The perfect way to enjoy Patrón is responsibly. All thoughts and opinions are 100% my own. Thanks for supporting posts that keep our doors open.

Today I’d like to have a conversation with you about cooking. We’ve talked about food on Apartment 34 for, well, years now. We all know there’s a big difference between feeding yourself – cuz lesbihonest – there’s Chipotle and Thai takeout for that – and then there is cooking. Getting in there. Making something from nothing. One requires no thought and often less than five minutes. The other can take copious amounts of preparation, time and often some skill. But one only feeds your hunger while the other feeds your soul. Yes, it may sound overly romantic but I firmly believe it’s true.

But am I whipping up 3-course meals every night? Of course not. Most evenings I’m wrestling a toddler into the tub, trying to dash off unfinished emails, tripping over legos all while writing blog posts in my head. I’m totally into those meal-in-a-box kits because, life. But of course I’d like to be of those people who can step into the kitchen and simply whip up something stunning. I look at people who come from a tradition of cooking, with family recipes and cooking skills passed down through generations I feel a little envious. So rather than lament, I decided I want to learn. That’s where my friend Selina Lee comes in.

Selina is an extremely talented home cook and food blogger. Her passion as she explains, “is combining traditional Korean recipes with modern flavors.” The effect is both delicious and beautiful. I’m lucky enough that Selina has offered to touch me – and all of us – some of her ways! If you’re looking to try something new, inject new flavors and new cooking styles into your repertoire, then you’re going to love this series. To kick things off, Selina introduced me to the cult food of the moment. Move over cronut – make way for Kimchi.

Next level cooking kimchi toast with quail egg on apartment 34Next level cooking kimchi toast with quail egg on apartment 34Next level cooking kimchi toast with quail egg on apartment 34Next level cooking kimchi toast with quail egg on apartment 34Next level cooking kimchi toast with quail egg on apartment 34

KIMCHI TOAST WITH QUAIL EGG (김치토스트) – 4 servings, yields about 8 toasts

INGREDIENTS
2 cups kimchi (seoul kimchi original)
8 sliced baguette
8 quail eggs
1 cup shredded asiago cheese
¼ cup chopped scallion
¼ cup lightly dried chopped parsley
SEASONINGS
1 tbsp butter
1 tsp soy sauce
½ tsp sugar
sesame oil
toasted sesame seeds
extra virgin olive oil

PREPARATION
Chop kimchi into small bite size pieces and finely chop 1 scallion. On a sheet pan, place sliced baguette (I love using sourdough or kalamata olive baguette), drizzle olive oil over the bread and sprinkle cheese. NOTE: soft white cheese like asiago or swiss will work best. Prepare sunny-side fried quail egg with crispy edges.

COOKING INSTRUCTION
1. Add olive oil on a skillet over med/high heat. Add chopped kimchi and cook it for about 3 min. I like using more leafy part of the kimchi. Add sugar and soy sauce and cook it for 2 min. TIP: Adding more sugar will balance out the sourness if the kimchi is overly ripened. Add butter and stir fry it until butter is melted then turn the heat off. Drizzle sesame oil (about two spins), sprinkle toasted ground sesame seeds. NOTE: I buy toasted sesame seeds and grind them on a mortar. It really brings out the flavor if you grind them by hand.

2. Bake sliced baguette with cheese in the oven at 325 F for just 15 min. Just enough to melt the cheese and the bread is lighted toasted.

3. Assemble the toast by adding cooked kimchi, fried quail egg and sprinkle some scallions and parsley over the toast. Serve warm.

This dish would be a perfect little appetizer before a beautiful fish dish. Or a stellar addition to a savory brunch menu. It combines familiar comfort foods – bread and cheese – with awesome spice and unique ingredients, but it’s really easy to make. But you don’t have to tell your guests that. This is the type of dish you can pull off quickly and you’ll look like a culinary genius. I can’t wait to see what Selina is going to teach me next.

Btw, if you’re in the Bay Area you should definitely sign up for one of Selina’s cooking workshops. You’ll get hands on experience with Korean cooking in a stunning environment. I can’t recommend it highly enough. The next one is all things Kimchi. You can get more details here.


For our entire recipe archive, CLICK HERE

food photography & recipe by selina lee /photographs of pottery by Erin Scott Studio for Sarah Kersten

Older posts
Gimme More