I have worked from home since long before it became a public health requirement, so while it’s nothing new for me, I know first hand how important it is to have a functional and aesthetically pleasing place to work. The couch or the bed just really don’t cut it when you’re doing 9-5 without leaving the house. I’ve had many a home-office iteration over my blogging years. You can see examples of those home offices here, here and here. With no end to our WFH life in sight, I am so excited to finally share my newly completed home office with you. I hope it offers some inspiration for your own workspace.

Thankfully, long before the pandemic took over our lives, I’d planned to create the ultimate work-from-home space as part of our backyard makeover, building a little free-standing structure in the yard’s back corner. Just don’t call it a She-Shed! The pandemic put the brakes on finishing up the design for a few months, but now all the pieces have finally come together and I couldn’t feel luckier to have this little escape.

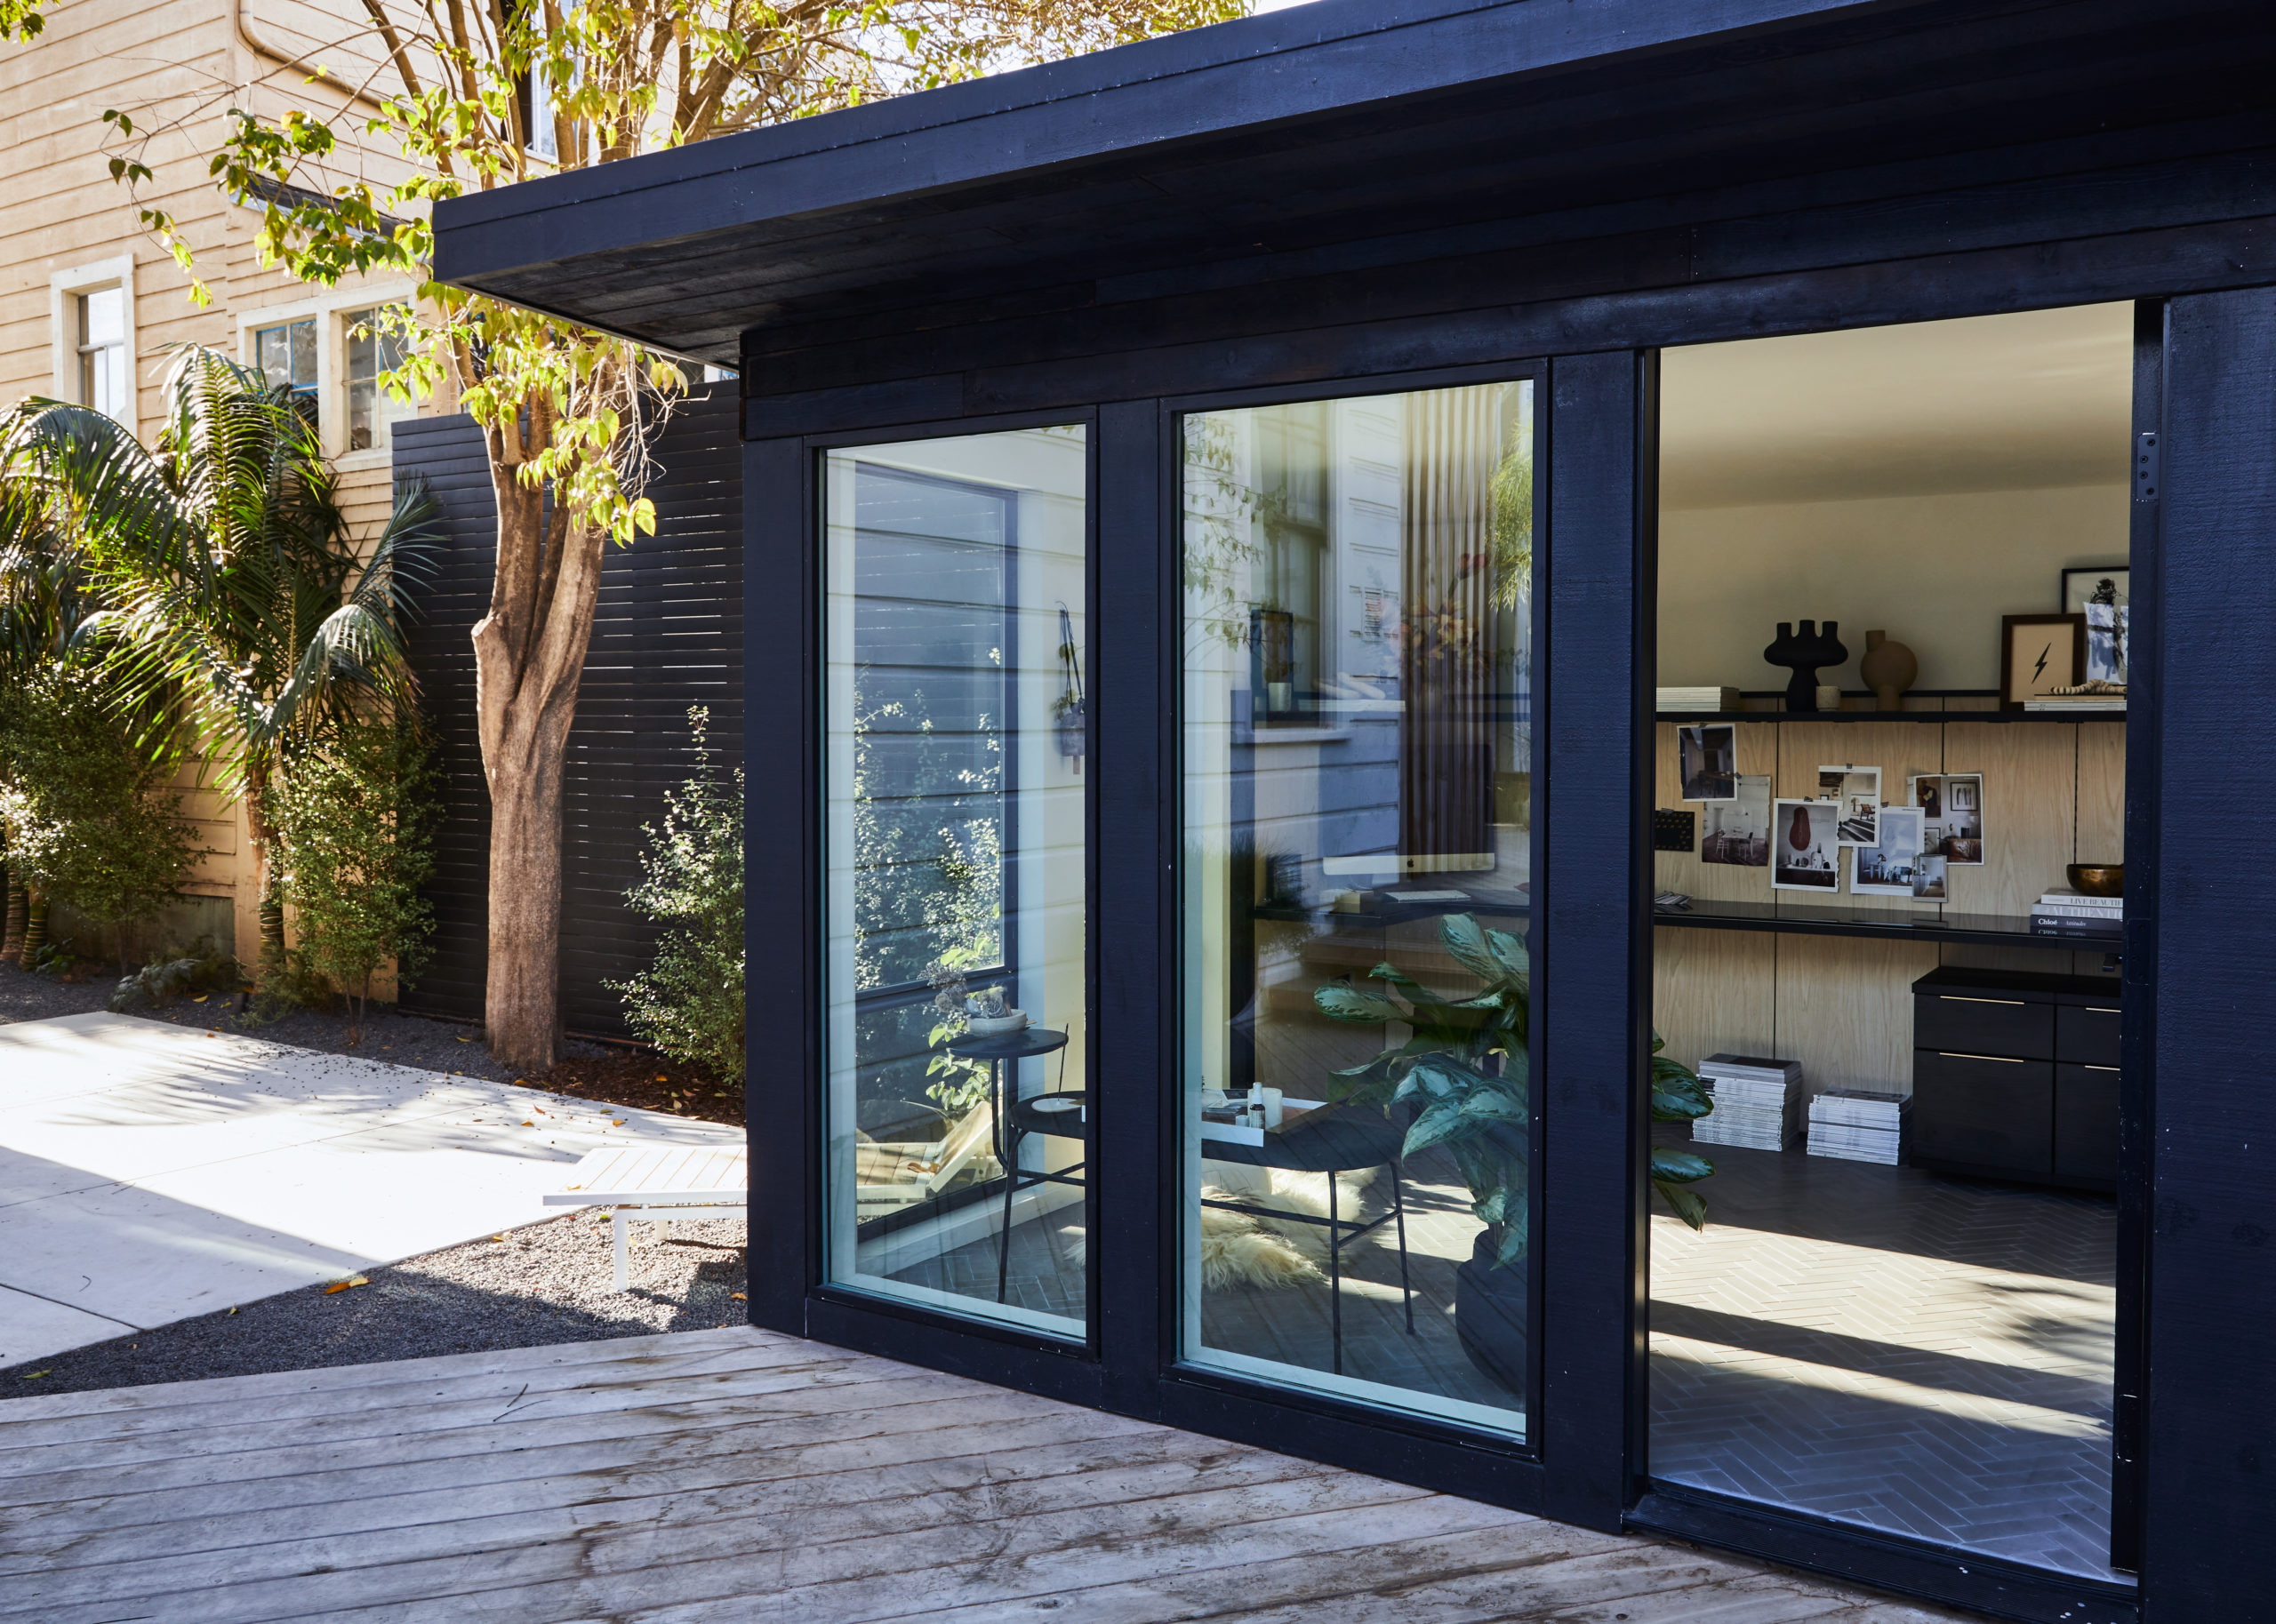
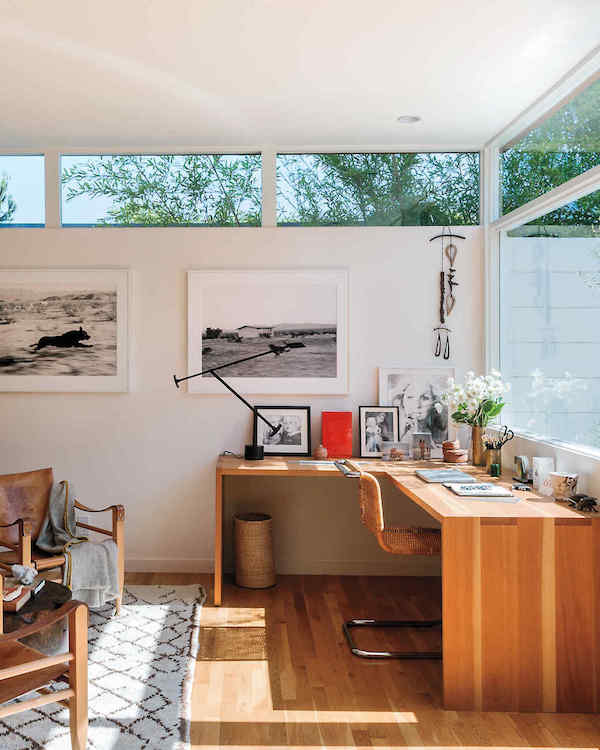
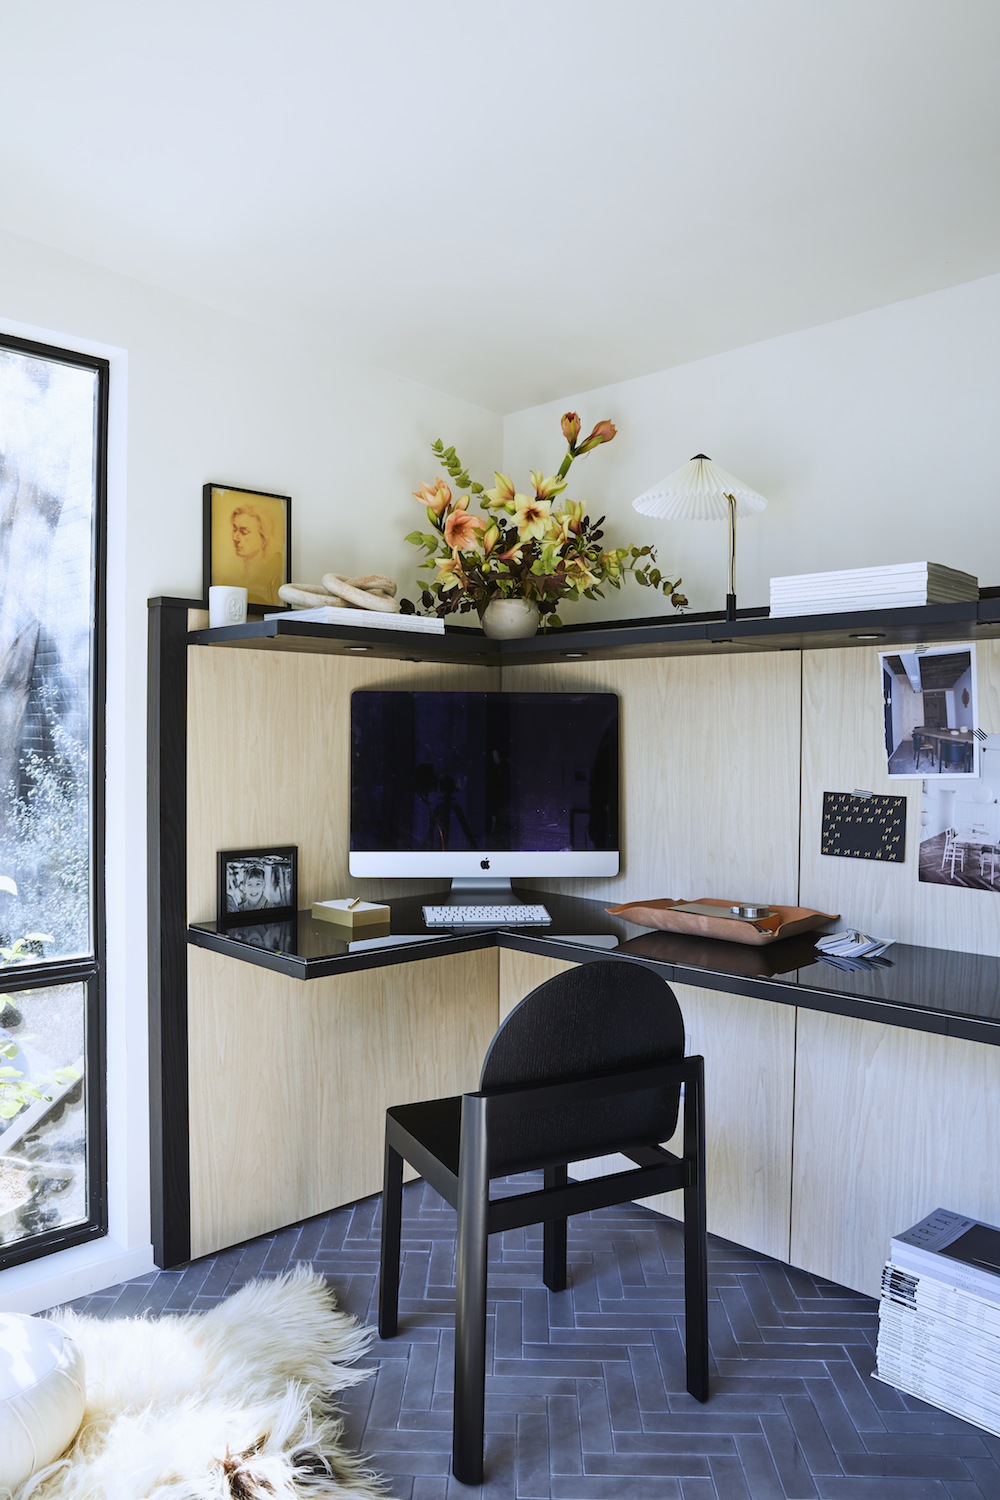
I worked with California-based Modern Spaces and Sheds to create the pre-fab structure. Even though the building is only a 10’x10′ space,  I’m so happy to have all of the natural light flood in – it makes the office feel much larger than it is. A slightly upward-sloping ceiling also gives the illusion of more space.

But what really took the office design to the next level was working with California Closets. If you’ve followed my renovation journey you know California Closets has been my go-to to both optimize storage in This Old Victorian and also get the gorgeous design I crave (you can see my dream closet here and my pantry here).

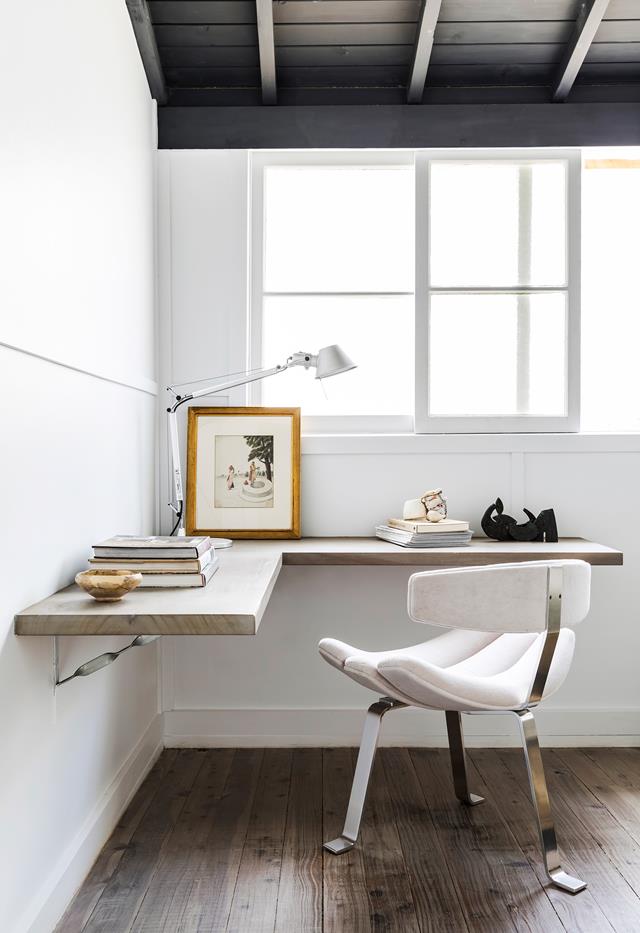
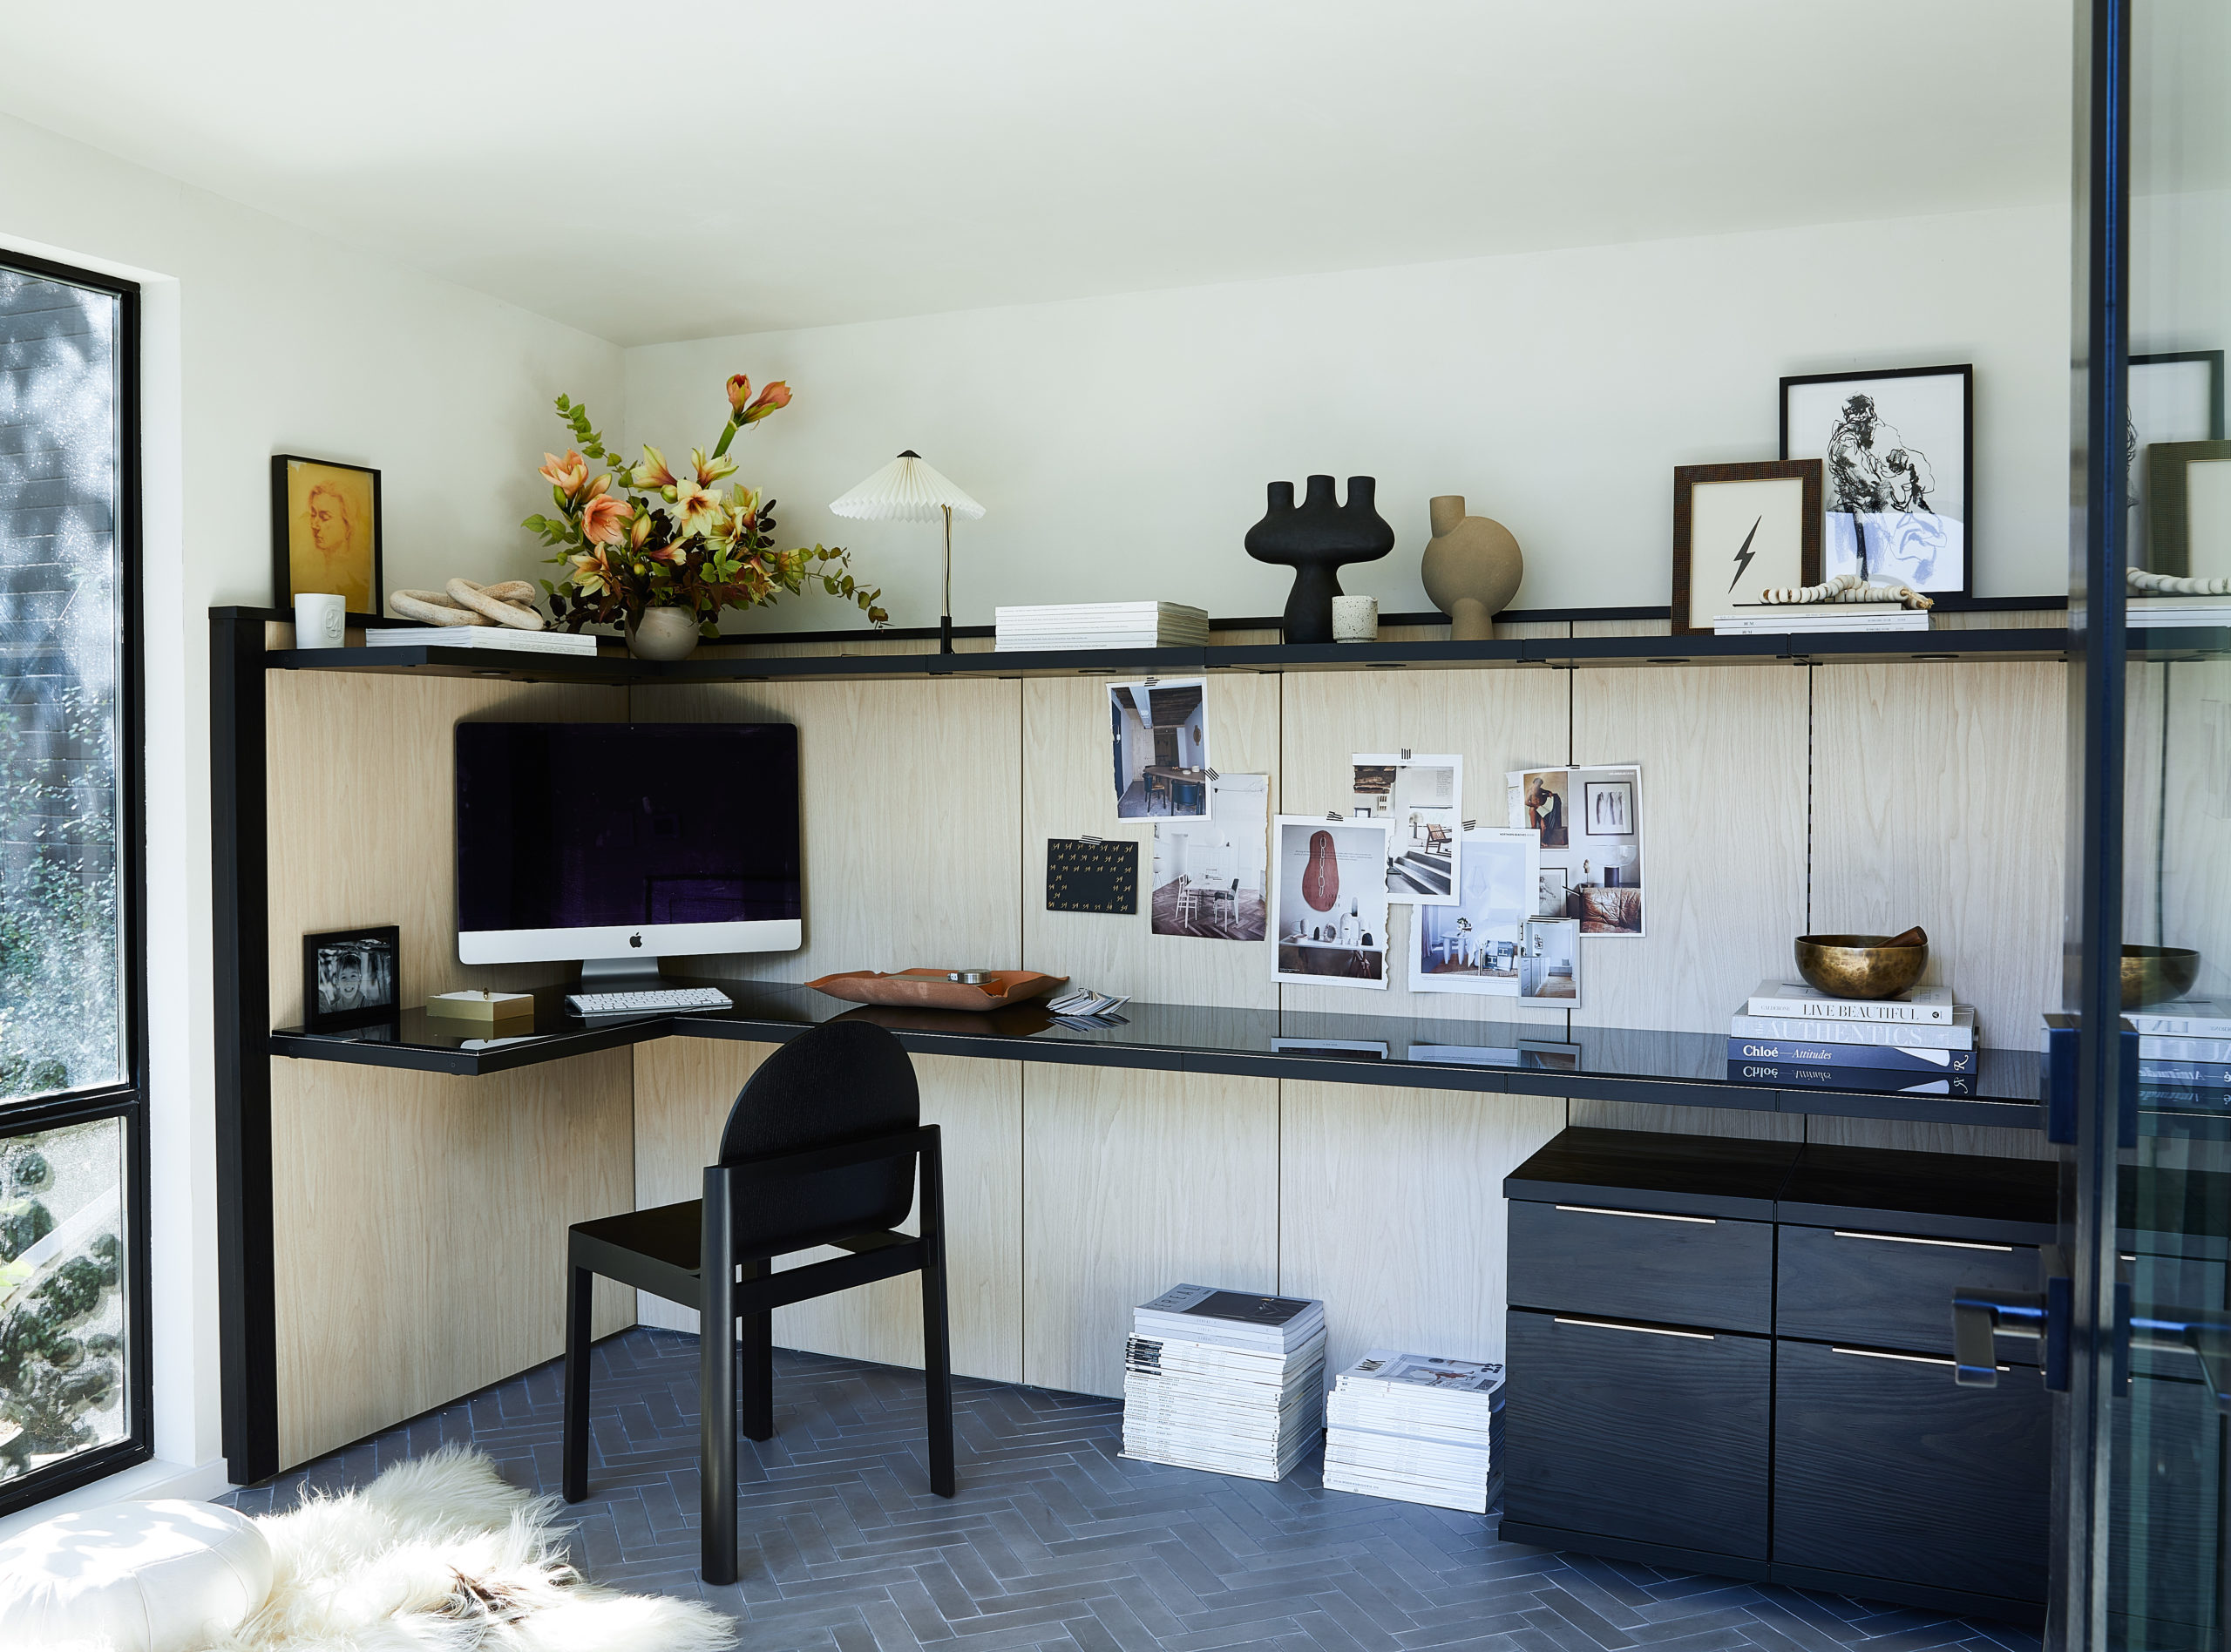
Since I was finally moving out of the corner of our guest room, I knew I wanted to put an expansive built-in desk into this office in order to optimize the shed’s footprint, but also to help elevate the feel. I was going for elegant, cool sophistication and I couldn’t be happier with the final result.

Over the course of the summer, I worked with my California Closets designer remotely and was able to finalize all of our choices online. Thank goodness for Zoom. She understood my vision immediately and was able to bring it to life. I love the mix of light wood with dramatic black accents. The black glass desktop adds a bit of sexiness.

The upper shelf was also one of my must-haves and California Closets made it work. I knew a little display shelf would be my major decorating moment – allowing me to showcase pieces that inspire and add major personality to my work area. The shelf is also quite useful, as it features built-in LED lights, allowing me to skip the expense of wiring the shed for overhead lighting.

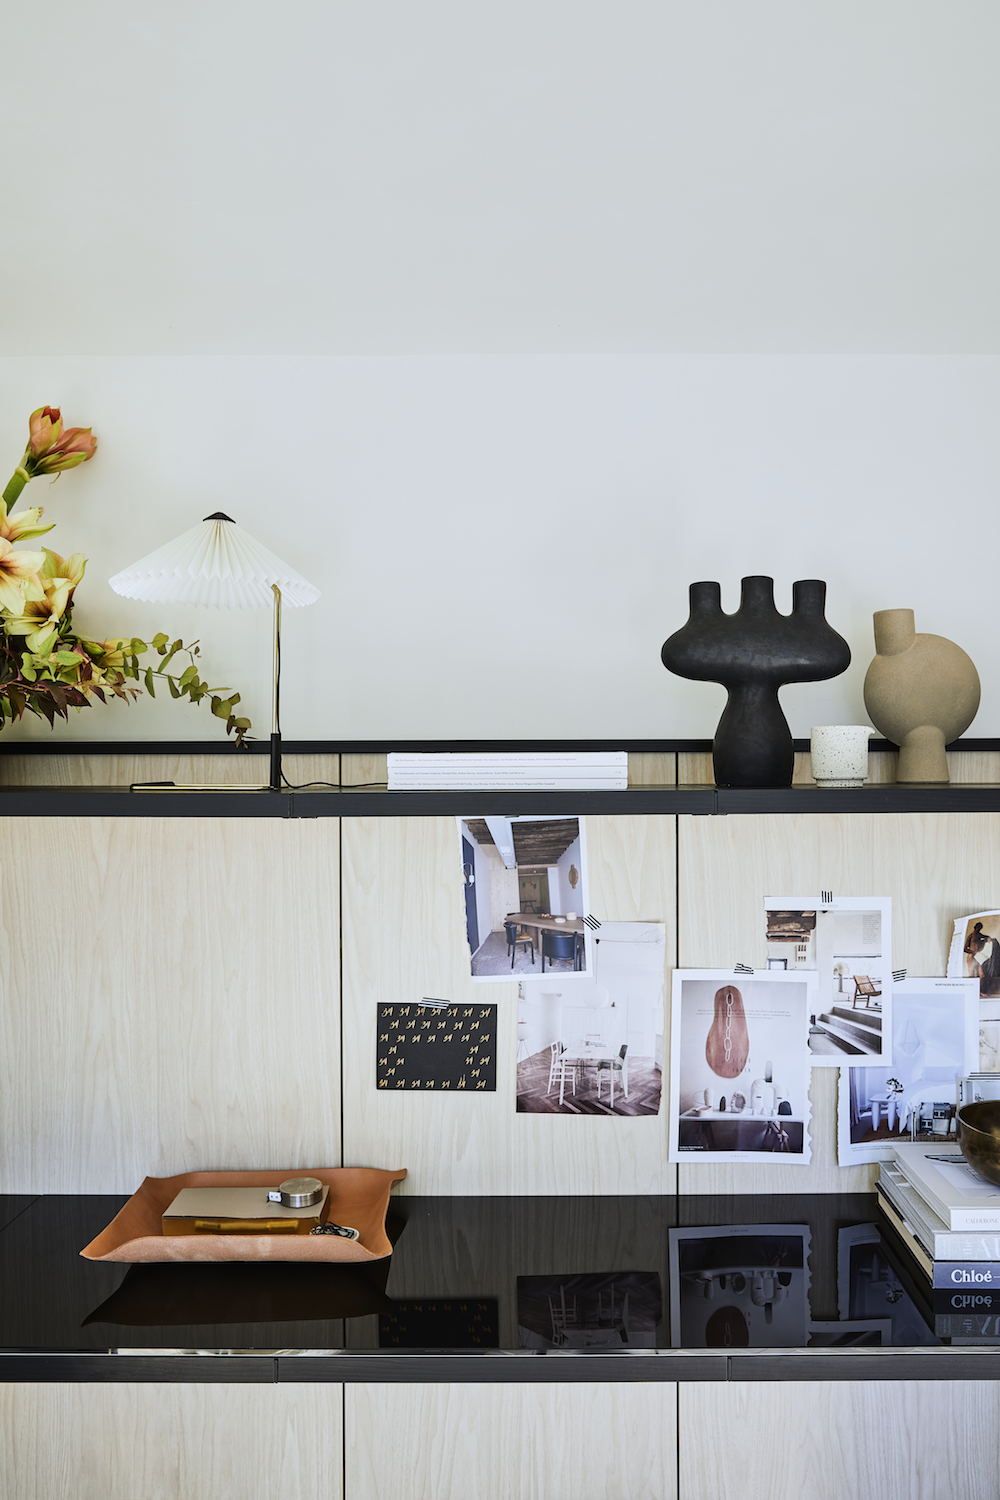
Let’s dig into some of the desing details. A physcial moodboard is always a requirement in my world – even if I’m not designing something. I just love having visual inspiration welcome me every day. I typically swap my tear-sheet mood boards out seasonally.

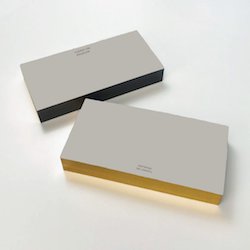
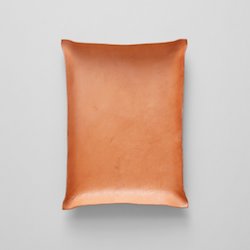
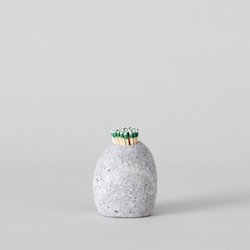
A simple, yet elegant leather tray from Bloomist’s new WFH Pro Gift Collection atop the desk corrals note pads, pens, and other office-y odds and ends.

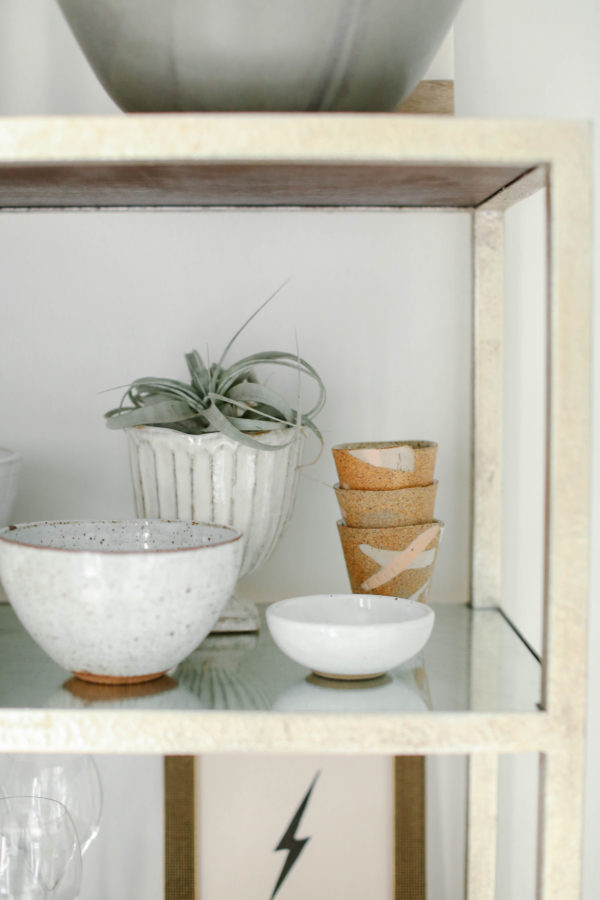
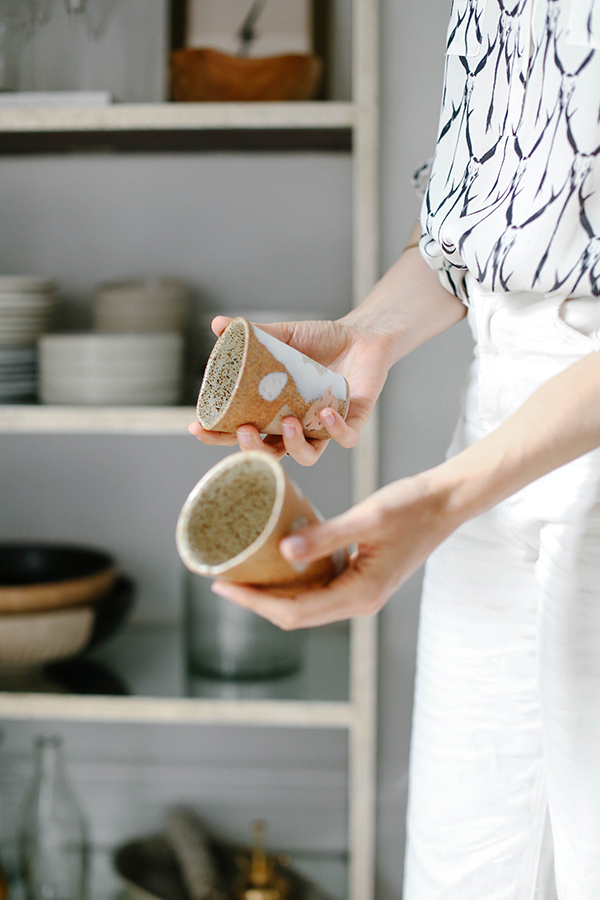
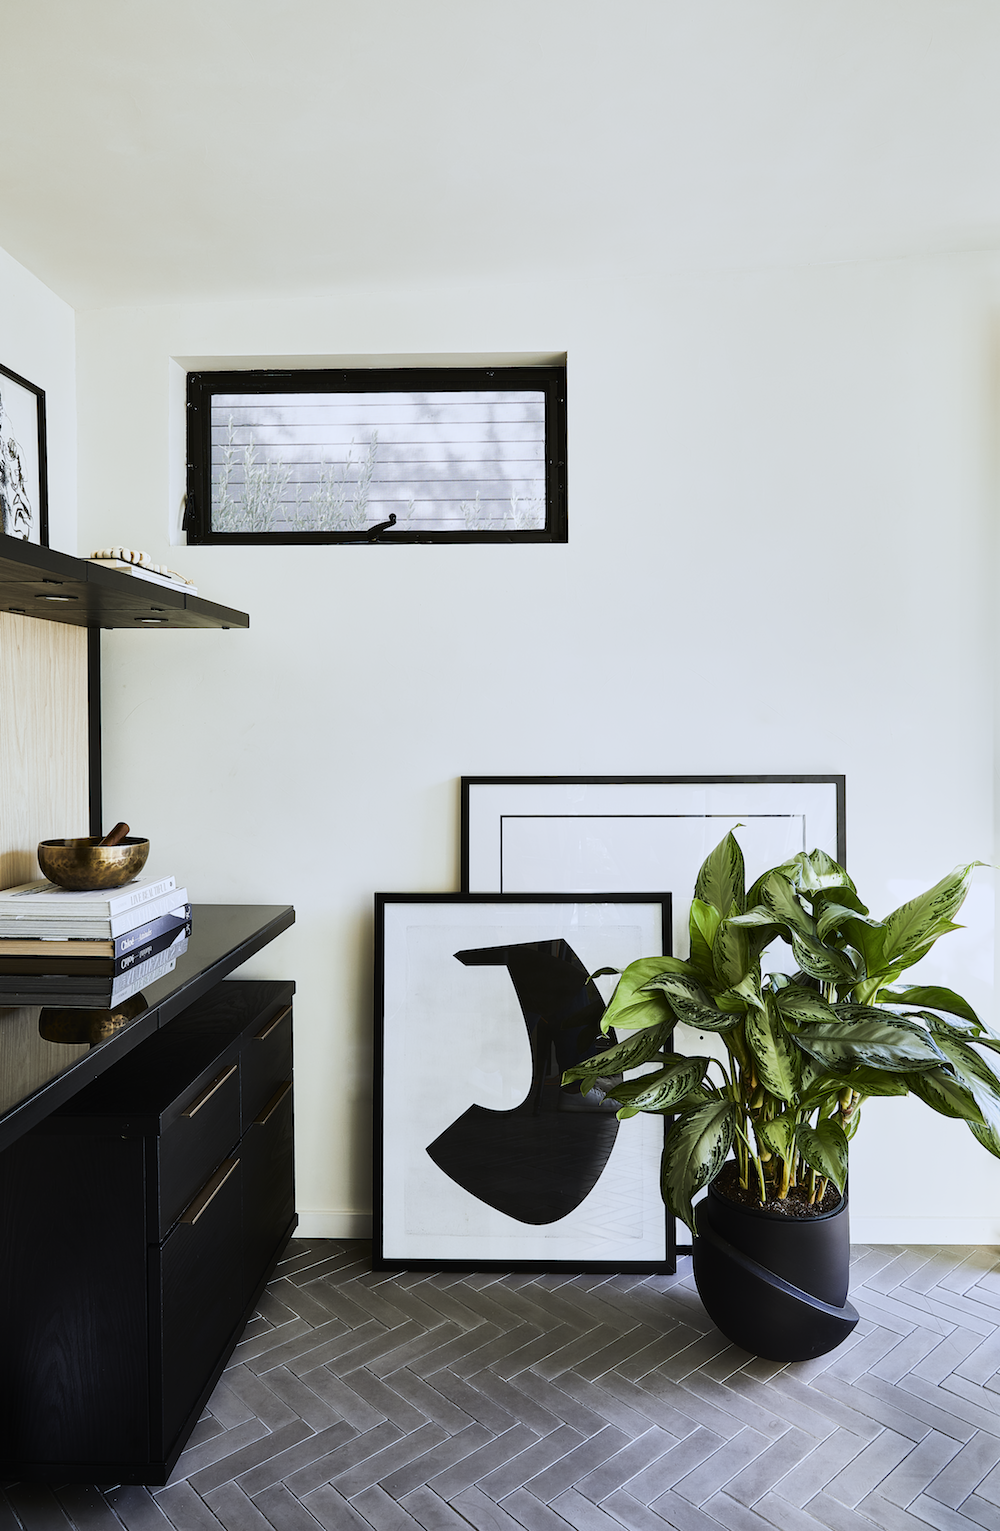
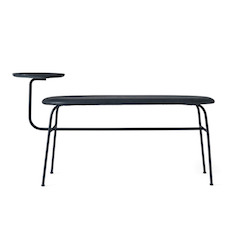
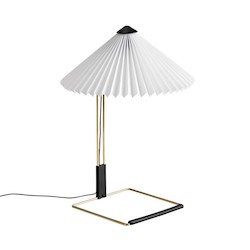
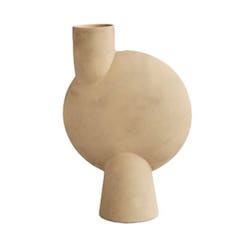
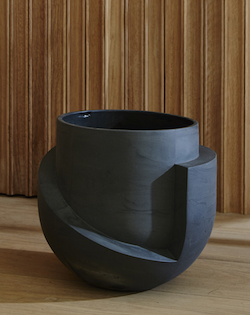
On the shelf above, I get to display some of my treasured pieces including the Matin Lamp from Hay Design, ceramics from Simone Bodmer-Turner, Frama and CPH 101, and framed art prints. I’m always a sucker for leaning art.

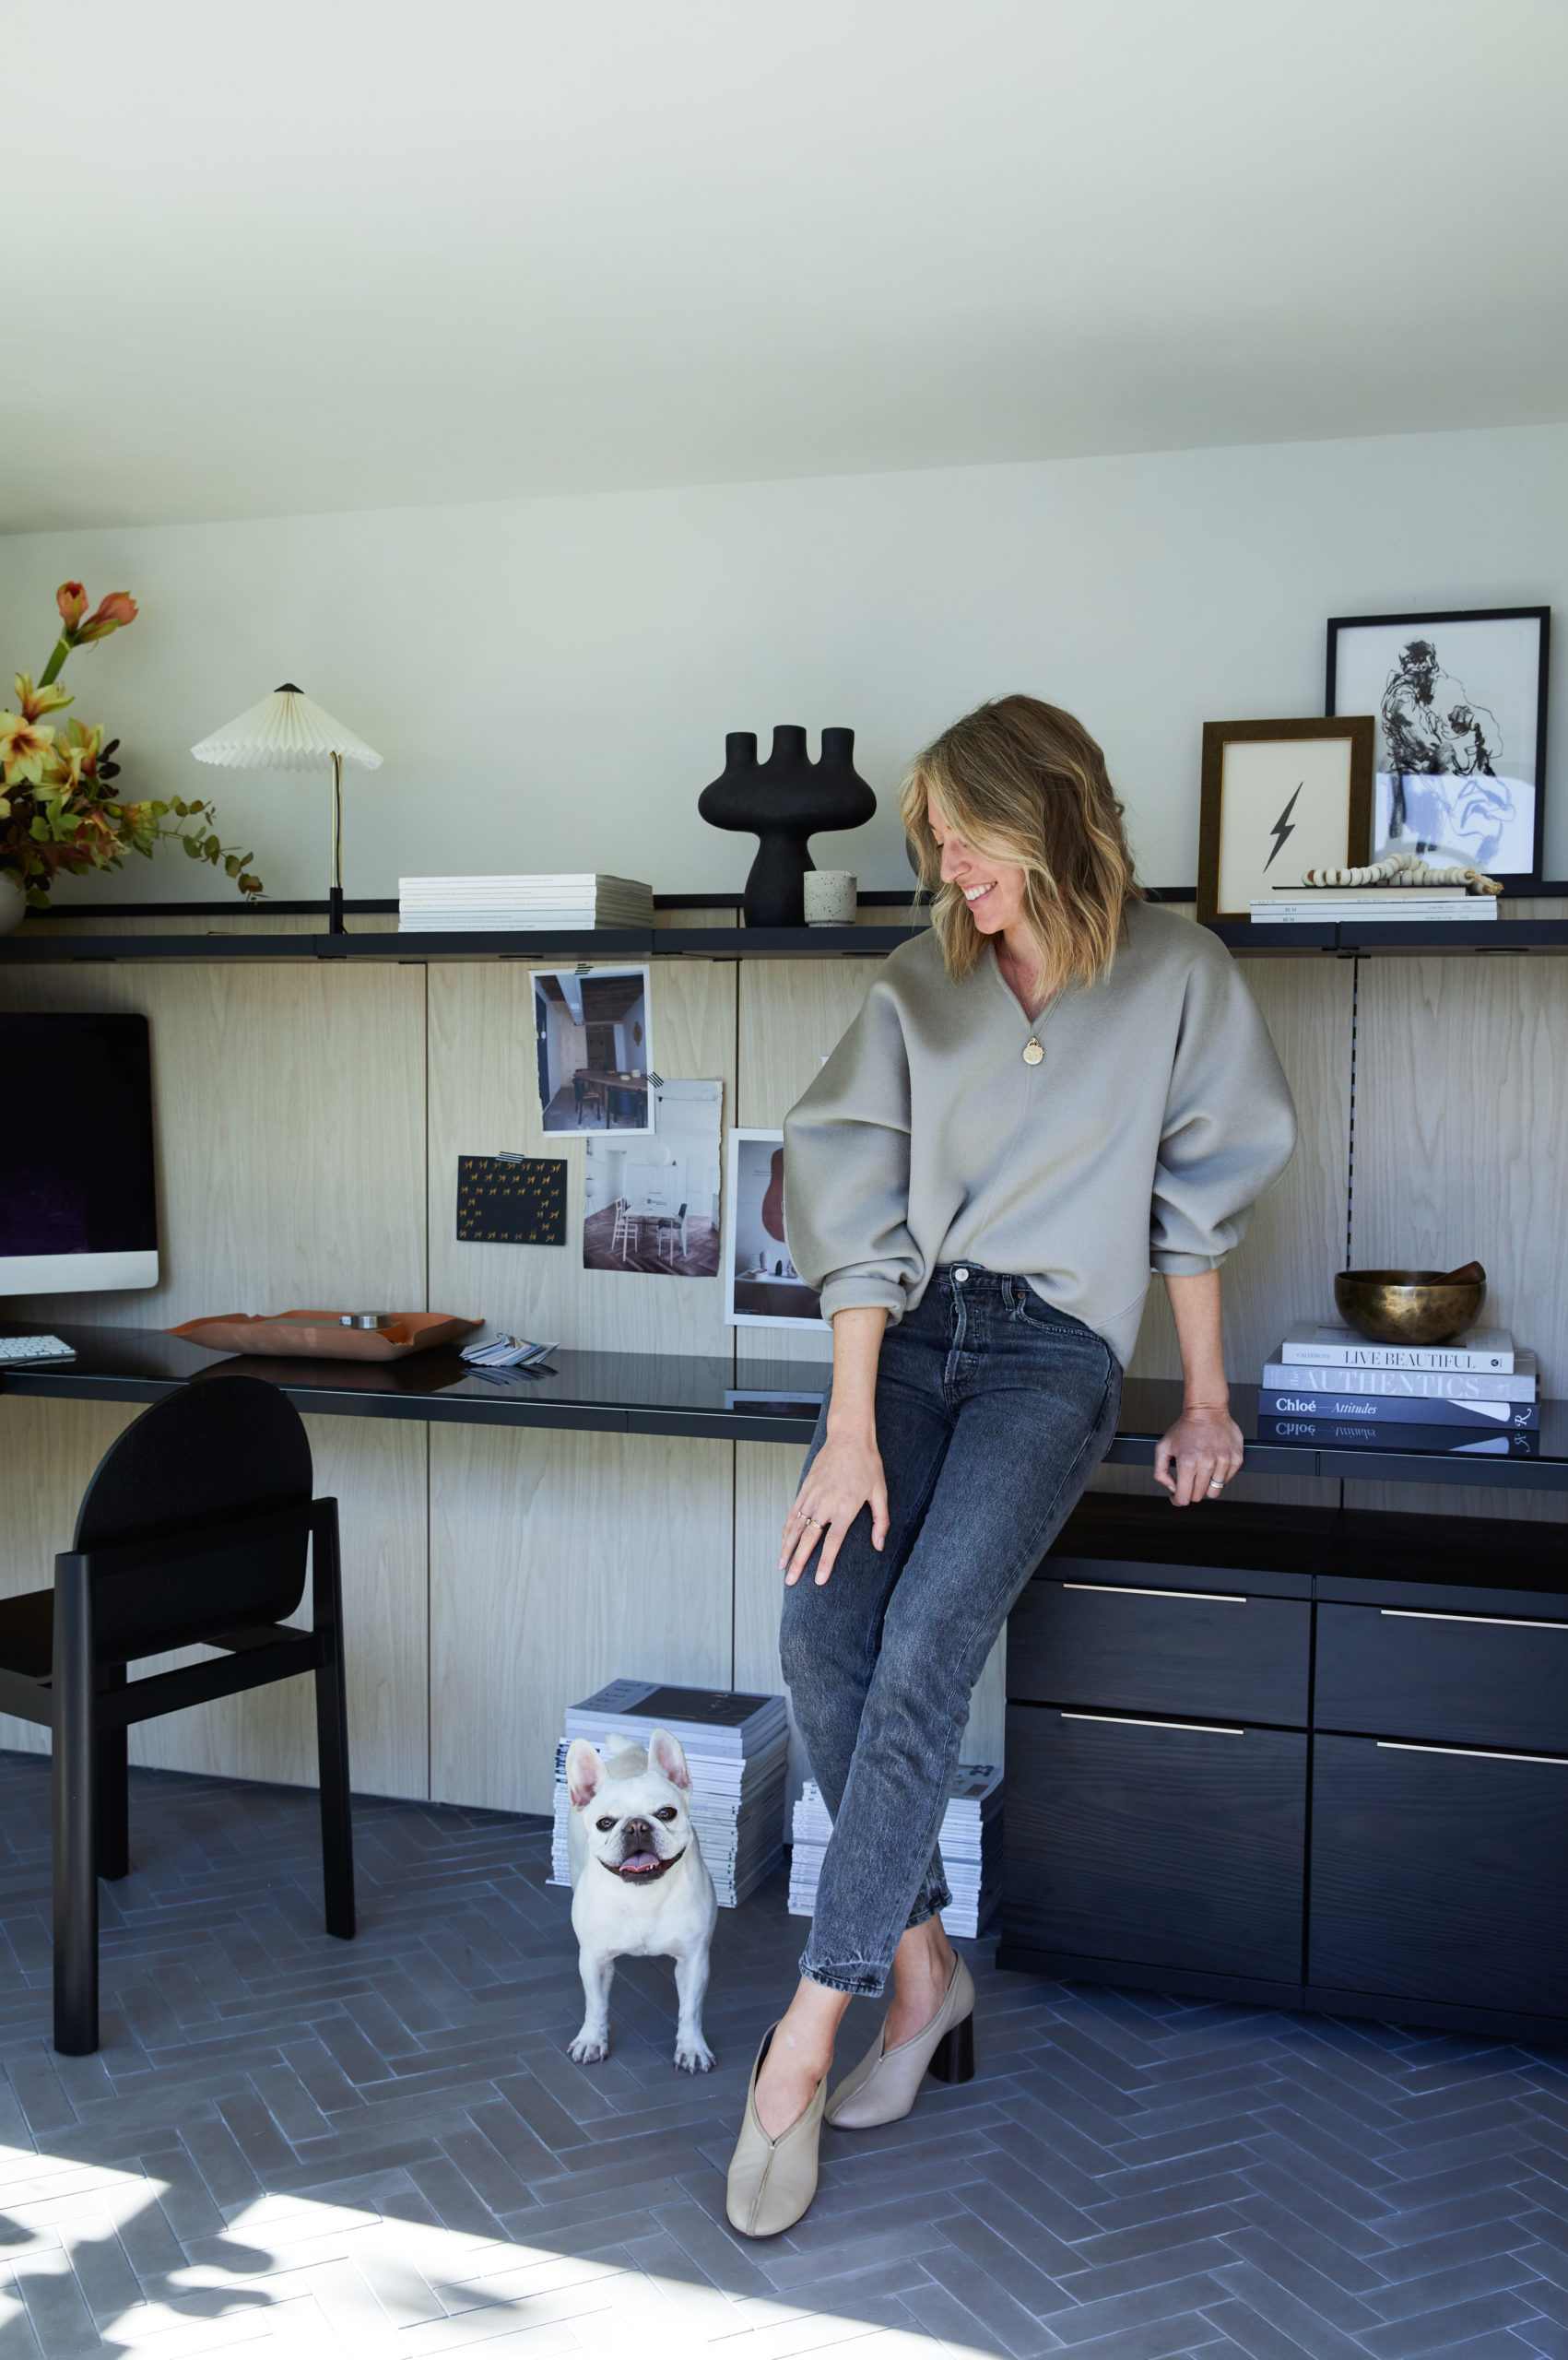
One of my first design decisions for the office was the flooring. I knew from the get-go that I wanted herringbone tile floors – and this beautiful concrete tile from Clé makes me oh so happy. It also is extremely durable. Radiant heat makes sure the space is always toasty. Luna certainly approves!

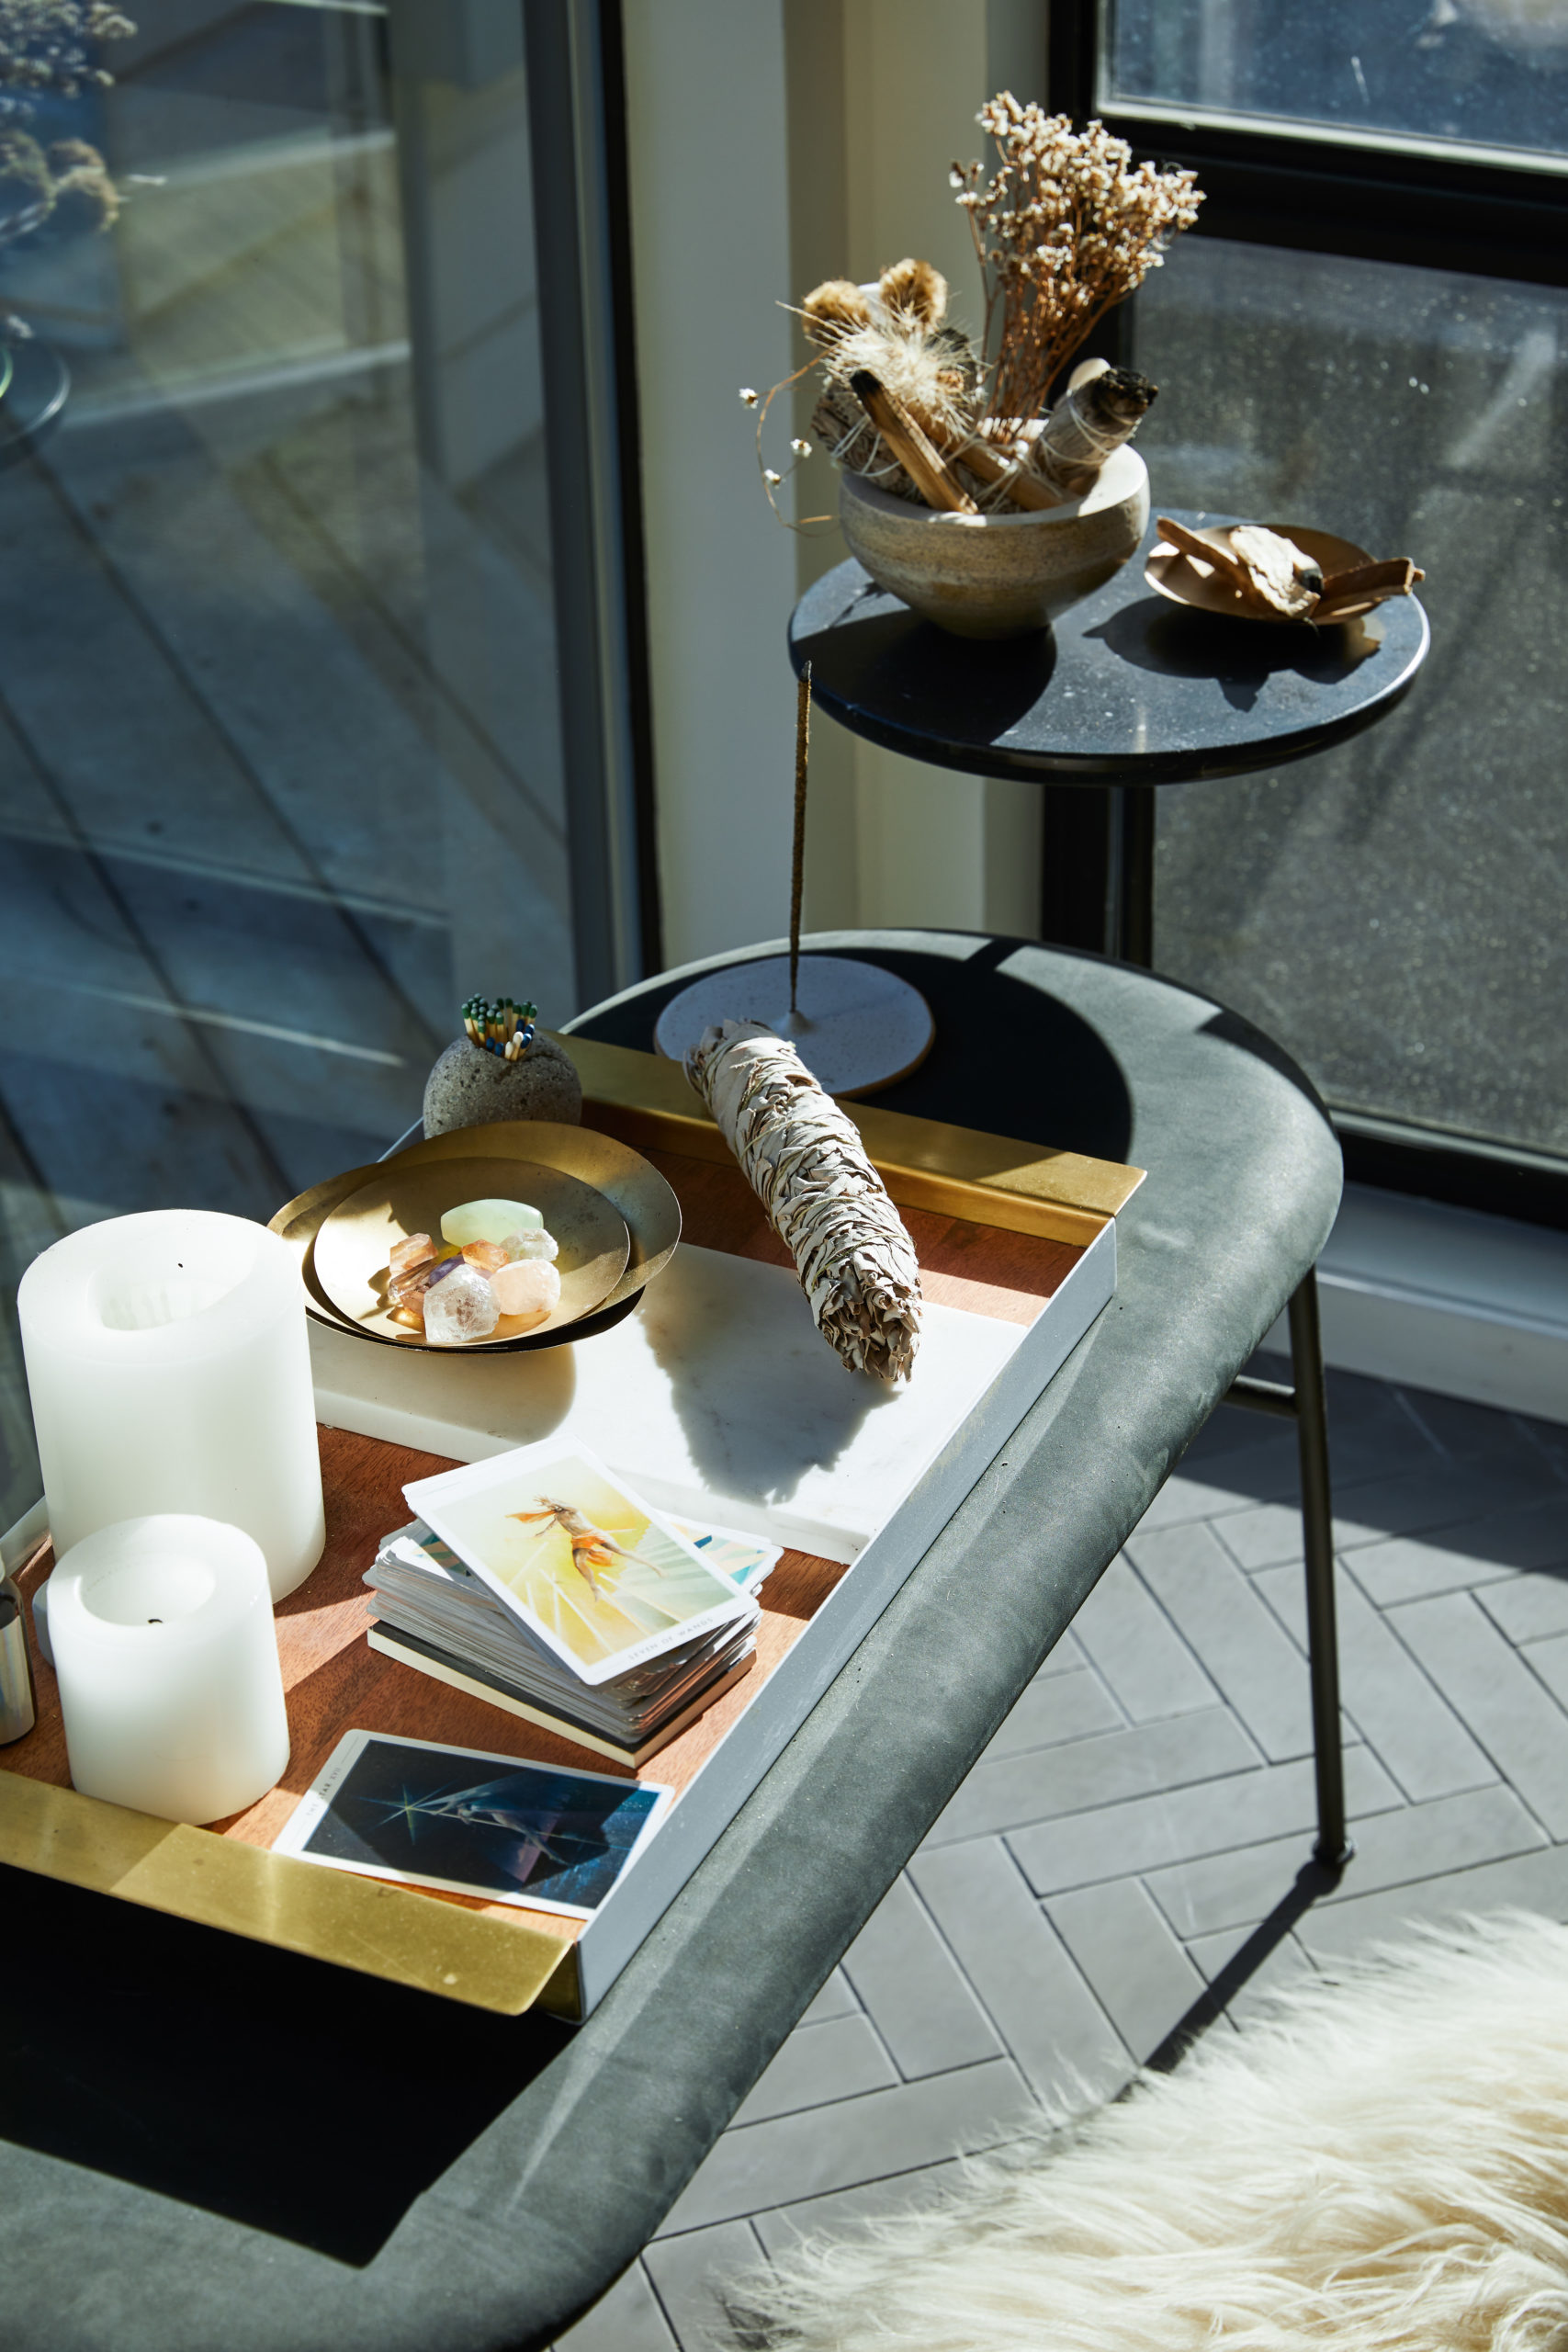
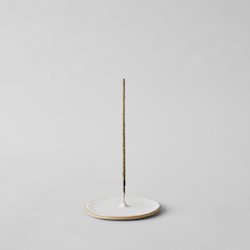
My office space also serves multiple functions. I have enough room to roll out my yoga mat and do Zoom classes. I also created my own private corner for self-care work including meditation and all my woo-woo ceremonies. I find daily or weekly rituals help ground me during this extremely chaotic time. Having an inviting set-up helps keep me motivated to invest the time to just sit and be still. If you know, you know.

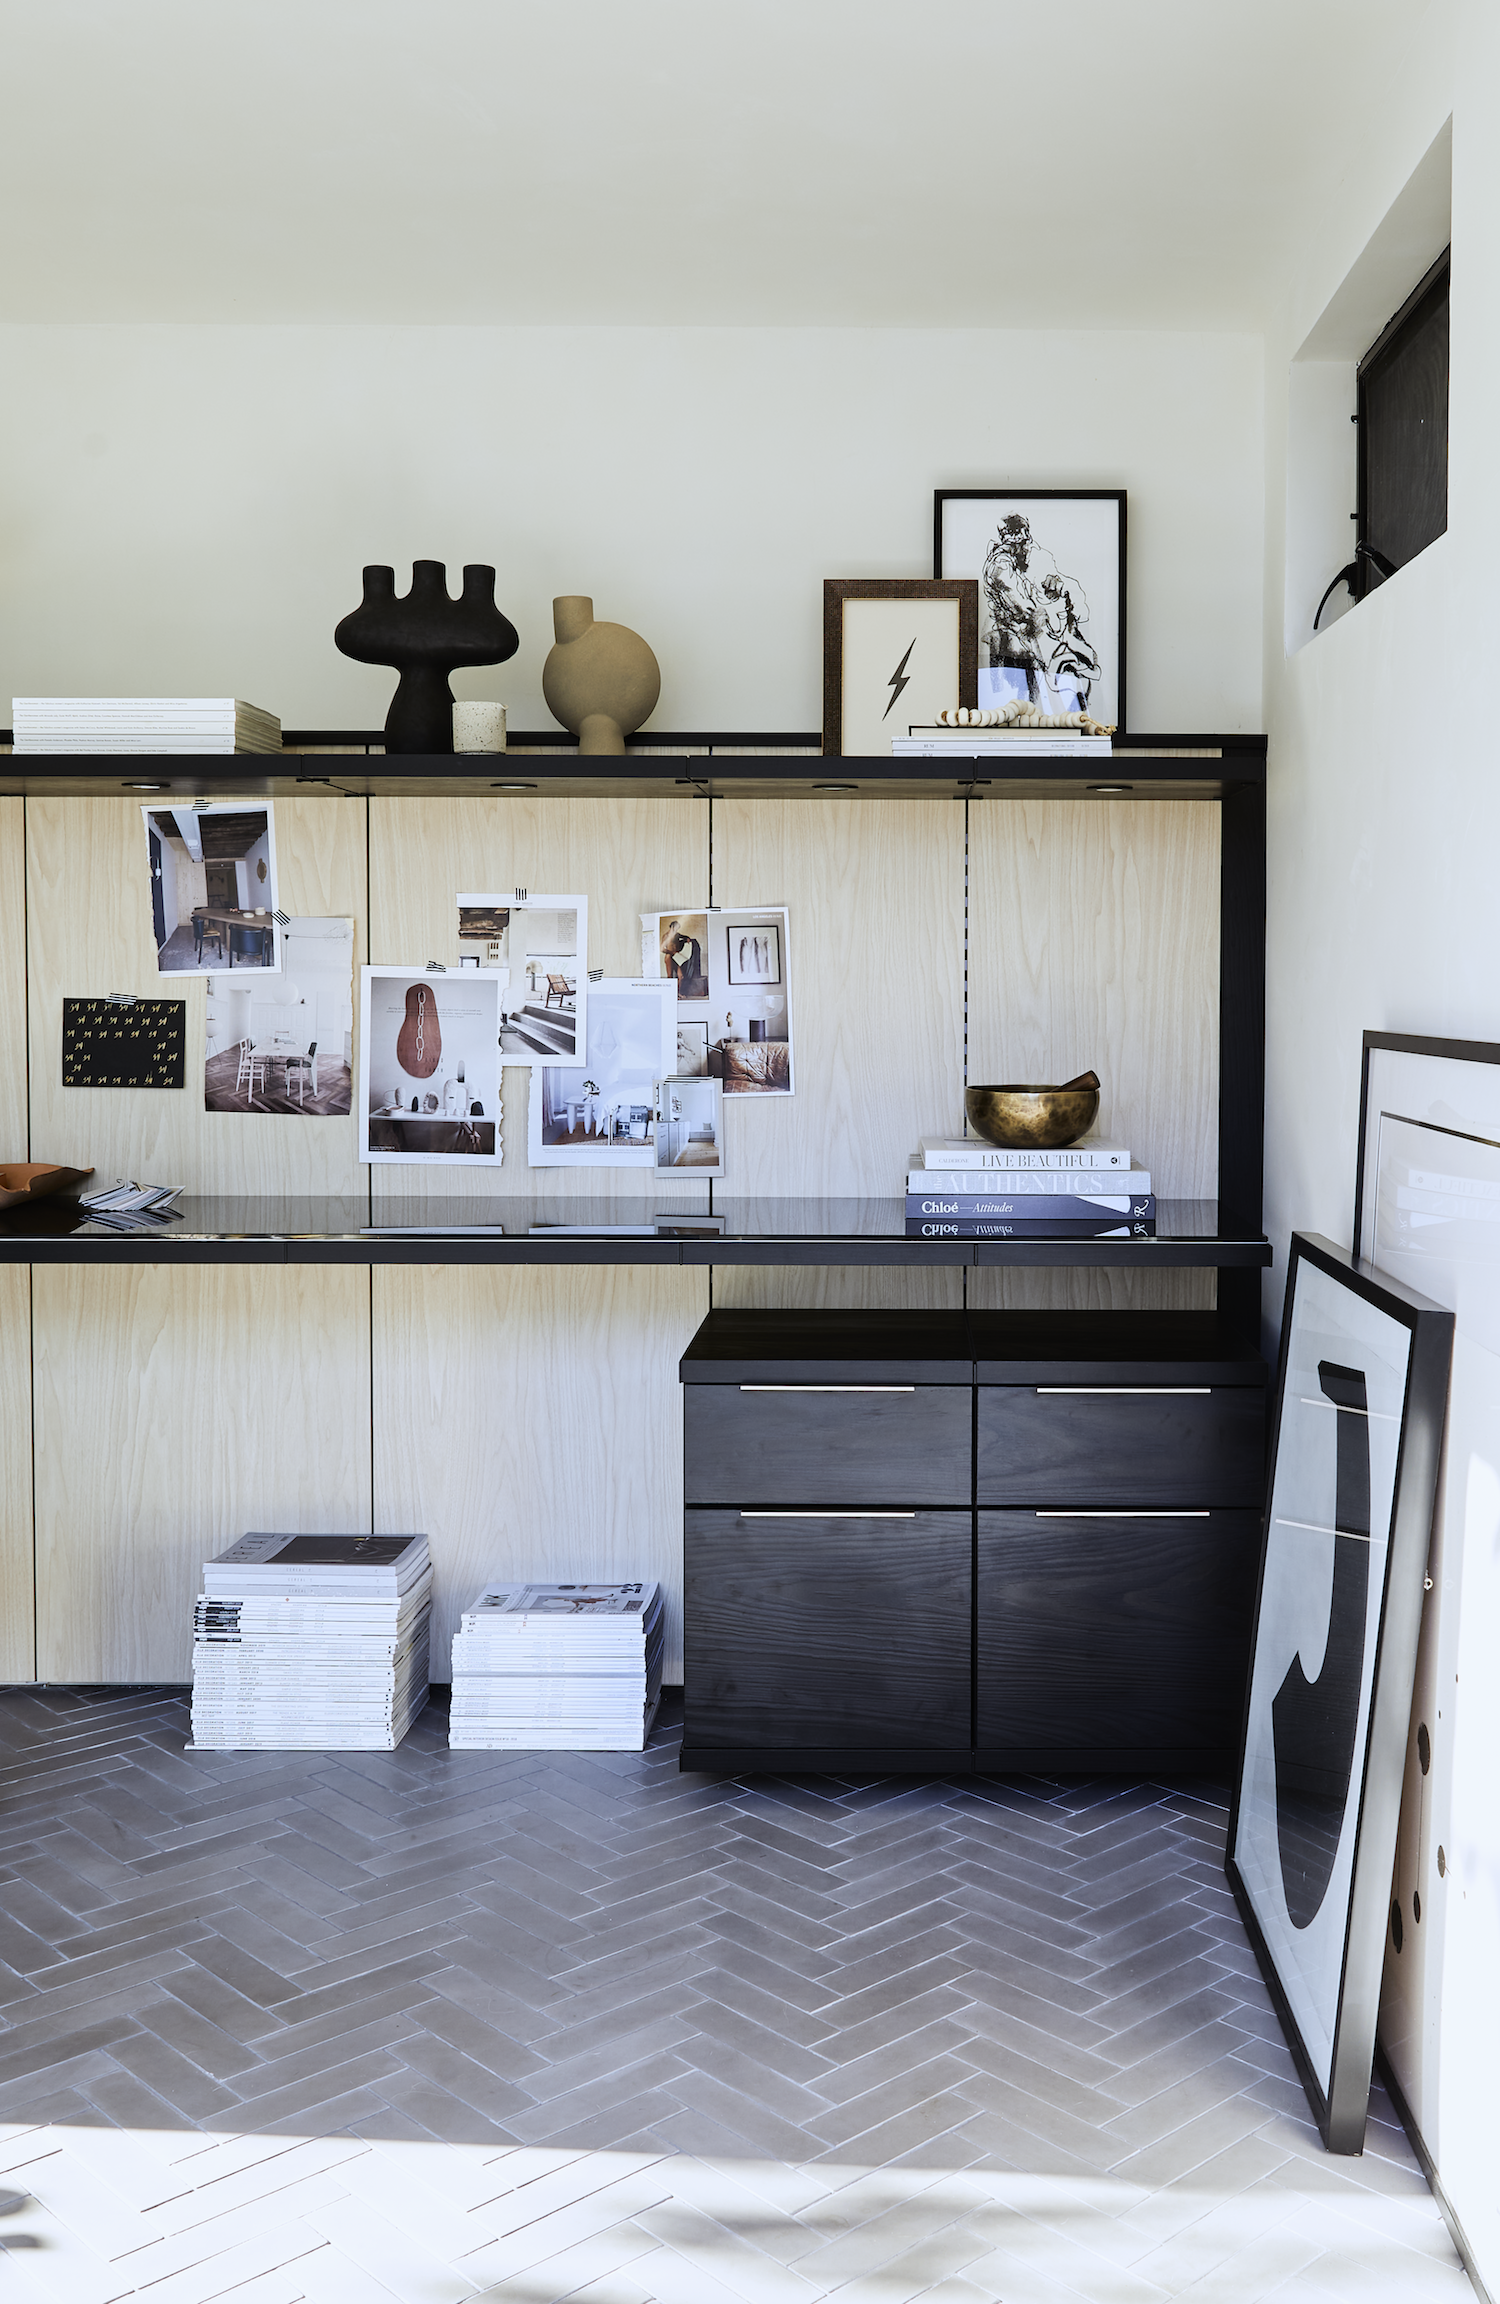
Anyone else still collect print magazines?? I just love having something physical to thumb through for inspiration. Having my collections – international titles like Ark Journal, Elle Decoration and Living Etc are favorites – right at my fingertips is also a great way to take a mental break during the day.

The two sets of floating drawers we added give me just enough closed storage to hide away less than pretty office supplies and organize files without accumulating too much crap. This year is all about minimizing the clutter.

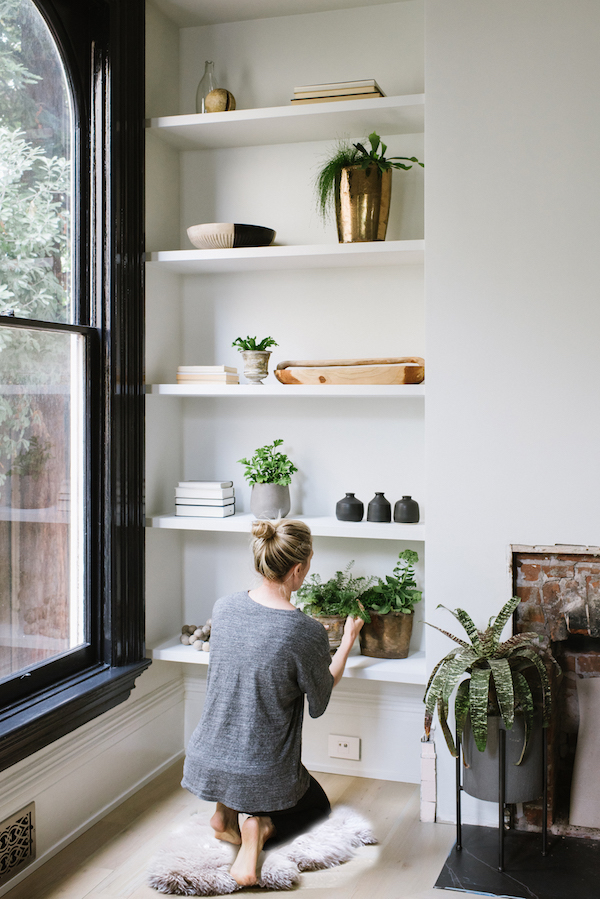
A finishing touch for any workspace is something living! As we spend so much time at home now, houseplants are an amazing way to bring the outside in. They’re good for your mental health and also for your physical wellbeing too as they help cleanse the air. I worked with Leon and George, an awesome plant delivery service, to pick the ideal plant for my office – in this case, a Silver Evergreen. The Vayu planter from Light and Ladder is a truly stunning vessel. Love their designs!

I know I am incredibly lucky to have a dedicated space of my own to get through these tough times. If you can’t build a shed in your own backyard, there are tips and tricks for upgrading your own WFH space – even if it’s just tucked into the corner of the living room. Here are a few of my favorite tips:

  • Try to work where this is maximum natural light. As we head into the winter months, natural light is going to help boost your mood and your energy levels.
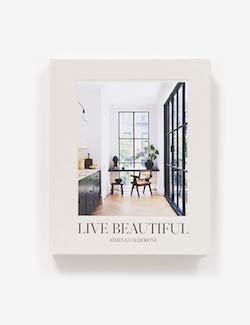
  • Surround yourself with beautiful things that you love, art, objét, or a stack of books and magazines. A little bit of inspiration can go a long way.
  • Add plants!
  • Invest in a few pretty pieces that help keep your workspace organized and pulled together. It’ll help you feel more pulled together too – even if you haven’t taken the time to shower (it me!).
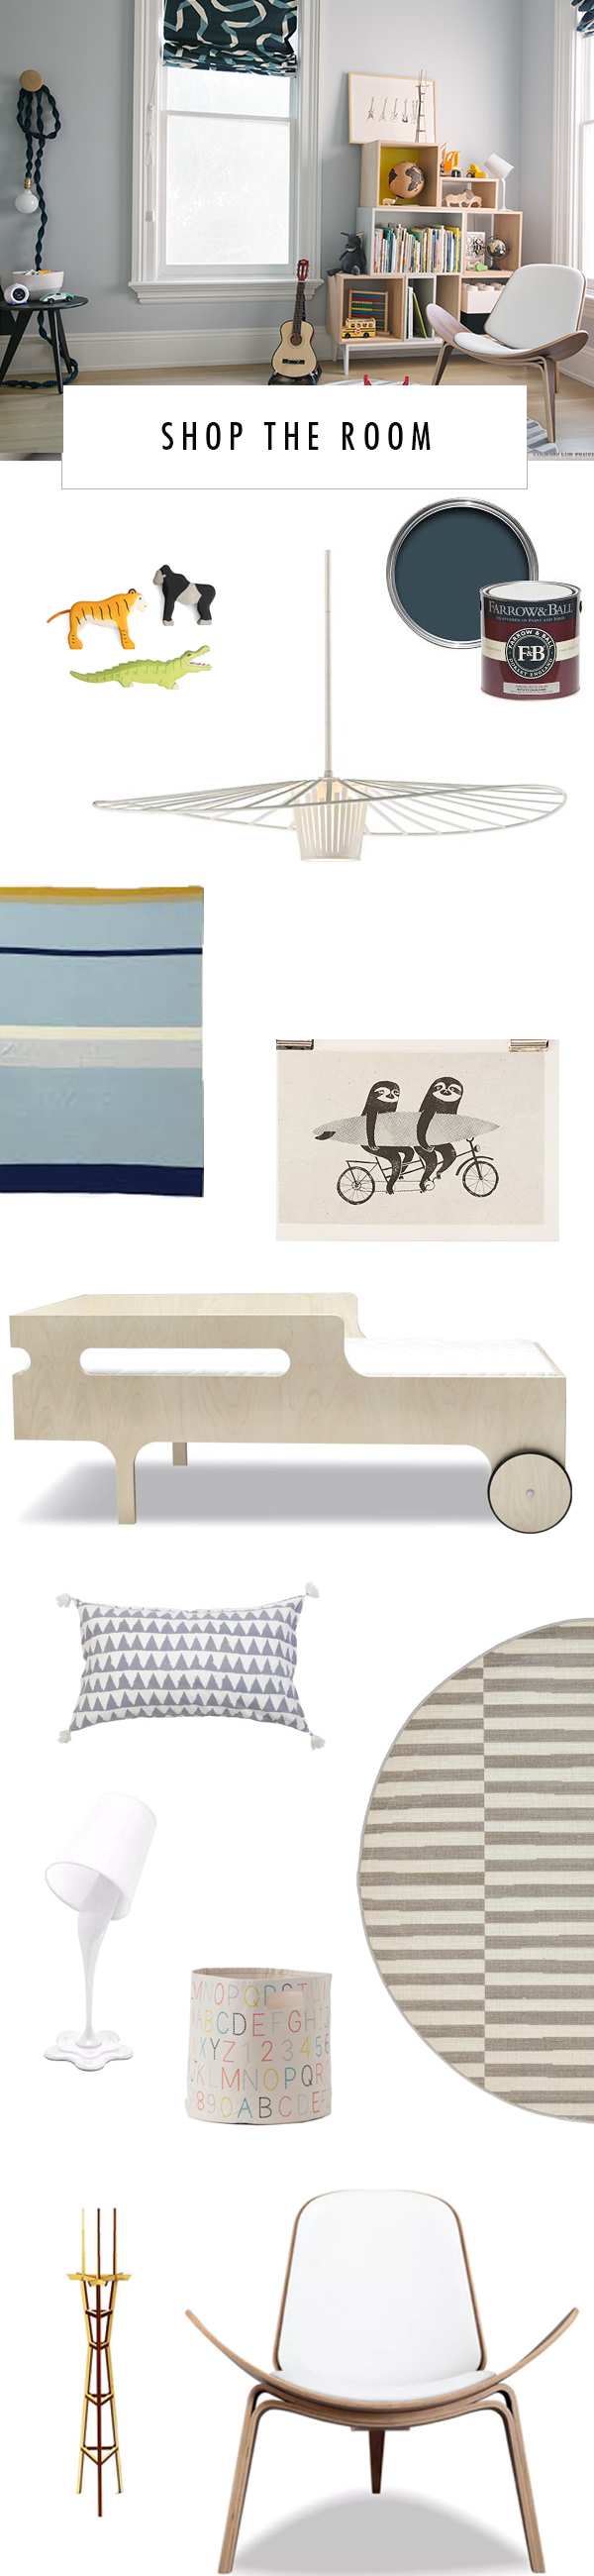


photography by aubrie pick, florals by marigold SF

Happy Monday friends! I hope everyone has been enjoying these first few days of spring. If you don’t mind, I wanted to share something a bit personal with you today. It’s been a bit since I pulled back the curtain on my life. In just a couple short weeks, my son will be turning four. While I feel like I’ve finally gotten a handle on many aspects of motherhood and mom boss life, I’ve continued to struggle with the simple prospect of…getting dressed.

There are a litany of reasons for this. Obviously, I had that tiny human (and also kinda birthed This Old Victorian at the same time). I work from home, often going days without seeing anyone during the day. It also doesn’t help that it took me more than three years to feel like my body has returned to (almost) normal. That definitely makes loving your clothes a lot more difficult.

But prior to pregnancy I loved fashion. Style was kinda my thang (have you ever checked out my old personal style posts, or our old Monday Workwear series?? I still kinda miss that one). But for the past year or two, I’ve looked at my (admittedly fully stocked) closet and have had no idea how to put a decent outfit together! It’s turned into quite a problem.

A Spring Wardrobe Refresh on apartment 34

Let’s face it, we all get in a rut with our closets from time to time.  But I’ve been feeling more stuck than that. My closet was actually becoming an overwhelming source of stress in my life so I just avoided it entirely. My yoga pants were just the easier option. But the easy way out isn’t much fun.

But getting in a style rut doesn’t mean we need to toss out our entire closet and start from scratch. Sometimes we just need a fresh eye to remind ourselves why we bought certain pieces in the first place.Thankfully, my girlfriend and fellow OG  blogger Christine is a professional personal stylist and she recently paid me visit to help me shop my very own wardrobe – and we captured the whole experience on video for you!

A Spring Wardrobe Refresh on apartment 34 A Spring Wardrobe Refresh on apartment 34

Christine takes a very intentional approach to her client work. She helps you reevaluate your current closet and purge what no longer brings you joy. That’s a key step – we rarely evaluate all the clothes we own. It’s truly an eye opening (read terrifying) experience – and is much easier tackled with a buddy to help you through it! Once the clutter is cleared, you finally have enough space to rediscover pieces you love and remember why you bought them in the first place.

Since I no longer have the luxury of taking a lot of time to get ready in the morning, Christine helped me identify my version of a cool mom uniform (sorry silk shirts, I no longer really have any use for you). She then helped me see how to layer back in pieces from my pre-mom life, amping up my style for things like business meetings, date nights and special occasions. Prime takeaway; never underestimate the power of a good pair of heels! Even though I so rarely wear any of my fancy shoes now, I’m glad I’ve held onto all my pretty ponies.

When I took my trip to Scandinavia a couple weeks back I really made a point to diligently wardrobe plan, picking through my closet and selecting the pieces that I felt both stylish but also comfortable in (I have a whole story saved on Instagram about that btw!). As we move into the new season, I’m making a point to plan out my spring wardrobe, selecting all of my go-to looks in advance and adding in a few fun accessories to take things up a notch.

You can check out an example of my spring wardrobe plan below.

A Spring Wardrobe Refresh on apartment 34

SHOP: sneakers / tee / jeans / blazer / necklace / sunnies / sandals / tote / heels 

It’s amazing how much better you feel about yourself when you take that little extra effort to put together a good outfit. Now I feel like I can do that quickly and easily – and I didn’t even have to buy anything new.

To see how Christine helped me shop my own wardrobe – and how you can do it too – watch our video below! Eager to hear if any of you struggle with similar challenges.

To check out Christine’s styling services, CLICK HERE.

To check out how I designed my closet, CLICK HERE. 

photography & video by andrea posadas creative

Do you ever have problems finishing things? Taking a project over that last 10 percent to consider it complete? Yeah, me too. Hence, why instead of finishing off my master bedroom and bath design (that still continue to languish more than a year after renovations), I’m distracted by other little problem spots in the house that have been bugging me. Like wanting to redo my home office. Again. Since I’m usually chained to it ought to be pretty dang good, don’t you think??

My current inspiration – the wrap around desk.

There are three reasons I really love this look. First, it’s beautifully minimal and when done right (yes, there are plenty of really wrong examples), a well-made wrap around desk can serve as a beautiful focal point of space – rather than just a utilitarian, functional thing taking up space in the corner.

Secondly, I strongly believe that not having drawers makes you keep less stuff. Easier said, than actually put into practice of course, but that lack of storage certainly gives you the incentive.

Finally, the corner desk gives you much more surface area. I realize that kinda subverts the less stuff goal, but if you’re constantly editing images on a massive desktop, or are constantly surrounded by books, magazines and other sourcing material as I typically am, then a place to spread out can be rather helpful. I’ve also come to realize I no longer need a fancy acrylic stapler or that cute little bowl of paperclips. And if you float your corner desk you can actually give the appearance of taking up less space.

There are few other key components necessary to complete this look. A stellar desk chair (I will be prepared for the comments about the lack of ergonomics, I’m ok with that), a scatter of your favorite ceramics, a really good task light and some framed art for that must-have visual inspiration.

I’m lucky that I have the perfect little corner for this type of set up in my office. Now let’s see if I actually see this idea to the finish line.

Would you like to see that??

for the Idea to Steal archive, CLICK HERE.

images 1 / 2 / 3 / 4

Yes, it is true. I’ve been working on the restoration and design of my historic Victorian home in San Francisco for nearly four years now. But even as a blogger, I’m still a normal person my friends. We didn’t win the lottery. I’m not a professional interior designer. Contrary to popular belief, I’m not getting everything for free. And this house is a beast! But I have actually shared quite a bit of my progress – with the hopes of a full before and after to come this fall, but my laundry room makeover has been the most popular reveal I’ve posted to date. In case you missed it, check it out below.

Everyone always wants their house to be pulled together. I’m no different. But since I can’t make couches or rugs magically ship faster, I’m making progress wherever I can. Case in point: Our laundry room! I’d neglected to actually design the space before we moved into our house. But after just a few quick fixes, I got the room all dressed up nice and I can actually smile while folding clothes!

laundry room makeover reveal on apartment 34

You may have caught the before pic of the space in this post. But in case you missed here it is again.

laundry room makeover reveal on apartment 34

The room was essentially nothing more than a tiny box with a giant washer & dryer in it! When it came to actually adding some design into this space, I focused on three main goals.

1. Make it Functional: In the rush of completing construction, I never put any thought into the laundry room other than creating one. I knew I wanted a front loading washer dryer for their ease and capacity. But I got mine and just plopped them in there. I didn’t spend anytime thinking about how to optimize space, storage or really make the room actually work.

2. Add Storage: Now that I’m mom, I’m dealing with every kind of laundry dilemma under the sun. So the amount of stain boosters, whiteners and laundry pre-treaters have exploded. I needed to create space in our laundry room so there would be room for it all.

3. Make it Really Really Good Looking: Utility spaces can look just as good as any other room in the house. A few design tricks can make even highly functional spaces chic.

And if I do say so myself, I think I was able to achieve all three of my goals – though I’ll let you be the final judge.

laundry room makeover reveal on apartment 34

Let’s talk function first. I selected the LG SideKick washer and dyer for my laundry room. I adore them, but they are pretty big! They both sit on pedestals making them nice and tall and easy to load and unload. But they are also rather deep. I nestled them into the wall as much as possible, but the laundry room is already relatively narrow. To get the storage I was craving, I had a custom shelf built that just fits over the two units. That shelf allows me to have everything I use daily – detergent and and laundry boosters et al at arms reach. I like that I don’t have to open any cupboards or move things in and out. Everything is right at my finger tips.

laundry room makeover reveal on apartment 34laundry room makeover reveal on apartment 34

I was also able to capitalize on storage built into the LG Twinwash washer/dryer system itself. For one thing, the washer pedestal actually conceals an additional mini washer! That lets me do a quick small load, wash delicates or soak stained items in my favorite pre-treaters without needing an additional tub or bucket. Winning! The dryer pedestal is also actually a storage drawer. That’s where I house all extra detergents, stain fighters, essential oils, linen sprays and the like. I love that it keeps all the packaged goods tucked away where I don’t have to stare at a hot mess of labels. Major decorating secret. Decant anything you can and hide everything else to help decrease the appearance of clutter Again, winning!

laundry room makeover reveal on apartment 34laundry room makeover reveal on apartment 34

The design elements of the room are where the design and function really come together. I started by installing beautiful Erica Tanov wallpaper to create a dramatic feature wall at the back of the room. I’m in love with the gold foil. It’s the perfect backdrop for my storage system. I worked with local organizing guru Bliss Haus to design a beautiful laundry supply storage system. Every cleaning product I need is decanted into glass jars for a clean, uniform look. There are even jars to collect dryer lint and lost socks! The custom print labels are so cool. It really took the room to the next level. A modern white and wood metal Japanese basket holds other key cleaning solutions like white vinegar, water and scented room spray. Because sometimes laundry rooms just get funky.

laundry room makeover reveal on apartment 34laundry room makeover reveal on apartment 34laundry room makeover reveal on apartment 34

I also used jars with natural wooden lids from Jenni Kayne to mix in a organic modern touch to the design. To create even more texture and save my bare feet on cold days, a vintage Moroccan dhurrie rug from St Frank was added to the floor. The golden tones warm up the room and tie in with the Erica Tanov wallpaper’s golden hue.

My favorite design idea in the space might have to be the Meghan Shimek weaving I found at local San Francisco boutique The Podolls. I needed something to conceal our electric panel! The wall hanging does the job perfectly. A fiddle leaf fig and white textured planter from my favorite local florist Flora Grubb adds life and a pop of rich color.

All these elements come together to create my dream laundry room. I can do loads and loads while loving my surroundings. One more room down. Many many more to go!

Check out our entire archive of house updates and all the rooms completed to date HERE.

For more of my favorite house tours, CLICK HERE.


original photography for Apartment 34 by aubrie pick 

Sound the horns, strike the drums, or do whatever you do to attract a ton of attention because today is the day – today you get to see the AFTER of our 6-week One Room Challenge. Are you excited? I’m excited. But to quickly recap for anyone who might be new here, I decided to transform my son’s nursery into a toddler room for this ORC – since he is three, going on ten now. I’ve summarized the room’s before look for you quickly below.

one room challenge toddler room on apartment 34one room challenge toddler room on apartment 34

And without further ado, here’s our after!

one room challenge toddler room on apartment 34

Ta-da! Do you love?! I love. I’m seriously so happy. But where to begin, where to begin?! Well, let’s dive into room layout first. I essentially mimicked the very same layout I used for the nursery design. As I’ve mentioned, this room is shoebox-shaped, and not particularly spacious. There’s only one solid wall. All the other walls are broken up by either windows or doors. So I stuck with what I knew.

Bed on the far wall to the left of the central window. Bookcase to the window’s right. Reading chair floating next to (the dreaded!) curved wall. Dresser moved into the closet. Thankfully, I was able to use an amazing new moving and storage service called Trove to remove and store all of my nursery furniture so I could move all the new pieces in all in just a couple of hours. Phew.

And just like that, it suddenly feels as if the amount of space has doubled. I accomplished this by getting rid of all things oversized. The 8×10 area rug, the floor-skimming drapes, the oversized glider – they are all gone (and I ain’t sad about it). Now the space has room to breathe. But it makes sense. The nursery was about being cozy and nesting. The new version of this room is about making space for energy, fun, and play.

one room challenge toddler room on apartment 34

Shall we talk color scheme next?? I hinted at my paint inspiration in previous weeks’ posts, but did you guess what I would do? I really didn’t want to fully repaint the room as I still love its original light gray hue, but the transformation did require a little refresh – something to make the room feel more mature. Well, I went with the triangle around the toddler bed idea and I’m obsessed with how it turned out. The paint color is a gorgeous deep teal/blue/green called Hague Blue from Farrow & Ball. It became the inspiration for all the other deep blue accents in the room.

I love how the triangle corner cocoons the bed and offers a graphic punch. I decided to go with a toddler bed because, well look at it, it’s just too dang cute. My son thinks its a car. I’m also hoping that the nest effect will entice him to actually sleep in his new big boy bed because right now he continues to opt for the crib (any and all parental advice on this one def welcome!). I kept the bedding nice and simple and added just a little playful touch with a block print pillow from Pom Pom at Home.

Since we live in earthquake-prone San Francisco, art over beds is generally frowned upon and so I needed to come up with an innovative way to hang art. I did that in two ways – first, I simply decided not to frame my art find –  Sloths Riding a Tandem Bike with a Surfboard (love!). I then decided to hang the print using simple clips. It feels both more young and more casual that way. Bonus, using clips also doesn’t damage my 150 yr old plaster walls (more to come on the challenges of plaster – keep scrolling).

one room challenge toddler room on apartment 34

A simple, modern Nova End Table from Room & Board in black offers a landing spot for books, my husband’s childhood pinewood derby car and my latest favorite parenting invention – the Stay in Bed clock. These things turn from yellow to green telling your child when its ok to get up. Genius. A gorgeous Helix Light in deep navy created by my friend and rope artist Windy Chien serves as a gorgeous bedside light.

one room challenge toddler room on apartment 34

Opposite the toddler bed sits the room’s new play/reading corner. I love the open, modern vibe. It’s now super easy for my son to pick from his ever-growing book collection or pull out his legos for a major building session. On the upper shelves, I added an homage to his current interests including a guitar print by another friend, artist Jennifer Ament custom framed with Framed & Mated as well as a replica of Sutro Tower, a San Francisco landmark that we can see from our neighborhood.

The Wing Chair from Overstock offers a comfy seat to read. I love the low profile. It’s also really comfortable for humans of all sizes – my three-footer and my six-footer both really like it. A striped round rug from eSale Rugs offers the perfect little padded play space. And I continued to pull in my blue accent color through the custom roman shades I had made with Dwell Studio fabric at Calico Corners. I love the road-like ribbon pattern. Blackout shades are must for those tiny humans. They make bedtime so much easier!

one room challenge toddler room on apartment 34one room challenge toddler room on apartment 34

The Woopsy Desk Lamp from LampsPlus offers a little whimsy. The Children’s Dictionary also comes from my husband’s childhood room. Some prized construction vehicles and jungle friends from my favorite online kid’s shop Bitte take pride of place.

And now to my curved wall challenge…

one room challenge toddler room on apartment 34

To accentuate the wall, I added three-dimensional constellations! Now I can’t take total claim for the idea. I spied something similar in a room by J&J Design Group. I’d been hoping to incorporate something star themed for a couple of reasons. Carter had a print of his astrological sign hanging over his crib since birth so I wanted to keep the theme going. We also sing Twinkle Twinkle Star every night. He immediately understood these were stars.

But perhaps most importantly, the way I conceived of the solution solved both my curved wall and my plaster problems. If you’ve never worked with plaster – don’t. It is SUCH a pain. It is highly ill-advised to put holes into plaster as it can make the entire wall crack. And once you do poke a hole there really isn’t any changing your mind. You can’t simply patch and repaint. It’s a process. So rather than deal with that headache, I used magnetic paint (per many a commenter’s suggestion) on the wall! Then to create the constellations, I simply used sets of magnets to create each constellation shape.

Truthfully, I’m a little disappointed with how the constellations look in photos. These images don’t really do them justice. The design would have photoed much better if I had used black cord, but I found glow-in-the-dark cord that turns his wall into a personal starry night. You’ll just have to trust me that it’s very cool in person.

one room challenge toddler room on apartment 34

Now, I couldn’t only use the Hague Blue around the toddler bed. I needed that color elsewhere in the room – and so to the closet I went! I painted both the exterior french doors and a half wall around the interior in that nice rich color.

one room challenge toddler room on apartment 34

I also transformed the closet back from a mini play area into the storage space I know we’re going to need long-term. Thankfully I could find a stylish dresser that fit into this relatively small space at Room & Board. They have such a great variety of sizes, styles and finishes. I knew I would find the perfect piece. And it actually holds a ton of clothes.

A sturdy two-toned basket from Overstock serves as a new laundry bin and I added a simple coat rack for jackets, hats and backpacks. It’s never too early to teach a kid that there’s a place for everything and everything should go back in its place! We’ll see how that goes of course.

I couldn’t bear to part with the animal alphabet print I got before I was ever pregnant so it now adorns the back closet wall. A Hey Handsome print from Minted is another nursery holdover. I couldn’t help myself – it’s too cute.

one room challenge toddler room on apartment 34

So there you have it. I’m pleased to report that my kiddo is totally into his new room. He’s already spending more time playing in there then he had before (mission accomplished!).

I so hope you enjoyed following along over the last six weeks. I’ve truly appreciated everyone’s comments, ideas and suggestions.

one room challenge toddler room on apartment 34

SHOP THE ROOM LampsPlus Tides Pendant / Bitte Wooden Toys / Farrow & Ball Hague Blue PaintPomPom at Home Pillow / Ferm Living blanket / Toddler BedSloth print / eSale Striped Rug /  Woopsy Desk Lamp from LampsPlus / Pehr Designs Alphabet Bin / Overstock Wing Chair / Sutro Tower / Overstock Woven BasketRoom & Board dresser / Room & Board end table / Calico Corners Roman Shades  / Minted Art PrintStacked Bookcase from Sourced By Good / Birch Coat Rack / Jennifer Ament print / custom framing Framed & MattedWindy Chien Helix Light / Cork Globe / Throw Pillow / Lego Storage

Be sure to check out everyone’s reveals by clicking on the links below! I can’t wait to see them all.


ONE ROOM CHALLENGE 

Beginning in the Middle | Coco & Jack | The English Room | The Gold Hive

Gray Malin | Jenna Sue Design | Jojotastic | Kelly Rogers Int. | Linda Holt | Marcus Design

Michelle Gage | Natasha Habermann | The Painted House | Rambling Renovators

Sacramento Street | Shannon Claire | Sketch 42 | Stephanie Kraus | Bisou Style

Media Partner House Beautiful | TM by ORC


To catch up on the entire ORC, click the following links Week 1Week 2, Week 3Week 4, Week 5

original photography for apartment 34 by bess friday

Now that the season has turned, have you started looking for ways to update your house for fall?! I thought so (don’t worry, me too). Starting with a bookshelf is a no brainer. They’re the perfect place to express your personality – and you can continually switch them up depending on your mood – all in really affordable ways. But perfecting them does take a little time. Maybe you’re working to build a library or perhaps you’re compiling a collection of curated objects. A couple of weeks ago I partnered with Overstock to share how you can amp up your bookcase (and many other parts of your house) with plants, but what about everything else you need to really make your shelves stand out? Keep scrolling for a few styling tips and you’ll have the perfect #shelfie in no time.

how to style the perfect shelfie on Apartment 34

Find Your Vibe. Do you love tons of color? Do you gravitate toward an eclectic look? Are you a minimalist?  To keep you shelfie in check, figure out your style and then commit to it 100%. I went for a light, bright and paired back look above. I was in an open and airy mood all summer, but check out my inspiration for a more layered look in a black color palette below. I’m totally feeling this approach for fall.

Layer It Up. To give your shelves depth and texture, it’s time to layer. Trays, stacks of books or a piece of leaning art serve as a good base. From there, you can add in a candle holder, a decorative bowl, a sculpture, a little lamp – and of course a houseplant or two. You want your eye to travel both back and forth and up and down as you move from shelf to shelf.

Leave Room to Breathe. To keep a shelfie from feeling overstuffed, group objects together in threes. Also vary the heights of the items in your grouping. You want each piece to speak to one another in some way, but if they’re all the same height they won’t stand out. And remember to leave a little white space. That way, people will admire your handiwork rather than wonder if you’re a hoarder.

While the above are good shelfie guidelines, I’m the first to admit there are no hard and fast rules. Simply keep your eye out for things you truly love and you’re already halfway there. Below are a dozen pieces from Overstock I’d certainly love to add to my shelves this season!

how to style the perfect shelfie on Apartment 34

shop the post: art // black leather tray // metal wire ball set // concrete light // marble bookends // stone vases // bowl // plant // statue // candlesticks // plant // sheepskin throw rug


For more fall styling ideas, CLICK HERE.


photography for apartment 34 by delbarr moradi

This post is in partnership with Overstock.com. Thank you for supporting collaborations we’re excited about and that have kept apartment 34’s doors open.

How does one develop their sense of style? Are you born with it? Do you try a new style on like a spring coat, shrugging it off again when it no longer suits? Do you cultivate your style over years? There are, in fact, thousands of influences that impact how our style evolves and crystallizes, but you cannot discount your childhood’s impact on how you approach the world today.

With Mother’s Day around the corner, and now a mom myself (is it normal that it still feels weird to say that), it’s fun to reflect on my childhood home, and how my mom’s style influences are showing up in our house. I’ve partnered with some of my favorite power mamas, Taylor Sterling of Glitter Guide and Jen Pinkston of the Effortless Chic to share how our moms influence us today. Oh and you’ll want to keep scrolling because there’s details about a $1000 GIVEAWAY below!

A lovely collection with Anthropologie on Apartment 34

At first pass, the connection to my mom’s style influence didn’t seem obvious. Our aesthetics are vastly different – I prefer a monochromatic, modern look while my mom has a more eclectic mix and match style. I love mid century classic pieces while my mom’s home is made up of a mix of antiques, family heirlooms and a few holdovers from the 80’s (sorry mom). I’m rather color phobic, while my mom embraces it. But as I looked around the Victorian and examined the direction the design is taking, it dawned on me.

A lovely collection with Anthropologie on Apartment 34 + $1000 Giveaway!A lovely collection with Anthropologie on Apartment 34 + $1000 Giveaway!

No matter how hard I try to maintain a minimalist hand in my designs, I cannot help but accumulate little collections (or big ones as the case may be). When it comes to beautiful objects, I’m like like a moth to a flame – just like my mom. Now her’s tend toward the natural, like houseplants and beach stones, while I have a weakness for home goods; glassware, vintage bottles, bowls of all shapes and sizes. Every time I purge, it seems a new collection springs up in the newly emptied spot. In particular, my mom instilled in me an endless love of both wooden bowls and ceramics. I am a child of the 70’s after all. When I see a piece that calls to me, I just cannot help myself. Occasionally vintage Tibetan bells in a little beachside tourist shop also catch my eye, but you’re always allowed outliers.

A lovely collection with Anthropologie on Apartment 34 + $1000 Giveaway!A lovely collection with Anthropologie on Apartment 34 + $1000 Giveaway!

But there’s a reason! Just look at how pretty they are. Natural pieces are the easiest way to add gorgeous texture and warmth to any room.

A lovely collection with Anthropologie on Apartment 34 + $1000 Giveaway!A lovely collection with Anthropologie on Apartment 34 + $1000 Giveaway!A lovely collection with Anthropologie on Apartment 34 + $1000 Giveaway!A lovely collection with Anthropologie on Apartment 34
shop the story woodland nesting bowl in mango wood / woodland nesting bowl in gray / marble stacking pinch pots / farmhouse potter silo bowl / ceres serving bowl / garden route platter / emerson vase | rachel comey jeans / jenni kayne slides / similar top

And while some might find a collection superfluous, if an object brings you joy, that’s all the reason you need to have it in your life. When I close my eyes and picture my mom’s house, I can see all her little collections – on a bookself there, on the kitchen counter there, in my mind’s eye. I like the idea that my kid might be able to do the same one day.

Have you thought about how your mom has influenced you? Have you ever thanked her for it? Well, we have a fun a little surprise to go along with this story. To help you both treat your mom and perhaps yourself, Anthropologie is giving away $1,000 gift card to one very lucky winner!

HOW TO ENTER:

1. Follow Apartment 34, Glitter Guide, the Effortless Chic and Anthropologie on Instagram

2. Check out THIS Insta for all the entry details!

The contest will end Thursday, May 11th at 6pm PST and the winner will be announced on our Instagram accounts on Friday, May 12. Open to US Residents only.

And be sure to check out Taylor’s story on Glitter Guide and Jen’s on The Effortless Chic!


GET YOUR SHOP ON

[show_shopthepost_widget id=”2655914″]

original photography for apartment 34 by andrea posadas

Like many of you, I’ve had daydreams of the ultimate closet dancing around in my head for a long time. I lived for years with clothes strewn on the floor, stuffed into every available corner, slowly creeping into one-quarter, then one-third, then a half of my husband’s closet (he was not pleased). So when we bought the Victorian, I was determined to create the closet of which dreams are made. And I’m so excited to hear what you think of the final result! Today you get to see my complete closet before and after.

Lifestyle blogger and design expert Erin Hiemstra reveals her dream closet

Above is the closet mid-construction. Drywall is in. The floors are down. While it looks like a relatively simple job, this space was once actually a bathroom! The only upstairs bathroom to be exact. The room is a decent size, but not huge by any means. This was an 1850’s bathroom after all. But the space does feature a lovely window and those glorious 11″ ceilings. Thankfully, we could relocate the bathroom so I got to snag this space for my own little oasis that now looks like this…

dream closet on apartment 34

Ta-da! I call this my closet miracle – a space where everything has a place, where I can actually see my clothes and I know what I have to wear. It truly is a game changer (check out how I rediscovered my own wardrobe in this post).

When it came to creating my dream closet, only one place came to mind: California Closets. They work with you from point A all the way to point Z to create a fully custom solution to meet your exact needs. The process started with my kickass designer Paige (it’s always fun when someone you work with becomes a friend) making a house call to our loft to do a personal closet assessment to determine my storage requirements. It wasn’t too challenging to identify the top priority – as I have probably 3x as many shoes as I do clothing! After years of cramming shoes onto little racks and having stacks and stacks of shoeboxes piled along the wall, I was really excited about the idea of finally having all of my little shiny ponies on display.

dream closet on apartment 34 dream closet on apartment 34

So Paige helped me devise this genius design above. The columns of shelves offer tons of shoe storage. We optimized the spacing and design based on the number of heels vs flats in my collection – though post-baby that number has shifted heavily in the flats direction! I love that I can now see exactly what I have without digging through mounds of boxes. I created a few more open sections to house bags, my denim and a few folded items like sweaters and tees. The center console houses my unmentionables, clutches & small bags as well as a velvet lined jewelry drawer. Swoon. The large bottom section hides laundry! Have I mentioned genius?

dream closet on apartment 34

One the opposite wall we installed a double-stacked hanging section for shirts, jackets, and blazers as well as a section for long items. I’m not a big dress person so that’s pretty small. And of course, there’s also more shoe storage on this side. The addiction is real people. Those 11′ ceilings came in very handy here (yes I need a step stool to reach the tippy top).

dream closet on apartment 34

Of course, I had to add a few original touches to make the closet truly feel like me. I selected a light gray finish for the built-ins and while we didn’t grab a good shot you might spy my black ceiling in the pics above. Obsessed. The dark ceiling makes everything pop. To further customize the look, I found amazing brass and lucite hardware on Etsy (you can check out the shop right here). I had them made in a smoke color – so good. I also added a floor-length drape from The Shade Store for some additional texture. Draperies really take a space to a whole new level.The room also features a pocket door on the (rare!) occasion I want to hide the space. Et voila – dream closet achieved.

Having a functional, organized closet is amazing for all kinds of reasons but three things really stand out. Number 1; general sanity and adulting. It’s refreshing to walk into my bedroom and not have it remind me of my sixteen-year-old self (or 27 or 35-year-old self for that matter!).  Now I only feel overrun by children’s toys rather than clothes. Number 2; I want fewer things. I don’t want a cramped closet so I find myself purging a lot more often. When the space starts feeling too full, I know it’s time for a closet clean out. And number 3; I shop way less and with a lot more intention. Shopping used to be a way to pass the time or I’d buy something “cute” on a whim. Now I know exactly what I have and can easily identify what I need. A pair of white denim to round out my jeans collection. A little camel bomber jacket for cool San Francisco evenings. A new flat sandal. But I keep the edit tight and the pieces timeless and classic. I actually just did another purge as part of my spring cleaning regime (have you checked out my tips here??). It’s the perfect way to make space for one or two pieces that will make my wardrobe feel fresh and new for Spring. I’ve included my current wishlist below.

dream closet on apartment 34closet reveal on apartment 34

SHOP:  tote / earrings / ring / jacket / shirt / jeans / clutch / sunnies / bucket bag / booties 


SHOP THE POST

[show_shopthepost_widget id=”2619095″]


I’d love to hear your thoughts on the final design and if you have any closet organization secrets up your sleeve. I’m always looking to add to my arsenal.


Check out all the updates on our renovation HERE

For more spring style ideas, CLICK HERE


original photography for apartment 34 by michelle drewes


Everyone always wants their house to be pulled together for the holidays. I’m no different. But since I can’t make couches or rugs magically ship faster, I’m making progress wherever I can. Case in point: Our laundry room! I’d neglected to actually design the space before we moved into our new house. But now that the room is all dressed up nice, I can actually smile while doing my chores!

apt34-laundry-638

You may have caught the before pic of the space in this post. But in case you missed here it is again.

apt34_laundry-room

It was essentially nothing more than a tiny box with a giant washer & dryer in it! When it came to actually designing this space, I focused on 3 main goals.

Make it Functional: In the rush of the move, I didn’t put thought into the laundry room. I knew I wanted a front loading washer dryer for their easy loadability and capacity. But I got mine and just plopped them in there. I didn’t spend anytime thinking about how to optimize space, storage or really make the room work.

Add Storage: Now that I’m mom, I’m dealing with every kind of laundry dilemma under the sun. So the amount of stain boosters, whiteners and laundry pre-treaters have exploded. I needed to create space in our laundry room so there would be room for it all.

Make it Really Really Good Looking: Utility spaces can look just as good as any other room in the house. A few design tricks can make even highly functional spaces chic.

And if I do say so myself, I think I was able to achieve all three of my goals – though I’ll let you be the final judge.

apt34-laundry-629

Let’s talk function first. I selected the LG SideKick for my laundry room. I adore them, but they are a pretty big washer and dryer. They both sit on pedestals making them nice and tall. They are also rather deep. We nestled them into the wall as much as possible, but the room is relatively narrow. To get the storage I was craving, I had a custom shelf built that just fits over the two units. That shelf allows me to have everything I use daily – detergent and boosters like Clorox Control Bleach Packs at arms reach. I like that I don’t have to open any cupboards or move things in and out. Everything is right at my finger tips.

apt34-laundry-637apt34-laundry-635

I was also able to capitalize on storage built into the LG Twinwash washer/dryer system itself. For one thing, the washer pedestal actually conceals an additional washer! That lets me do a quick small load, wash delicates or soak stained items in my favorite pre-treaters without needing an additional tub or bucket. Winning! The dryer pedestal is actually a storage drawer. That’s where I house all my laundry secret weapons like Clorox 2 Stain Remover, Clorox 2 Darks and Denim, Oxi Max Radiant White and the like. I love that it keeps all the packaged goods tucked away where I don’t have to stare at any labels. Again, winning!

apt34_laundryroom_revealapt34-laundry-632

The design elements of the room are where the form and function really come together. I started by installing beautiful Erica Tanov wallpaper to create a dramatic feature wall at the back of the room. I’m in love with the gold foil. It’s the perfect backdrop for my storage system. I worked with local organizing guru Bliss Haus to design a beautiful laundry storage set up. Everything is decanted into glass jars for a clean, uniform look. There are even jars to collect dryer lint and lost socks! The custom print labels are so cool. It really took the room to the next level. A modern white and wood metal Japanese basket holds spray bottles and scented room spray. Because sometimes laundry rooms just get funky.

apt34laundry_reaveal2apt34-laundry-627apt34-laundry-630

I used jars with wooden lids from the Jenni Kayne to mix in a modern touch. To add even more texture, I added a vintage Moroccan dhurrie from St Frank to the floor. The golden tones warm up the room and tie in with the Erica Tanov wallpaper’s golden hue. My favorite design idea in the space might have to be the Meghan Shimek weaving I found at local San Francisco boutique The Podolls. I needed something to conceal our electric panel. The wall hanging does the job perfectly. A fiddle leaf fig and white textured planter from Flora Grubb adds life and a pop of rich color.

All these elements come together to create my dream laundry room. I can do loads and loads while loving my surroundings. One more room down. Many more to go!

Check out our entire archive of house updates and all the rooms completed to date HERE.

For more of my favorite house tours, CLICK HERE.


original photography for Apartment 34 by aubrie pick 

This content was created is in partnership with Clorox

Older posts
Gimme More