You’ve worked hard for months to get that beach bod of yours {and girl, you look good in that bathing suit!} but don’t think you have to starve all summer long to maintain it. What a tragedy that would be! In fact, you can enjoy yummy treats that are not only surprisingly healthy, but fun to eat. Take the açai bowl. We’re quite confident you’ve seen them on Instagram repeatedly, but for good reason! Packed with antioxidants and fiber, this superfood snack will keep you super full and your figure feelin’ fine until your next meal. It’s perfect for breakfast, snack, lunch or dessert and soooo easy to make yourself. Plus, it’s pretty!

acai-bowl-recipe-2acai-bowl-recipe

Homemade Açai Berry Bowl

1 packet frozen açai
1.5 cups greek yogurt
handful of strawberries, sliced
handful of blueberries
handful of blackberries
dragonfruit, sliced
mango, sliced
granola

Blend açai packet and greek yogurt in blender. The more yogurt you add, the thicker the açai mixture will be. In a bowl, lay fruit and granola on top of açai mixture. Take Instagram and enjoy! 😉

acai-bowl-recipe-3

What’s fun about this treat is that you can put whatever in it or on top of it. Blend the açai with your favorite milk, almond butter and bananas for a drinkable smoothie. Try putting peaches, cocoa nibs or chia seeds on it. Anything goes – making this healthy recipe taste different every time you snack!

Trust us, your bikini body will thank you!

original photography for apartment 34 by aubrie pick // styling by bianca sotelo

As we all know, quinoa is now a staple. It certainly hits my table at least three times a week. And while I love it, it can also get a little…well, let’s just call a spade a spade: boring! Yes you can add in this, that or the other, but I’ve been on the hunt for fresh recipes to really mix my quinoa repertoire up.

Thankfully, the possibilities of how to cook quinoa are pretty endless – it’s such versatile little grain. For this week’s Tasty Tuesday, AQ Wellness dished up their secret recipe for this bright and healthy Spring Asparagus and English Pea Salad. I think we found our new favorite team lunch!

apt34-quinoasalad


Spring Asparagus + Pea Quinoa Salad by AQ Wellness

________________________________________________________________________

Ingredients:

2 cups quinoa, soaked overnight with 1 tbsp apple cider vinegar, drained, rinsed well
1 bunch asparagus, sliced 1/4 inch thick at a bias
1 cup shelled english peas
1 meyer lemon, juiced and zested (more if needed)
sea salt and freshly ground pepper
olive oil to taste
mixed greens

Instructions:

Add rinsed and soaked quinoa to a large sauce pan and cover with at least 2 inches of water. Bring to a boil and lower to a simmer for 5 minutes or until grain no longer has a white center.

Add in sliced asparagus and english peas and mix until vegetables turn bright green, around 1-2 minutes. Do not overcook.

Strain quinoa and vegetables in a fine mesh strainer and rinse with cold water to stop cooking. Drain water completely, shaking it vigorously and place in a large bowl.

Stir in meyer lemon zest and juice of 1 lemon. Season to taste with sea salt and freshly ground pepper. Adjust to taste with more lemon juice, lemon zest, salt and pepper.

Drizzle with olive oil and place over a bed of mixed greens.

________________________________________________________________________

Who knew that a great quinoa secret is to soak it overnight in apple cider vinegar?? It certainly ups the flavor factor. This salad is the perfect lunch to make in a big huge bowl and keep the extras for the next day’s leftovers. The veggies are super crisp and crunchy and the meyer lemon zest {which we’re quickly learning is a secret weapon when cooking!} adds that zing of freshness. If you need a last-minute recipe for Easter weekend, I think we’ve found your winner!


original photography for apartment 34 by Aubrie Pick // original recipe for apartment 34 by AQ Wellness // dishware by Vietri // art direction + styling by Apartment 34 

Now that April is here, you know what that means…our sights are set firmly on bikini season {and no this is no April Fool’s joke! How did that sneak up on us so quickly?!} Now’s the time to forgive the lapse on the whole New Year’s resolution business and allow yourself a real fresh start! We wanted to help you {and motivate ourselves!} to do just that, so for this month’s Tasty Tuesdays we’re focusing on dishes that are equal parts good for you and just plain ole’ good.

While I’ve focused on eating healthy for a number of years {with slip ups mind you! I say equal parts quinoa, red wine & dark chocolate!}, I wanted to give you the best tips I possibly could, so I’ve brought in some experts to help.

aq-wellness

A few weeks ago I met the lovely ladies, and more importantly, the trained and certified natural chefs behind AQ Wellness – a new Bay Area food service dedicated to helping you live a conscious lifestyle. Being a major juicing and health foods nut, I felt privileged to give the AQ Wellness recipes a serious taste test and I was blown away. Everything I tried was absolutely delicious, but more importantly, everything felt like real food – because it was! Full meals. Delectable fresh salads. Steak for dinner. Sweet, but still healthy, treats as snacks. The whole focus of AQ Wellness is wellness, not feeling deprived or measuring success by numbers on a scale. Yes, cookies are off the menu but I promise you won’t mind so much.

We are kicking things off with a juice. I know, I know…It may seem a bit cliché, but fresh veggie juice seriously is a miracle worker. When I have mine I can skip coffee {most days!}. It’s a wonderful way to wake up and give yourself a burst of energy. It’s also a great alternative to a sugary afternoon snack – or second coffee. If you have a hard time getting enough veggies into your daily diet then I must recommend adding a juice to your repertoire. And trust me – you will love the way this one tastes!

green-pineapple-juice-recipe-apartment-34

Green Pineapple Juice + Bee Pollen by AQ Wellness

_________________________________________________________________________

Ingredients:
1 bunch parsley
1 large handful watercress
4 broccoli spears
1/2 pineapple
1/2 tsp bee pollen

Instructions:

Juice parsley, watercress, broccoli and pineapple using a Vitamix or slow juicer {sadly a blender will not suffice here!}. Whisk in bee pollen, serve and enjoy!

_________________________________________________________________________

This is just the start of four weeks’ worth of recipes that will put some healthy options into your daily and nightly routine. We hope you enjoy them as much as we do!


original photography for apartment 34 by Aubrie Pick // original recipe for apartment 34 by AQ Wellness // art direction + styling by Apartment 34

Today is the last of our gluten-free desserts series. We certainly hope that you non-gluten consumers have enjoyed them as well- we wouldn’t share anything that everyone wouldn’t enjoy eating!

While we first baked a light and lemony almond cake that is seriously to die for, today we’ve got a vegan treat that will satisfy any chocolate lover! This decadent Coconut and Chocolate Pistachio Tart is rich, smooth and bowl-lickin’ good {oh yes, we did!}!

gluten-free-dessert-recipes-chocoloate

We chose to make the recipe in mini pie pans {makes about 6 minis!} which are perfect for individual servings at a dinner party, but you can easily use it to fill a regular sized pie pan. We know coconut is one of those things- you either love it or hate it. Not nuts for coconut? You will be after you try this tart!

chocolate-gluten-free-tart

Coconut + Chocolate Pistachio Tart {vegan, gluten free}

Ingredients: 

Crust:
½ cup unsweetened shredded coconut
1 ½ cups almond flour
2 Tablespoons coconut oil
¼ tsp salt
2 Tablespoons Maple Syrup

Ganache:
1 cup full fat coconut milk
12 oz bittersweet chocolate, finely chopped
1 teaspoon vanilla extract
Topping:
½ cup unsweetened coconut flakes
½ cup pistachio nuts, coarsely chopped

Preheat oven to 350 degrees. In food processor, pulse together almond flour, salt and shredded coconut until finely ground. Mix together coconut oil and maple syrup and add to almond flour mixture. Pulse until coarse crumbs form.

Transfer into greased 9-inch tart pan with removable bottom {or minis like we used}. Evenly press dough in bottom and up sides of pan to form the crust. Bake in center of oven rack for about 15-20 minutes, until golden brown. Let cool on wire rack.

Spread the chopped pistachio nuts and shredded coconut onto sheet pan and bake 3-5 minutes, until lightly toasted. Set aside.

Place chopped chocolate into large mixing bowl. In small saucepan, bring coconut milk to a boil. Pour hot coconut milk over chocolate and stir until smooth and creamy. Mix in vanilla extract.

Pour chocolate into tart shell. Lightly sprinkle toasted pistachio nuts and toasted coconut for garnish. Chill for at least one hour or until set and enjoy!

chocolate-tart

That last shot reminds me of how delicious these tarts were- we spooned the chocolate filling from the bowl and indulged in a mini tart, each! The coconut milk and oil in this recipe is so faint- it just adds an extra creamy layer to the tart and the healthy fats are good for you! Despite the chocolate being decadent and finger lickin’ good, the toasted coconut and pistachio garnish was easily our favorite part- the original recipe called for macadamia {equally as yummy!}, but we just love the hint of green and the light crunch the pistachios bring to the dessert!

We really hope you had as much fun as we did with our “healthy” take on desserts to start the new year. Because even though we’re resolving to be healthy, that doesn’t mean we’re going to deprive ourselves!

original photography for apartment 34 by Aubrie Pick // art direction + styling by Apartment 34 // original recipe adapted via Gourmande in the Kitchen 

Last week, we introduced you to January’s Tasty Tuesday series: Going, Gluten, Gone– a journey into finding yummy gluten-free treats that satisfy your sweet tooth without totally busting your New Year’s Resolutions. We started with a super light and beautiful Lemon Almond Ricotta Cake {check it out here if you haven’t already seen it!}.

This week, we found a recipe that combines two of my favorite things: chocolate & breakfast!

chocolate-dessertThese Chocolate, Banana and Almond Butter Bites had us at butter- almond butter that is! With actually no butter at all, these raw gluten-free bites are equal parts scrumptious and easy to make. Not only do the bites take less than 10 minutes to prep, there’s no baking required!

While intended as a sweet treat, they also have a ton of protein, making them a perfectly portioned snack to ease that afternoon sugar craving {or if you’re like me, that I-just-woke-up-and-want-a-treat-for-breakfast craving!}. Did we mention that they have the most delicious cacao & coconut crunch coating {with a little kick of cayenne!} on the outside?

gluten-free-chocolate-dessertChocolate Almond Butter Bites {Gluten Free, Raw, Vegan}

Ingredients*

For Bites:
1 cup of raw almonds
1 very ripe banana
1 date, pitted & mashed
1 tablespoon of cacao powder
1/2 cup + 1 tablespoon of almond butter
a pinch of salt
1/2 tablespoon sugar
1/4 cup shredded coconut for coating outside
2 tablespoons cacao powder for coating outside

For Cacao Crunch:
1/4 cup of almonds
1/4 cup of cacao nibs
a pinch or two of salt (preferably, himalayan pink sea salt)
a pinch or two of cayenne (optional)

Directions

Place 1 cup of almonds into the food processor (blender works!) and pulse until finely ground.

To avoid the mess of cleaning out the blender, combine almonds and the rest of the ingredients for the bites in a bowl and mix with a fork or hands.

Take mixture and form bite sized balls by rolling in between the palms of your hands. Set aside on plate or baking sheet and freeze for 30-45 minutes.

almond-butter-dessert

While bites are in the freezer, make the cacao crunch. Place all of the ingredients into food processor or blender and pulse several times until a fine texture with a bit of chunkiness.

Remove bites from freezer and roll in crunch mixture. You might need to give the bites a roll between your fingers to get them sticky, then roll them around on the plate with the crunch mixture. Do this until they are all coated. If you want to make them pretty and add variety to the bites, you can also coat some with cocoa powder and some with shredded coconut!

Place them back in the freezer for about 20 minutes and enjoy!

*This recipe only makes about 8-10 bites so if you plan to freeze some for later, double the recipe. You can keep these bites in the fridge for a couple of days {if they’re not all gobbled up by then!} or in the freezer for later snacking.

chocolate-almond-butter-bites

These bites are perfect for a pre or post-workout protein fix and are really great to grab for a breakfast on-the-go. They taste a bit like the most delicious energy bar you’ve ever tried and while they’re definitely not a slice of cake or a cookie, they’re a delicious and healthier option when your sweet tooth is screaming for some suga’!

original photography for apartment 34 by Aubrie Pick // art direction + styling by apartment 34 // original recipe adapted via What’s Cooking Good Looking 

This time of year cleanses, juices, smoothies and rabbit-food-like recipes are everywhere you turn. Sure, we love starting the new year off on a healthy foot too, but no matter our good intentions, it’s just too hard to quit desserts cold turkey. Since you can run to Pinterest to find your next cleanse, we’ve decided to take a slightly different track with our New Year’s Tasty Tuesdays…and here’s why:

Just before the holidays, my doctor informed me I have a gluten sensitivity. Pretty much the worst timing, right? No Christmas cookies, no pies, no scones on Christmas morning? What was I going to do?!

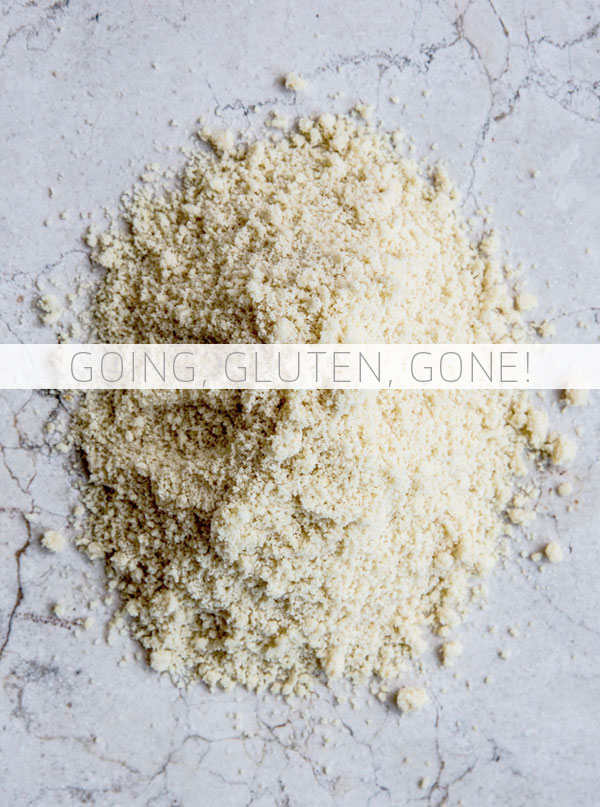
What I did was scramble for recipes that would work within my new diet restrictions and still be delicious. When it comes to those baked goods, they’re just not the same without a little gluten in them, or so I thought! We’ve rounded up some stellar options to add to your arsenal – whether you’re gluten free or not!! This gluten-free almond cake is topping my list right now.

gluten free almond cake on apartment 34

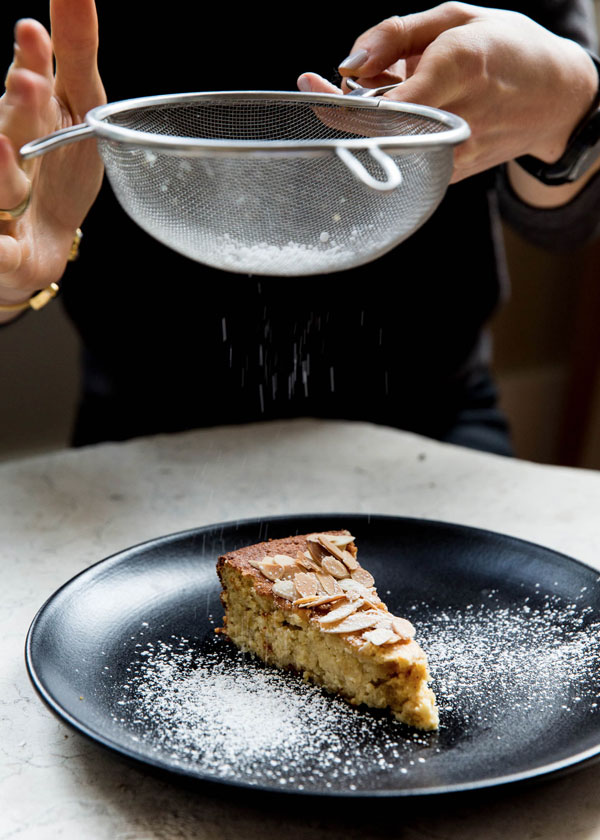
First up on my mission to find something just as good as our bread-eating buddies get to enjoy, is this Lemon Ricotta and Almond Cake. You may have already spied it on Instagram. So many requests for the recipe came in, we knew we had to share it!

gluten free almond cake on apartment 34

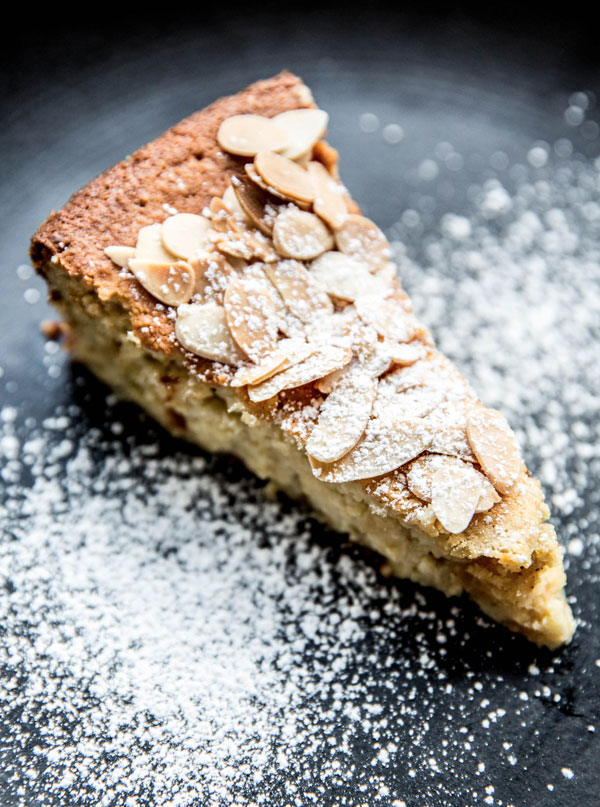
This cake is not overly sweet and extremely tasty. Let’s just say, you had better make two because one is sure to disappear, fast!

gluten free almond cake on apartment 34

Lemon Ricotta and Almond Cake (Gluten Free)

Ingredients:

1 stick unsalted butter, softened
3/4 cups caster sugar
1 vanilla bean, split and seeds scraped (or 1 tsp vanilla extract as a substitute)
1/4 cup lemon zest
4 eggs, separated and at room temperature
2 1/2 cups almond meal
10 1/2 oz. ricotta
Flaked almonds, to decorate
Icing sugar, for dusting

Directions:

Preheat over to 325 degrees. Line the base and sides of 20cm round cake tin with baking paper.

Place butter, sugar, vanilla and lemon zest in an electric mixer and beat for 8-10 minutes, until smooth. Add egg yolks in, one at a time, until batter is fully combined. Add almond meal and fold ricotta into mixture.

Beat egg whites with hand-held electric mixer until soft peaks form. {I’m always bad at this part – I just keep going until a peak will form at all!}. Gently fold a third of egg whites into the cake mixture. Then add the next third and then the final third. Don’t over mix.

Pour mixture into prepared cake pan and decorate top of cake with almond flakes. Bake for 40-45 minutes- cake should be firm to touch. Allow to cool and dust with powdered sugar to serve!

gluten-free-recipes

We’re telling you this is a recipe that everyone will love. It’s lemony, it’s fresh and it’s wonderfully light. I ate it for breakfast the entire Christmas week and the whole team has banked this recipe in our personal baking files.

For more healthy (ish!) recipe ideas, CLICK HERE

original photography for apartment34.com by Aubrie Pick | art direction & styling by apartment 34 | recipe adapted from Cakelets & Doilies

Our food series were something new that we tried this year that have definitely been well worth the effort. Not only have they pushed us creatively in the kitchen, but they’ve allowed us to try our hand at food styling which is challenging, meticulous and tons of fun! 

The day usually consists of getting up super early to prep ingredients that we’ve bought the day before. Learning what to prep, what will lose its color or texture has been a learning experience {like the time we baked a chicken, covered it until shoot time and lifted the lid only to reveal a very shriveled and sad looking piece of poultry!}. Setting up for food shoots is very similar to preparing a meal for a party- everything must be ready to go, ready or not! We loved the colors of this orange salad and the fact that you can make it year round. It would be perfect to whip up now to cleanse the body of post-holiday indulgences!


As mentioned last week, I am guilty of buying cookbooks {especially ones with pretty covers and pictures!} and rarely actually cooking out of them. I recently picked up this gorgeous Sicilian cookbook {get it here!filled with rustic recipes and beautiful scenic imagery. But this time around, I was determined to crack it open and learn something new! For our second edition of Cooking Out of Your Comfort Zone, I took on the Insalta di Arance!

Orange-Fennel-Salad-Tasty-Tuesday-2Sicily-CookbookOrange-Fennel-Salad-Tasty-Tuesday-Recipe

Recipe: Insalata di Arance (Orange Salad)

Ingredients

3-4 fennel bulbs, thinly sliced
8 oranges
1 cup roasted olives {or your favorite combo from the olive bar!}

For the dressing:
5 tablespoons olive oil
juice of 1/2 lemon, strained
2 tablespoons chopped flat-leaf parsley
1 teaspoon fennel seeds (optional)
salt and pepper

Tasty-Tuesay-Orange-Fennel-Salad-Ingredients

Start by preparing your dressing. Whisk together the olive oil, lemon juice, parsley and fennel seeds in a bowl and season to taste with salt and pepper. Set aside.

Cut off the peel from the oranges, removing all of the white pith. Cut the flesh into rounds. {Editor’s note: I mixed CaraCara and Valencia oranges to get a pretty mix of color. You can even try grapefruit!}. Slice your fennel – I recommend using a mandolin to really get them thin. It’s my new favorite kitchen tool! In a large bowl add the fennel and olives. Drizzle the dressing over the salad and serve!

Orange-Fennel-Salad-Tasty-Tuesday

Since fennel has such a strong flavor, I eye-balled how much I wanted in the salad. I would say that it serves 6, not 8.

This recipe was very simple to make and I love that it turned out looking just like the  picture in the book! It was so refreshing and juicy with really bright flavors. I loved the vibrant colors it added to the table. A perfect potluck dish to wow your friends at your next barbecue!

If you missed it, you have to bookmark this recipe for Spicy Garlic Shrimp on Coconut Rice with Mango Basil Salsa!

original photography for apartment 34 by Simone Anne // styling and art direction by erin hiemstra

Being gluten free has become a major dietary issue for many of us. According to most reports, about 1 in 100 people {that’s 20 million in the U.S.} suffer from celiac disease, a serious condition that makes it impossible for you to digest gluten. Others are diagnosed with a wheat allergy. Countless thousands, diagnosed or not, might suffer from a gluten sensitivity. This New York Times article on the subject is quite a good read if you want to know more.

Regardless of which camp you fall into, there’s good news. Going gluten-free no longer means giving up the foods you love or eating things that taste like cardboard. Case in point, Lisa Thiele of the stunning and entirely gluten-free food blog, With Style & Grace.

lisafinallisa1

Lisa has amassed so many mouth-watering original gluten free recipes since starting her blog that she just launched her first e-book and she’s giving us a sneak peek!

The husband and I went voluntarily gluten-free awhile ago amidst an attempt at eating Paleo {that should probably be another post!}. I actually really prefer gluten-free recipes. We don’t have any dietary restrictions that require us to eat this way, but I can attest I don’t miss the processed carbs. It also lets me justify the calories in that glass of red wine all while keeping weight off! I really prefer that!!

There are three things that I love about Lisa’s recipes in particular; they’re composed primarily of whole foods rather than processed ingredients, they’re really easy to make, and they are delicious!

I swear, it’s really not as hard as you think to eat gluten-free. Break a few simple habits and you’re there. Here’s a sample of the gluten-free ingredients that Lisa advises you have on hand.

lisa2

And even though I like eating gluten free, that doesn’t mean I’m willing to give up my favorite, traditionally wheat based treats. Cookies, muffins, pancakes. They’re all still must haves! But luckily for us, Lisa has thought about that too. As a new mom herself, I know she needs a good treat now and then.

I don’t know about you, but I’m certainly drooling over this stack of Lisa’s Saturday Pancakes.

lisathielesaturdaypancakes

I don’t know about you, but I’m making a date for breakfast in bed asap!

This is only one tiny sample of the amazing recipes and super helpful tips {you’re going to want to to know what A.C.T. means!} about adapting to a gluten free life that you’ll find in Lisa’s book. If you’re on doctor’s orders to change your eating habits or are just interested in adapting a healthier lifestyle Lisa is going to help you.

So go and get your copy of Living a Gluten Free Life With Style & Grace now!!