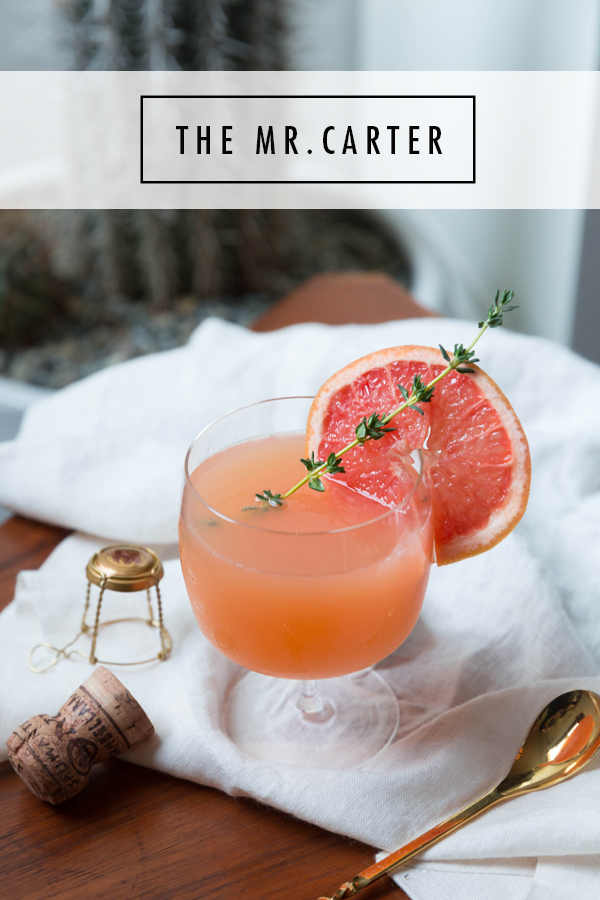
Since we mark the unofficial start of summer at the end of this month I thought it would be fun to get a jumpstart on bikini season with some healthy recipes! When I’m looking for new ideas for delicious food that’s also actually good for me, I turn to my friend Sarah – a Bay Area Health Coach and all around beautiful soul – who is constantly inspiring me to be my best self. Or least cut down on my daily wine consumption. But in all seriousness, I’m so excited because she is bringing us a weekly recipe to help us get our glow on – from the inside out. Trust me, your summer-ready body will thank you.  

apt 34 healthy recipes for summer

Summer will be here before we know it, so I wanted to share some scrumptious recipes that will leave you feeling cool, light, energized, cleansed and glowing throughout the warmer months. As women, it’s important to nourish our bodies on a daily basis by maximizing the nutritional value of our meals so that we can be our best selves.

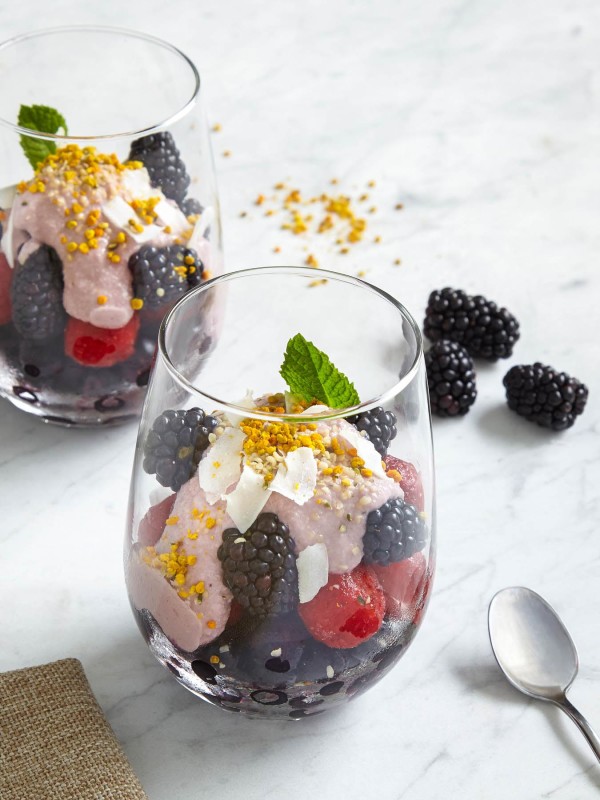
To kick off this six part series, I was inspired to make this berry-licious sweet treat using only the natural sugars from fresh fruit and a little bit of raw honey. Delight in every bite of this refreshing super food dessert that’s packed with nutrients, especially antioxidants and phytochemicals, which help to prevent pre-mature aging and skin damage from excess sun exposure.

Bountiful Berries served with Cashew Cream

Total time to make: 10 minutes
Serves 2

INGREDIENTS (all organic where possible)

BERRY BASE
1 cup frozen raspberries
½ cup frozen blueberries
½ cup frozen strawberries
Frozen black berries work well too

CASHEW CREAM
½ cup raw cashews
¼ cup pure water
2 tablespoons desiccated coconut
2 tablespoon frozen raspberries
1 tablespoon raw honey
¼ teaspoon pure vanilla extract
Juice of 1 lemon
Pinch of sea salt

GARNISH: A dusting of cinnamon, a sprinkle of finely shredded mint leaves, a pinch of bee pollen, crunchy coconut flakes, and protein rich hemp seeds

DIRECTIONS
For the cream, mix all of the ingredients in a blender until smooth (if you wish to thin it out a little, optionally add an extra splash of water)

Plate in your favorite bowls or fancy stemless wine glasses by first adding the frozen berries, and then topping with the cashew cream. Garnish away to your hearts content! Enjoy immediately while the berries are still frozen, or wait a little while until they soften up a bit.

Recipe inspired by Nutrition Stripped // photography by joe lee photo

apt34-contributor3

Today I’ve got a delicious treat for you. If you missed the reveal of my kiddo’s first birthday party yesterday, I hinted at the best part of the party – for the adults anyway – our signature drink!

Once again my girl Ashley came to my rescue. In case you haven’t followed along for awhile, Ashley is my former production assistant/cocktail recipe whiz, who is now rocking the mixology world with her own company Crafts & Cocktails. Yet again, Ashley crushed it with a custom punch recipe for the birthday party. I decided to deem it “the Mr. Carter,” because it was an upbeat, easy-going, can’t get enough cocktail – kind of like my kid!

apt34 cocktail recipeapt34 summer cocktail recipeapt34 summer cocktail recipe

I requested a light and delicious recipe and Ashley did not disappoint. Punches are the perfect thing to serve at parties. You mix it once and let everyone serve themselves, leaving you to enjoy the festivities. Punches are also great because they’re often a lot less expensive then buying fancy spirits for a cocktail and can be made so they’re not overly, strong. Perfect for toddler-focused celebrations when you need a little somethin,’ but not too much!

This punch was incredibly easy to make and included some of my favorite flavors. Grapefruit (as seen in my other favorite concoction of Ashley’s), sparkling wine and Lillet. Ashley gave the recipe a sophisticated twist by adding thyme syrup. It gave the drink an almost savory quality that I know might sound a touch odd but was in fact delicious. Here’s how you can whip up a batch of your own Mr. Carter Punch for your next get together. I’d serve it at brunch, a BBQ – really any reason to get friends together!

MR. CARTER PUNCH
Ingredients
3 parts sparkling wine
1 part Lillet
2 parts grapefruit juice
1/4 part thyme simple syrup
Thyme sprig garnish
Grapefruit slice garnish, optional

Simple Syrup: To make simple syrup, bring sugar, water and thyme to a low simmer in a small pot over medium heat. Stir until sugar is dissolved. Let sit 30 minutes or overnight for a more intense flavor. Strain.

Punch: To make your punch simply combine all ingredients in a punch bowl or other serving container over ice. Pour into cups & garnish with a thyme sprig and grapefruit wedge.

When it comes to exact quantities of your ingredients, we purchased six bottles sparkling wine, two 750 ml bottles Lillet and three 32 oz cartons grapefruit juice which was more than twice what we needed for about 20 adults. It was such a light, refreshing drink I’m tempted to whip another batch right now.

SHOP THE POST
[show_shopthepost_widget id=”1552100″]

To continue with my resolution to make more meals at home this month, I’m turning my attention to sauces — that versatile, last second add-on that packs a serious punch of flavor to any dish. You can quite literally use special sauces on anything from chicken to fish to leftovers! Use them as a dipping sauce with bread or slather them on a sandwich, mix them with roasted veggies or top grilled fish or meat.

Here are three special green sauce recipes from around the world and created by my friends at Good Eggs that’ll bring any dish from bland to party-in-your-mouth-amazing.

green-sauce-recipe

Green Olive Salsa Verde

Ingredients:
2 tbsp. Salt Packed Capers
About 4 tbsp. of Red Wine Vinegar
A tablespoon of Shallots, diced
A handful of Arugula roughly chopped
A handful of Parsley, roughly chopped
A handful of toasted Almonds, roughly chopped
A handful of Castelvetrano Olives, pitted and roughly chopped

Rinse the capers of their extra salt in a strainer and place in a big mixing bowl, along with the chopped greens, chopped olives, almonds, vinegar and shallots and a few glugs of olive oil.

Major pro tip for de-pitting olives: to easily remove the pits from the olives, put the olive on a cutting board and place the flat edge of a chef’s knife on top of the olive. Using the heel of your hand, rap the knife a few times until the olive has softened up and the pit slips out easily.
Salt and pepper to taste and adjust the acid levels as you wish.

Green Goddess Aioli

Ingredients:
1 egg yolk
1 cup of olive oil
1 anchovy fillet
1 clove of garlic
A bunch of chives
A bunch of tarragon, leaves removes from stems
A handful of parsley, leaves removed from stems
The juice of one lemon
Salt & pepper

Place egg yolk in the bottom of a mixing bowl and add a few drops of olive oil. Whisk vigorously until the olive oil is fully incorporated. Keep adding a tiny bit of olive oil and whisking it into the yolk until you have a pale yellow, fluffy aioli. Your arms will be tired, but it’s well worth it!
In a blender, add the herbs, garlic, lemon, anchovy and a few glugs of olive oil. Whir together until it’s a smooth puree.

Gently fold the herby puree into the aioli with a spatula. Adjust salt, pepper and lemon to taste.
Serve as a dip for veggies, alongside simple steamed shellfish, spread on toast or add a dollop to a green salad.

Chermoula

Ingredients:
1 teaspoon of cumin seedds
A big handful of parsley leaves & stems, coarsely chopped
A big handful of cilantro leaves, coarsely chopped
3 cloves of garlic
1 teaspoon of smoked paprika
About half a cup of olive oil
A small chunk of peeled fresh ginger (about the size of a peanut)
A few squeezes of lemon

Combine all ingredients in a blender and blend until it has the consistency of a chunky puree. Adjust acid, salt and pepper to taste.

Chermoula is delicious stirred into a fresh batch of labneh, a topping for broiled fish or a marinade for chicken.

No matter how you use them, this trifecta of green sauces will never do the at-home-cook wrong. January’s traditionally bland healthy dishes just got a flavorful upgrade in our house.

original photography, recipe and styling by good eggs for apartment 34

A few weeks ago we introduced our newest contributor to the team, Zoe. She’s an amazing food stylist and recipe creator who is passionate about cooking food that features quality ingredients and is as healthy as it is delicious. We’ll add beautiful to the list too! With just days of fig season left, we’re right there with her on baking this Gluten Free Fig and Crème Fraîche tart! You’ve got to cherish everyone one of those sweet little jewels while you can. Thankfully, today, Zoe is teaching us how…

I’m in love with figs and have recently been obsessing over the hundreds of different kinds of tart combinations – from sweet to savory. So one afternoon I decided to make these delicious gluten-free mini tarts with fresh figs and crème fraîche. They were enjoyed over a magical moment catching up with a girlfriend whom I hadn’t seen in years. The tarts are so light and fresh that we managed to save two for after dinner and enjoyed a second round, post-meal. Shhh, don’t tell!

fig-tart-recipe

This recipe features a gluten-free crust alternative that has a lovely nutty finish which pairs deliciously with the figs. This is also a particularly healthy dessert – perfect for enjoying these last days of indian summer and officially welcome fall. You may want to try it with bee pollen sprinkled on top, a superfood that is delicious with tarts, yogurt or granola!

Gluten Free Crème Fraîche Fig Tart

Ingredients:

Shortcut Pastry:
3/4 ground almonds
2/3 cup buckwheat flour
1/2 cup millet flour
1/2 cup apple sauce
4 Tbsp butter
2 Tbsp honey
1 tsp baking powder
1 pinch of sea salt

Filling:
3/4 cup crème fraîche
3/4 cup cream cheese
2 Tbsp sugar
Grated zest of 1large lemon (or two small ones)
Juice of 1 lemon
15 to 20 fresh figs, rinsed and quartered

Directions:

1. Mix the dry ingredients with the butter, apple sauce and honey and knead the dough until it becomes a smooth pastry. Wrap it in cling film and refrigerate it for 30 minutes.

2. Roll out the pastry (the easiest way is to roll it out directly on baking paper) and place it carefully in a greased tart pan and prick it with a fork (I used several small pans). Bake in the oven for 20min at 375°F.

3. In a bowl, stir together the crème fraîche, cream cheese, sugar, lemon zest and lemon juice.

4. Fill the cooled tart shell with the cream filling and arrange the figs in circles. Drizzle with honey and sprinkle bee pollen on top right before serving (optional).

For more of our favorite recipes, including gluten free optionsCLICK HERE!

original photography and recipe by food contributor, Zoe Armbruster 

Yeah, that was our exact reaction too! A Rosé slushie?! Is there such a thing or has the heat gotten to us and we’re only halucinating? No, this isn’t a mirage! While we were initially sad to see the Sips for Summer series come to a close, we’re thrilled that the finale is featuring this delicious recipe.And of course the group of ladies at Glitter Guide would save the most fun sipper for last. Look no further rosé lovers {#roséallday!}, your Rosé Slush, aka quite possibly the best summer cocktail ever invented, awaits you…

rose-wine-slush

Once you wipe the drool from your computer, hop on over to Glitter Guide for the full recipe!

Have you missed out on the rest of our #SipsForSummer?? You can see the archive of recipes RIGHT HERE.

photography and styling by Caitlin Kruse

Phew! Things are heating up around here! Temps have hit a summer high and we’re knee deep in finalizing home renovations. Thank gawd, Camille Styles is basically reading our minds! This Honeydew Ginger cocktail {by the pool, no less!} is exactly what we need right now. A little dip and sip sounds ah-mazing. We’ll be shaking this cocktail up as soon as the clock hits happy hour. Now we just need to find a pool!

sips-for-summer

You can find the recipe for this yummy cocktail here. Don’t forget to hashtag your #SipsforSummer on Instagram!

image via camille styles // photography by buff strickland

For the past couple of weeks, we’ve been sharing how to enjoy the dog of days summer by teaming up with a group of amazing bloggers who know a thing or two about stirring up a stellar drink. Each mixologist maven is dishing on their fave sips for summer and this weekend we say slush on this: a rum and salted watermelon cocktail! Enjoying  a boozy watermelon slushy is exactly how we want to ring in the final weeks of summer – not to mention, it sounds like the perfect sip to help us cool down from this heat!

watermelon-slush

Something tells us that these cocktails are dangerously good! What do you think? Head on over to Style Me Pretty Living for the full Salted Watermelon Slush recipe!

image via SMP Living 

Yes, we realize popsicles are the summer dessert du jour, but we just couldn’t help ourselves from jumping on the bandwagon! They’re the perfect treat to help cool down and you can just pop them out of the freezer whenever you feel like indulging. The kids love them, sure, but we’re loving the resurrected idea that you don’t need to be five years old, covered in dirt and dripping in sugar to enjoy them. While the adult {aka alcoholic!} recipes are enticing, the fact that I get drunk off of one sip of wine these days makes, the idea of snacking on a healthy popsicle even better. Not convinced? Well you must try this recipe!

popsicle-recipecoconut-milk-popsicles

Berry Coconut Milk + Honey Popsicles

serving size: 12 popsicles

1/2 cup blueberries
1/2 cup raspberries
24 mint leaves
4 cups coconut milk
2 cups coconut water
1/2 cup honey
1/2 cup plain greek yogurt
1/2-1 cup granola

In a big bowl mix coconut milk, coconut water (straining is optional) and honey.

Next, plop berries of choice and 2 mint leaves in each popsicle form {we used this one and love it!}. Next fill popsicle forms to the top with coconut mixture.* Freeze for 3 hours or overnight. Once frozen, remove popsicles from forms and dip 1/3 of each popsicle in yogurt. Roll dipped area in granola and place on baking sheet. Freeze for another 30 minutes. When it’s time to eat, drizzle with honey for extra sweetness and enjoy!!

*Tip: The berries will float to the top of the popsicle forms, meaning all of the berries will end up at the bottom of your popsicle, near the stick. If you’d like berries to be throughout the popsicle, follow the recipe, only filling forms half way, freeze for two hours, then repeat.

While we’re digging this delicously healhty recipe, the options are literally endless. Instead of coconut milk, use almond milk. Dip them in dark chocolate. Dip them in chia seeds! When it comes to healthy popsicles and they are admittedly, SO fun to make – you can play like you’re a kid again. If you don’t have popsicle forms yet, you’re missing out on quintessential summer fun. Get yours now and do share what popsicle recipe is your fave to make!

Need more summer treat ideas?? We save all of ours HERE!

original photography for apartment 34 by aubrie pick // styling by bianca sotelo 

What better way to welcome the weekend than with our second installment of #SipsforSummer! In case you missed our first post, we’ve teamed up with Glitter Guide and some of our favorite ladies around the interwebs for the biggest cocktail party ever! We actually kicked things off with a refreshing twist on a Margarita, but we’re salivating over the libation prepped by Ashley of Sugar & Cloth – The Spicy Paloma.spicy-paloma

Grapefruit, tequila and a little kick?? Sign us up! Hop over to her site for the FULL RECIPE HERE.

And be sure to check in every Friday for lots more #SipsForSummer! Happy hour never looked, or tasted, so good!


image via Sugar and Cloth // photography by Jared Smith

Older posts
Gimme More