Like many of you, I’ve had daydreams of the ultimate closet dancing around in my head for a long time. I lived for years with clothes strewn on the floor, stuffed into every available corner, slowly creeping into one-quarter, then one-third, then a half of my husband’s closet (he was not pleased). So when we bought the Victorian, I was determined to create the closet of which dreams are made. And I’m so excited to hear what you think of the final result! Today you get to see my complete closet before and after.

Lifestyle blogger and design expert Erin Hiemstra reveals her dream closet

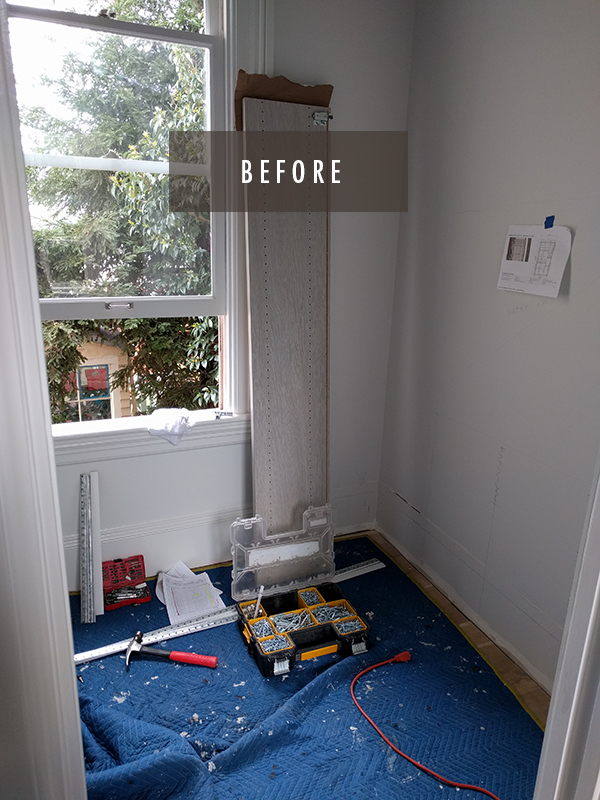
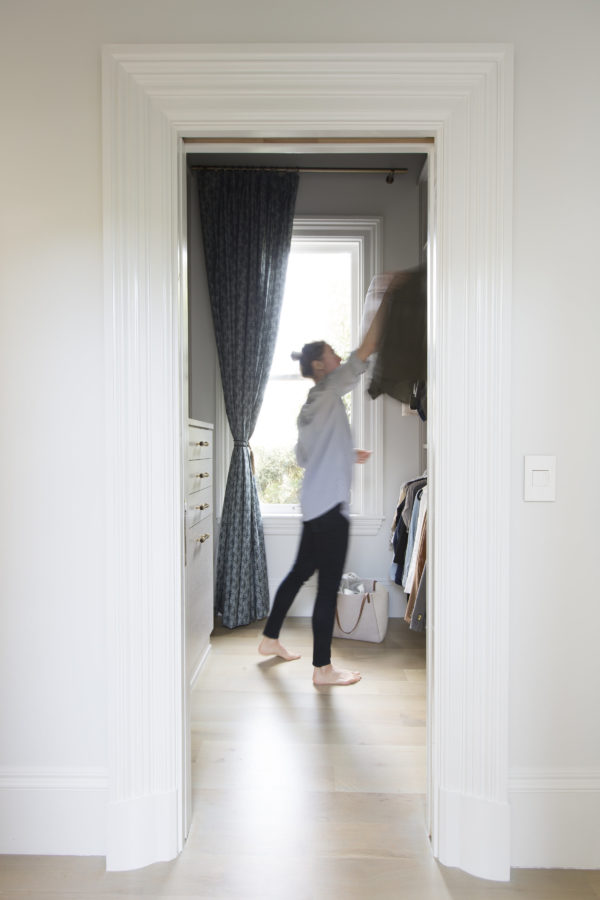
Above is the closet mid-construction. Drywall is in. The floors are down. While it looks like a relatively simple job, this space was once actually a bathroom! The only upstairs bathroom to be exact. The room is a decent size, but not huge by any means. This was an 1850’s bathroom after all. But the space does feature a lovely window and those glorious 11″ ceilings. Thankfully, we could relocate the bathroom so I got to snag this space for my own little oasis that now looks like this…

dream closet on apartment 34

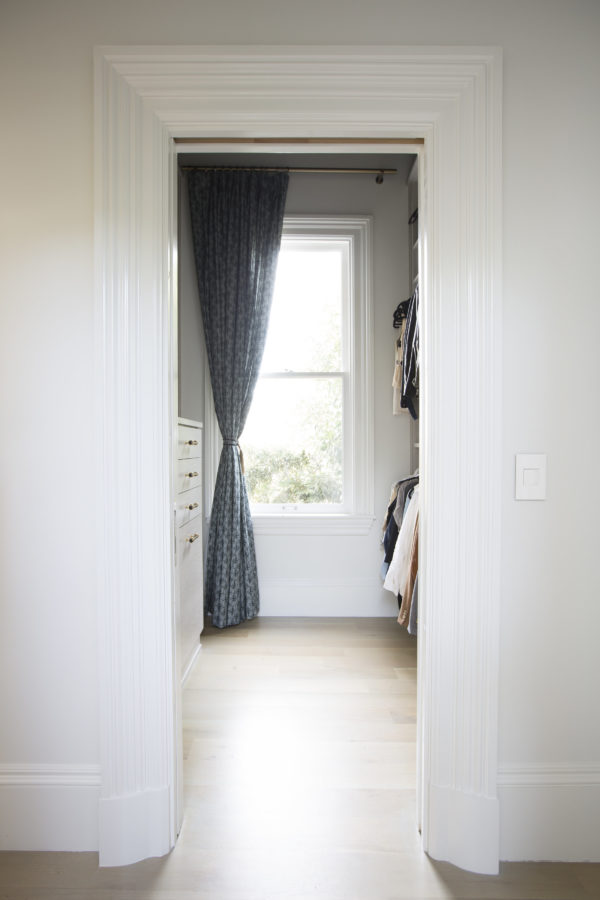
Ta-da! I call this my closet miracle – a space where everything has a place, where I can actually see my clothes and I know what I have to wear. It truly is a game changer (check out how I rediscovered my own wardrobe in this post).

When it came to creating my dream closet, only one place came to mind: California Closets. They work with you from point A all the way to point Z to create a fully custom solution to meet your exact needs. The process started with my kickass designer Paige (it’s always fun when someone you work with becomes a friend) making a house call to our loft to do a personal closet assessment to determine my storage requirements. It wasn’t too challenging to identify the top priority – as I have probably 3x as many shoes as I do clothing! After years of cramming shoes onto little racks and having stacks and stacks of shoeboxes piled along the wall, I was really excited about the idea of finally having all of my little shiny ponies on display.

dream closet on apartment 34 dream closet on apartment 34

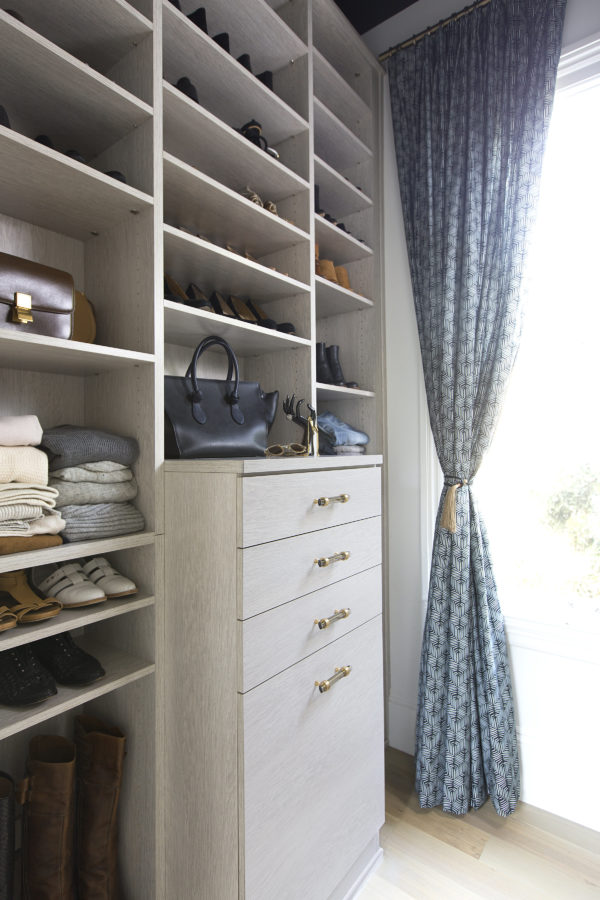
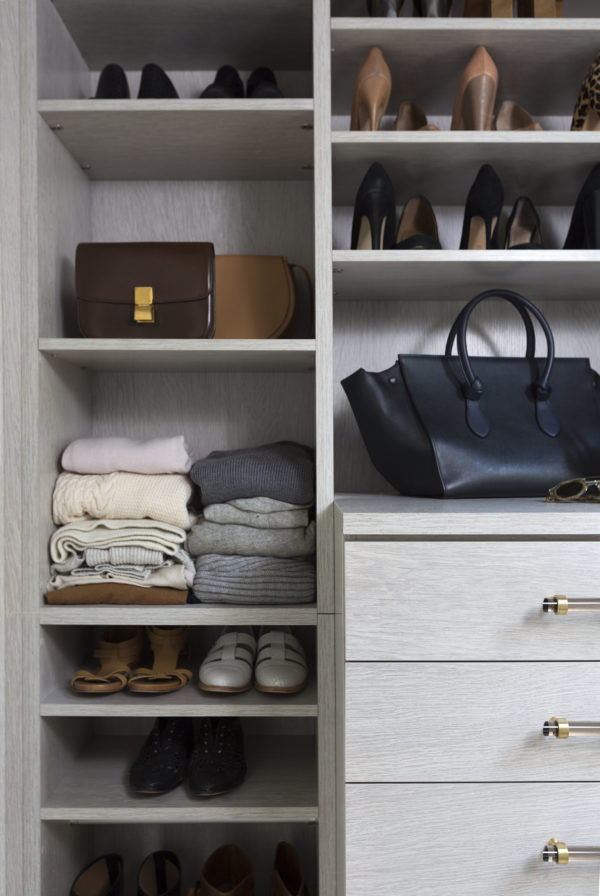
So Paige helped me devise this genius design above. The columns of shelves offer tons of shoe storage. We optimized the spacing and design based on the number of heels vs flats in my collection – though post-baby that number has shifted heavily in the flats direction! I love that I can now see exactly what I have without digging through mounds of boxes. I created a few more open sections to house bags, my denim and a few folded items like sweaters and tees. The center console houses my unmentionables, clutches & small bags as well as a velvet lined jewelry drawer. Swoon. The large bottom section hides laundry! Have I mentioned genius?

dream closet on apartment 34

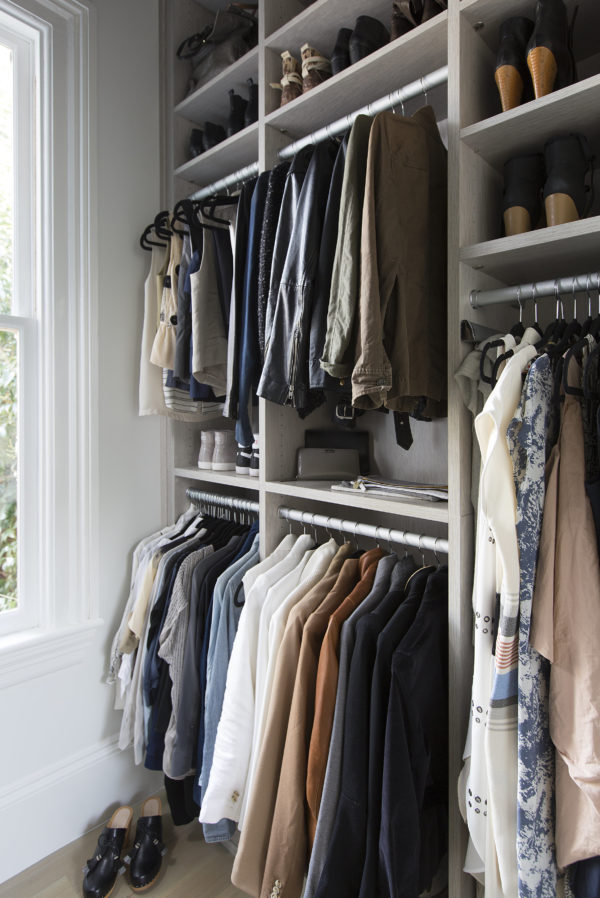
One the opposite wall we installed a double-stacked hanging section for shirts, jackets, and blazers as well as a section for long items. I’m not a big dress person so that’s pretty small. And of course, there’s also more shoe storage on this side. The addiction is real people. Those 11′ ceilings came in very handy here (yes I need a step stool to reach the tippy top).

dream closet on apartment 34

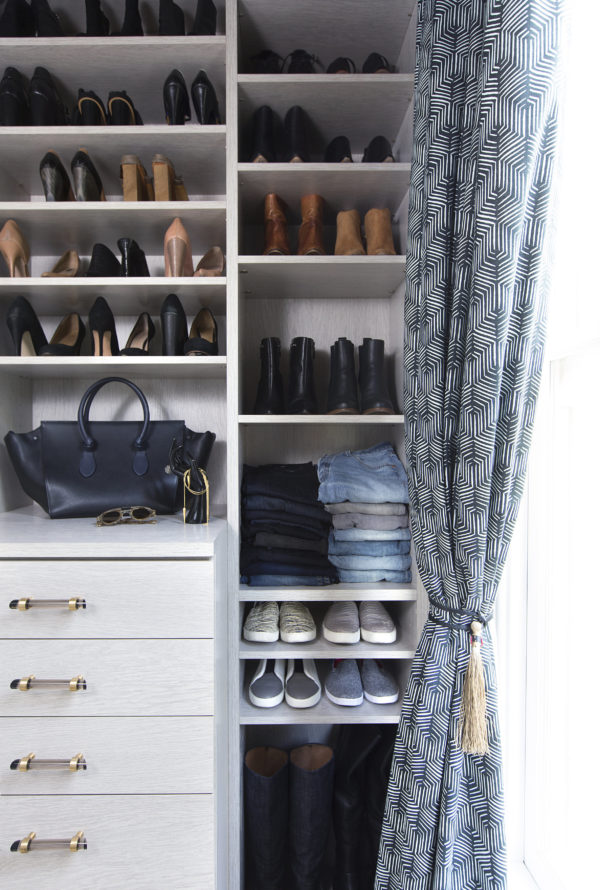
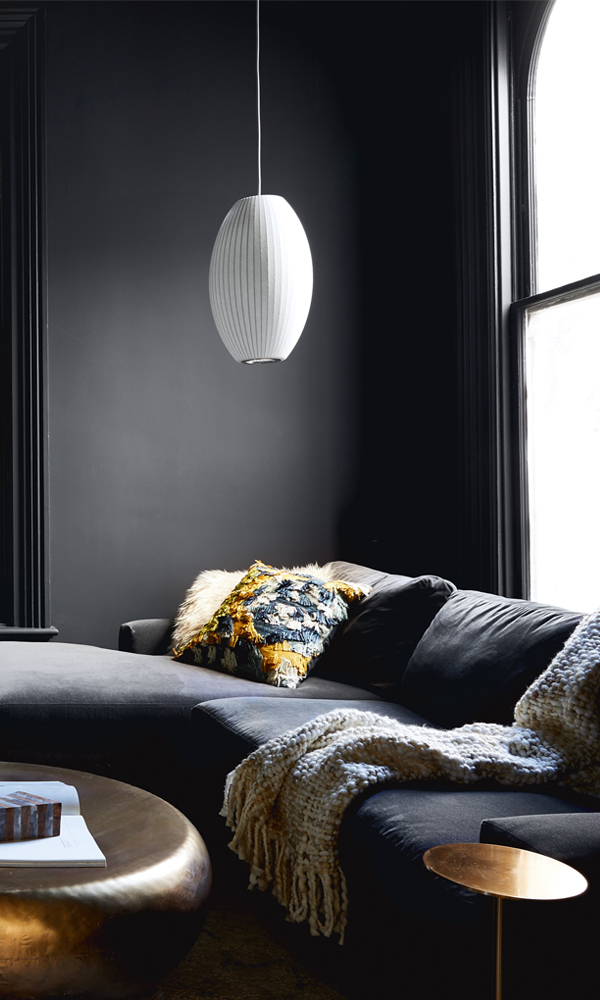
Of course, I had to add a few original touches to make the closet truly feel like me. I selected a light gray finish for the built-ins and while we didn’t grab a good shot you might spy my black ceiling in the pics above. Obsessed. The dark ceiling makes everything pop. To further customize the look, I found amazing brass and lucite hardware on Etsy (you can check out the shop right here). I had them made in a smoke color – so good. I also added a floor-length drape from The Shade Store for some additional texture. Draperies really take a space to a whole new level.The room also features a pocket door on the (rare!) occasion I want to hide the space. Et voila – dream closet achieved.

Having a functional, organized closet is amazing for all kinds of reasons but three things really stand out. Number 1; general sanity and adulting. It’s refreshing to walk into my bedroom and not have it remind me of my sixteen-year-old self (or 27 or 35-year-old self for that matter!).  Now I only feel overrun by children’s toys rather than clothes. Number 2; I want fewer things. I don’t want a cramped closet so I find myself purging a lot more often. When the space starts feeling too full, I know it’s time for a closet clean out. And number 3; I shop way less and with a lot more intention. Shopping used to be a way to pass the time or I’d buy something “cute” on a whim. Now I know exactly what I have and can easily identify what I need. A pair of white denim to round out my jeans collection. A little camel bomber jacket for cool San Francisco evenings. A new flat sandal. But I keep the edit tight and the pieces timeless and classic. I actually just did another purge as part of my spring cleaning regime (have you checked out my tips here??). It’s the perfect way to make space for one or two pieces that will make my wardrobe feel fresh and new for Spring. I’ve included my current wishlist below.

dream closet on apartment 34closet reveal on apartment 34

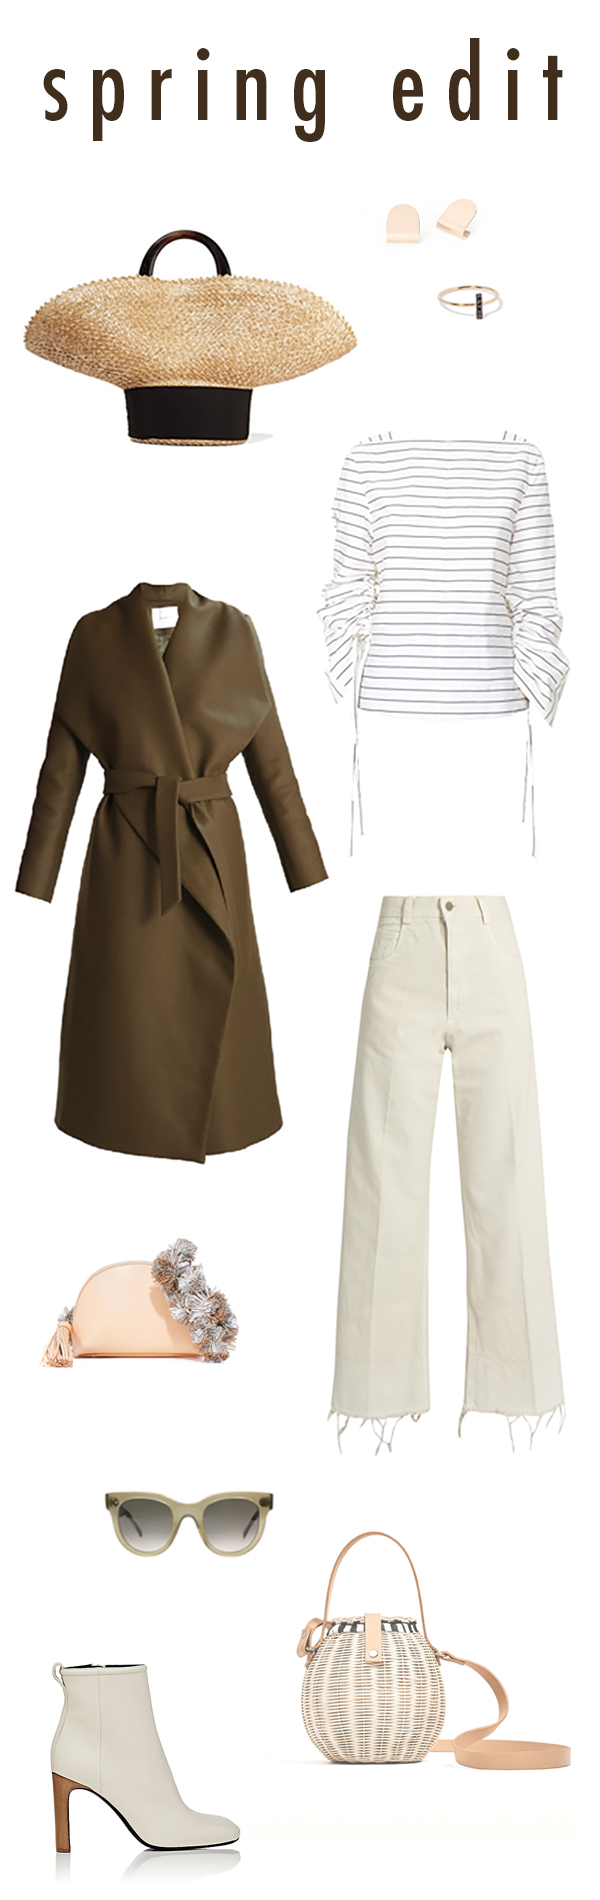
SHOP:  tote / earrings / ring / jacket / shirt / jeans / clutch / sunnies / bucket bag / booties 


SHOP THE POST

[show_shopthepost_widget id=”2619095″]


I’d love to hear your thoughts on the final design and if you have any closet organization secrets up your sleeve. I’m always looking to add to my arsenal.


Check out all the updates on our renovation HERE

For more spring style ideas, CLICK HERE


original photography for apartment 34 by michelle drewes


You can feel it, can’t you? The burst of energy? The desire to get outside. The need to just do something. The whole spring renewal thing is legit. Hence why it really is wise to harness some of that new-found energy and put it toward…spring cleaning! It is a thing and it is a super smart thing to actually do. After being cooped up for the winter now is the time to shake off the cobwebs, both figuratively and literally. But now that I’m back to being a homeowner after many years of loft living, tackling the spring cleaning to-do list can feel rather daunting. When strapped for time, spring cleaning is hard to get started. However, I’ve found a formula that will help you get it done without feeling overwhelmed. Because there’s nothing better than the sense of accomplishment when you complete a good cleaning sesh. And neat, clean spaces have been proven to lower stress and anxiety levels! We all need that. If you use the tips below, I promise you’ll get to the aww, I just got off work on a Friday-afternoon feeling asap.

To kick off your spring cleaning regimen, map out your cleaning game plan. Dedicate 15 minutes to organizing all of your cleaning supplies and deciding which rooms you plan to tackle and the products you’ll need. Then, assign a day to tackle each of those spaces. This step will keep you from feeling completely overwhelmed when you aren’t quite sure where to start.

how to tackle spring cleaning on apartment 34 how to tackle spring cleaning on apartment 34

Then, it’s time to clear the clutter and prep for the deep clean. Bedrooms and bedroom closets are hot spots for clutter, so they’re often a good first room to be cleaned during spring cleaning. And for more than one-in-four Americans, the pantry and kitchen drawers also gather clutter. I recently tackled both my pantry and my closet and could not be happier with the result. When it comes to cleaning a pantry (or cupboards – the definition of pantry can be loosely applied), ditch anything that is expired or you haven’t touched in at least six months. You can check out my pantry organization post right here for how I pulled my pantry together.

I took a similarly tough approach to sprucing up my closet for the new season. Since I finally have my own closet, I have no excuse not to keep it organized. Why is that always so much easier said than done?? Anywho, I finally tackled the beast. Anything really worn out or looking sad? Out. Anything that doesn’t fit well? Out. Anything I haven’t worn in six months (excluding seasonal items) out! That actually opened up some space, but you’ll have to wait until next week for the rest of my closet tour and my spring wardrobe wish list.

how to tackle spring cleaning on apartment 34

Once key spaces are clutter-free, tackle the most dreaded chore on your list first. Deep cleaning the bathrooms is most definitely my least favorite cleaning activity – I like organizing the stuff – attacking the actual dirt just grosses me out. But once you conquer your most dreaded space, whatever it is, the rest of your spring cleaning chores will feel like a walk in the park!

how to tackle spring cleaning on apartment 34

To keep yourself motivated through your cleaning sessions, allow yourself to take breaks. Snacks and screens, whether be it the television, computer or smartphone, are the most popular ways to take a break during cleaning sprees. For women, in particular, snacks, checking e-mail and catching up on social media are go-to ways to break up a long cleaning session. So set the phone in the other room until you finish a task and then you can give five minutes of Insta-Stories time (are you totally addicted? yeah, me too). Creating even larger incentives for yourself, such as hosting a get-together for the finale of your favorite TV show, or taking a well-deserved staycation once you tackle everything on your list, will also keep you motivated throughout the cleaning process.

how to tackle spring cleaning on apartment 34

And you can always look for ways to make your life easier. To tackle dust I use a reusable dust cloth which is dry and non-abrasive to trap and lock dust, allergens – even pet hair away. I use them on furniture, electronics, blinds, frames, baseboards, floors and more. Pro tip, to keep guest areas low maintenance put potted plants next to the bed instead of fresh flowers so you don’t have to worry about wilted blooms and dripping pollen falling everywhere.

how to tackle spring cleaning on apartment 34

While the spring cleaning list can sometimes feel long, you can, in fact, power through it without devoting your life to the task. Simply make your list of the must-tackle projects and check ’em off one-by-one. Turn up the volume on your favorite playlist or catch up on a good Podcast. I can even get my kiddo into the cleaning act. He thinks sweeping is the cat’s pajamas. Although he really only moves dirt from one part of the floor to the other, it’s the thought that counts, right?

I’ve listed out what I would recommend tackling this spring cleaning season below:

SPRING CLEANING CHECKLIST

> Dust all crown molding, baseboards, light fixtures, ceiling corners

> Wipe down all blinds, clean curtains or any other window coverings

> Clean all doors and windows inside and out

> Disinfect all door and cabinet knobs, as well as counters and other hard surfaces

> Disinfect remote controls, dust & disinfect all of your other frequently electronics, keyboards, mouse, your phone (make sure to follow instructions – they can be sensitive to various cleaners)

> Change out any air vents and filters throughout the house

> Thoroughly vacuum all rugs and clean floors under them

> Wipe down all furniture, making sure not to miss corners of shelving units

> Clean out all your countertop appliances as well as your refrigerator, oven and microwave

> Swap out all bedding, flip your mattress, clean the mattress coverings

> Clean under the bed

> Disinfect your toothbrush holders, soap dishes, shower curtains

> Clean out your medicine cabinet/vanity

> Wash all your make-up brushes and throw out expired or seldom-used make-up (this post is helpful for that)


For even more peeks into our house (I swear it’s going to be done soon!) – CLICK HERE.


original photography for apartment 34 by Michelle Drewes

While I typically reserve Wednesday to talk about wine, there’s nothing wrong with indulging a day early – especially on Valentine’s Day! I must admit, the contrived Valentine’s romance isn’t really my jam, but an excuse to bring some of my girls together – that I can get into.

apt34-rosé-1APT34-rosé-16

Since I haven’t seen a happy hour in I can’t remember how long, hosting a ladies lunch is a lot more mom-friendly. A few friends, a pretty table and some light bites are all you need to feed your need for girl-time.

Even though my table was Valentine-inspired, I didn’t want it to feel saccharin. With a dark gray tablecloth as a ground, all of the warm neutrals stand out. To make place settings a little more special, the secret is to layer. A charger, dinner and salad plate all stacked together create texture. I wrapped a set of printed napkins (designed by Erica Tanov – a major design crush), with a bit of rose-colored suede. Brass flatware and a little gold dish on each place add a hint of glam without getting overly girly. A floral centerpiece with creamy ranunculus, anemones, sweatpeas and jasmine soften the entire scene.

APT34-rosé-15APT34-rosé-11

But it wouldn’t be a proper party without a little wine! While rosé is my summer staple, there’s no reason you can’t enjoy it even when there’s snow on the ground. Elouan Rosé is the perfect light, bright and delicious addition to some quality time with your girls. Elouan’s name literally means “good light.” Fitting, no?

I really quite like this wine. Created with Oregon-grown pinot noir, it has real depth of flavor and some good body. So many rosés are rather insipid. This one is lovely whether you’re enjoying a glass all on its own, or pairing it with food. It’s the perfect all-year-round wine. It also always settles the divide between those who want to drink white and those who want to drink red. Rosé always satisfies.

APT34-rosé-10

I also like giving my guests a little favor to take home – in this case pieces of tangerine quartz. It has properties of strength and tenacity, but is also calming and centering. Exactly what all moms need, especially in these trying times!

APT34-rosé-9APT34-rosé-8APT34-ROSÉ-7APT34-rosé-6

Since I’m often stuffing leftovers from a child’s tray into my mouth and calling it lunch, this is a refreshing respite from day-to-day mom life. Hopefully we don’t have to invent another holiday before doing this again.

For more table top and entertaining ideas CLICK HERE

Fore more Wine Wednesday posts, CLICK HERE


dishware via mrs.peasy / florals by lambert floral studio

photography for apartment 34 by delbarr moradi

This post is in partnership with Elouan wine. All thoughts and opinions are 100% my own. Thanks for supporting collaborations we’re excited about and that have kept apt34’s doors open.

As progress on our house continues, ever slowly but ever surely, I’m turning my sights to our living room. It’s been the most neglected to date- really serving as our dumping ground while the rooms around it have taken shape. (Check out my dining room, media room and even a kitchen sneak peek in case you missed them). But I’m ok with really taking my time in the living room because eventually, it’s going to be the heart of our home. That’s why I custom designed a sofa (that’s coming any day now!), insisted on built-in shelving (which you can see here) and am being incredibly choosy about every piece of furniture I add to the space. I want to make sure I get this room right and fill it only with treasures that I truly love.

One of the biggest decisions I’ve yet to make is a rug choice. Rugs can set the tone for an entire room. While the beni ourain trend still has a vice grip on our style subconscious, I’m craving something equally timeless, but decidedly different. Here are just a few of the rug ideas I’m currently considering.

apt34-rug-ideas-2

Still Moroccan, still vintage but in a noticeably different style and color. I’m loving the mix of a grid and squares in the example above. It would be a really interesting conversation piece.

apt34-rug-ideas-3

I’ve talked about layering rugs before but hadn’t thought about it for my living room until now. It would make it easier since I wouldn’t have to hunt down something in the over 12′ range. It would allow more flexibility for switching up styles down the road. It would let me play with tone and texture…color me intrigued.

apt34-rug-ideas-6

A flatweave with black stripes would create a striking visual and would be a fun way to mix and match print and pattern in the room.

apt34-rug-ideas-9

I am leaving heavily toward a vintage option and I’m liking the darker tones of the rug in this picture. It would ground the room and give it depth.

apt34-rug-ideas-5

While I tend to shy away from color, I’m into this multi-toned striped rug idea. It still feels neutral even though it includes some blush and earthy brown tones. Something like that would play well off of our light oak floors.

apt34-rug-ideas-1

When mixed with an eclectic grouping of furniture a classic blue and white stripe goes from feeling nautical to feeling modern. Hmmmm.

apt34-rug-ideas-7

But then I come back to a beni ourain. A good vintage one with asymmetrical, unique patterns really does feel classic. But is classic a cop out?

What would you do??

To check out my living room design inspiration, CLICK HERE

For all the updates on our renovation and the reveals to date, CLICK HERE

image sources 1 / 2 / 3 / 4 / 5 / 6 / 7

Now that all the holiday trimmings are packed away, it’s like a breath of fresh air. This is the perfect time to around at your home and get a little picky. Every January I love to walk around my spaces and ask myself: what am I loving? What am I just sick of? What could I do to give this room a facelift? Thankfully, you don’t have to completely ditch everything you already have or bring in all new furniture to make a room feel fresh. Simply focusing on a few small details can make a really big difference.

apt34_shelfie

Case in point: a bookshelf. A bookshelf is the perfect place to express your current design personality in a snap. Think of it like your hairstyle – you can continually switch it up depending on your mood. After the holiday hustle, I really wanted to create a calming zen-like feel with the built-ins in my living room. To ease visual clutter, I decided to stick with a singular color palette; black, white and warm wood tones. But now that we’re getting settled into our house, I also wanted to get some family photos out and about. I am a mom after all. But of course, I also refused to compromise my design. To keep my look consistent I turned to Mpix for help.

Mpix is an online photography printing service that lets you create your own cards, gifts, photobooks and framed wall art. I simply went onto the Mpix website and uploaded a collection of professional photos of my kiddo that we’ve had taken since he was born. There, I was able to turn all the images black and white to make them consistent with my bookcase color scheme. I choose different sizes for the images ranging from 4″x 4″ to as big as 16″x 20″, but for consistency I framed them all in a timeless silver metal. As I discussed in the reveal of my dining room, I’m obsessed with the informal look of leaning art, and layering an abstract piece  with a large scale photo softens the look even more. It also helps keep a toddler out of my unfinished fireplace. Bonus.

ErinApt34-0017-600x

I was so impressed with how the frame pictures turned out. First of all, they arrived in what was nearly fortress-like packaging. I think this is the first time I’ve received mail-order framed prints with zero scratching, cracking or any gaps in the frame. The quality is truly exceptional. The photos also printed extremely crisp, printed on high quality black & white photo paper. I also selected a non-glare glass which really elevates the look.

apt34_shelfie2

With the fabulous framed photos in hand, I could then get down to it. When it came to styling these shelves, I wanted to take as minimalist of an approach as I can muster. I do like my collections – ask my husband. But everything in life feels so crowded these days, I really like my house to feel open. I’ve been working very hard to purge and pare down and I think this endeavor was successful. I limited the amount of things on each shelf, allowing for a lot of spacing between groupings. I finally had a spot to put my Kinfolk Magazine collection on display, which also helped me stick with my monochromatic look. A few special pieces, my trio of Gerhard Ceramics bud vases, a few vintage treasures and gifts from friends (or gifts to myself!) add texture. A brass jack paperweight adds a warm metallic touch – always nice.

apt34_shelfie1

While there’s no one-size-fits-all formula for perfecting your bookshelf look, compiling a collection of curated items requires a little patience and perhaps a little practice. But no matter where you are in your shelfie game, remember these three rules and you’ll have a perfectly styled bookshelf every time.

#1: Horizontal x Vertical Books. Shelves should start with books, but mix up the way you display them. Try piling them horizontally or flipping the spines to face inward as well as keeping some standing vertical.

#2: Remember the 1:1 Ratio. For every stack of books, add an object. It could be anything: a candle, brass box, pretty collection of rocks, that awesome “thing” you couldn’t not buy at last month’s flea market. This is the best way to break up the ‘boxy library look’

#3: Vary Your Heights. You want to keep the eye traveling all the up your shelving, so vary the heights of your groupings, be it of your book-stacks or your objects.

apt34-shelfie-get-the-look

SHOP THE POST Mpix wall art / bookend / marbleized vases / vintage wood bowls / brass jack paperweight / candle sticks / bud vases / wood beads / white books


original photography for apartment 34 by michelle drewes

This is post is in partnership with Mpix. all thoughts and opinions are 100% my own. thanks for supporting collaborations we’re excited about and that have kept apartment34’s doors open. 

When it comes to cleaning, we all have misconceptions on what works best and what cleaners serve multiple purposes around the house. Homemade is great when it comes to cookies, but isn’t always best when it comes to cleaning. Especially when germs are involved. Clean or to sanitize/disinfect? How many people really know the difference between the two and what should they do where and when? There’s a difference between making your white counters sparkle and actually getting them clean – aka germ free.

apt34_whitekitchen

Even when you think you’ve got this domestic goddess thing down, you might be surprised by what can be hidden in plain sight. During cold and flu season, myths can be just as contagious as the germs circulating. Between old wives’ tales and unique cleaning remedies, it can be hard to decipher what is myth and what is reality.

In order to stay healthy this season, it is important to know the difference between cleaning and sanitizing/disinfecting to keep your home safe. The kitchen and bathroom are places that can get exceptionally germy and require special attention. Knowing a friend whose toddler ended up in the hospital after getting the flu this year, I’m certainly feeling very motivated to keep bad germs at bay, I recently read that there are more E.coli in a kitchen sink than in a toilet after you flush it! Ew.

Apt34-Thermador-8299

While there is a lot of talk around about cleaning alternatives, I was stunned to learn about the nitty-gritty differences between cleaning and disinfecting. I’ve often used a mix of vinegar and water to cleanse my kitchen surfaces. However, it’s been proven that vinegar is not as effective as bleach and does not kill as many germs. Researchers in infection control tested 5% vinegar against some common human pathogens and antibiotic-resistant bacteria and found that vinegar only kills 80% of germs and 82% of mold. Bleach disinfects to kill 99.9% of germs and bacteria.

And bleach is in fact a natural compound. When added to water, it will disinfect and then turn into totally harmless table salt. Literally. In fact, if you’re in an emergency situation when you’re out in nature, you can purify water yourself with regular bleach. Simply add 1/8 of a teaspoon of bleach (not scented) to two gallons of water – or two drops per quart, cap it, shake well and let it sit for 30 minutes. It might not kill every parasite in existence but it will kill all of the bacteria – rendering it safe enough to keep you alive! I never knew that.

apt34clean

The key to using bleach correctly and safely is diluting it. Sure, no one appreciates the smell of a bottle of pure bleach. That’s because it’s highly concentrated to make sure the germ-killing power doesn’t degrade over time. But when you dilute bleach it becomes easy to work with while retaining its highly effective cleaning and disinfecting properties.

While you probably don’t need to disinfect on the daily (unless you have someone who is already sick in your household) you can use Clorox® Regular-Bleach to disinfect to keep your family safe by helping to reduce the spread of germs.

You can use Clorox® Regular-Bleach to clean and disinfect frequently touched hard surfaces, such as the bathtub, bathroom sinks and light switches, by doing the following:

> Use 1/2 cup of Clorox® Regular-Bleach in 1 gallon of water.

> Thoroughly wet the surface with the solution and allow it to remain on the surface for 5 minutes.

> Rinse with clean water and dry.

I had no idea, but you can in fact use Clorox® Regular-Bleach at home to sanitize sippy cups, teething rings and rubber duckies

> Make sure to select nonporous toys that are washable.

> Clean toys weekly according to instructions, keeping in mind that many toys can simply join your dishes in the dishwasher.

> Disinfect washable colorfast plastic toys with a solution of ½ cup Clorox® Regular-Bleach and 1 per gallon of water. Soak for 5 minutes, rinse and air dry.

Baby bottles, nipples, dishes, teething rings, sippy cups and high chairs can also be easily sanitized using Clorox® Regular-Bleach1. Soak washed items for 2 minutes in a solution of 2 tsp of Clorox® Regular-Bleach1 per gallon of water. Pour solution through nipples. Drain dry.

Trust me, before having kids I did not put nearly so much thought into the science behind cleaning, but now that I’ve got a little germ farm running through my house on a daily basis, it puts things in a new perspective. And since I did just invest the past two years in creating my dream kitchen, i might as well take proper care of it!

Here’s to staying happy and healthy this winter.

This post is in partnership with Clorox. All thoughts and opinions are 100% my own. Thanks for supporting collaborations I’m excited about and that have kept Apt34’s doors open


I have a particularly exciting home tour for you today – because it’s a tour of another room in our house! You’ve seen sneak peeks of this space (here & here) when my design was still in process, but over the past couple of months, I worked with One Kings Lane to finally bring the whole room together. The final result is exactly what I was looking for: a classic, timeless space with a modern touch.

apt34_diningroom11

I’ve waited a long time to have a formal dining space. Years of apartment living and 4-person dinner parties definitely put a cramp in my entertaining style. Finally having a dining room gives me what I’ve longed for – a spaced dedicated to bringing people together over good food. I had a strong vision for the room and was thrilled to learn One Kings Lane had a Design Studio and in-house designers who could help bring my dream room to life. I met my designer, Chelsea Conrad at the San Francisco Studio at One Kings Lane. I came armed with my reams of pins – mostly of Parisian pre-war apartments – and Chelsea immediately got my vibe. Witha firm design plan crafted, I was able to set Chelsea out to source the perfect pieces – and she was certainly successful.

apt34_shops_004apt34_oklstudio

Her first find, and possibly my favorite piece in the whole room, is the dining table. It’s an eight-foot long beauty made of reclaimed pine in a soft ash stain. The lighter hue and ornate trestle base keep the table from looking too rustic.

apt34_dining4apt34_diningroom2

Such a stately table required equally substantial chairs. We tried a variety of options but many dining chairs felt dwarfed by the dining table’s heft. The traditional Louis XVI-style chairs,  that were ultimately selected as our final winners, are stately with nice tall backs that help balance the room’s proportions. I also love how the chairs juxtapose classic detailing with chic black leather upholstery, adding an unexpected edge to the room. The black gives the chairs a glamorous update, while the weathered wood brings the formality back down a notch. And perhaps most importantly, they’re really comfortable.

apt34_diningroom

The dining room is long, rectangular and relatively narrow, but there are little nooks on either side of the fireplace – perfect spots for having a little fun. To the left of the fireplace, I repurposed shelving I used in my old Apt34 studio to house a selection of my tableware collection. After years in this blogging business I have quite a lot. I intentionally kept the color palette neutral and muted. I didn’t want the bookcase to feel too busy. A few of art books and a vintage portrait add some additional texture. I’m also a sucker for a good occasional chair and the high-backed piece placed next to the shelving spoke to me immediately. Right now a shot of my husband holding our son when he was just days old takes prominence of place against the chair-back. I love leaning art rather than hanging it on the walls. It gives a space a more relaxed, undone feel. It also lets you play as your mood and decorating whims change!

apt34_diningroom14apt34_diningroom

When it comes to setting the table, my love of contrast continues. I like a mix of natural organic elements like woven placemats, bouquets of eucalyptus and natural edged dishes, all paired with my modern black flatware. Did you spy the marbleized vases, both on the table and on my bookshelf? Obsessed!

apt34_diningroom15

I wanted to bring in some bench seating to both soften the room and break up the formality of the table. I fell in love with the texture and rounded corners of the linen tufted bench immediately. By matching tones in different finishes you can create depth and interest in a room without having to bring in color. The bench also the perfect soft spot for my toddler to scramble up and sit at the table. He loves to “talk” with the rest of the adults.

apt34_diningroom13

One of the biggest challenges with this room is proportion. The 12-foot ceilings seem to dwarf things so finding furnishings with just the right scale became key. I firmly that is where you can benefit from outside design expertise the most. You can probably pull together color palettes or identify the style of things that you like with relative ease, but if the scale of your furnishing don’t work together, the whole room is thrown off. To help deal with our crazy ceiling height Chelsea chose a sideboard with tall, narrow legs and a surface that sits higher than the dining table. It draws the eye up. I also love that the sideboard has ample closed storage, allowing me to keep even more of my serveware in the dining room without adding clutter or breaking up all the clean lines. An étagère likewise adds lift to an empty corner.

apt34_diningroom12

I firmly believe that you cannot entertain without a proper bar area. On the opposite side of the fireplace from my book shelf, we leaned a floor mirror (which adds depth to the narrow room and also bounces around even more light) and then placed a vintage-inspired – fully stocked bar cart. I love the mixed metallic finishes and the nod to the historic elements of the house.

All told, I couldn’t be happier with how this room came togehter. It’s now a place we not only gather for parties but for nightly family dinners and I often take up refuge for a power blogging session! Because the dining room is connected to the rest of the house it is a key part of the heart of our home.

For a peek at the dramatic before of this room CLICK HERE

For the entire feature on the room’s design CLICK HERE

To shop this space on One Kings Lane CLICK HERE

And if you want to get a really personal view of how the space came together check out the One Kings Lane instagram account at 11:00 AM PST TODAY! I’m going to be doing a live tour of the room – eek!!

photography courtesy of one kings lane, photography of The Studio by OKL delbarr moradi 

Well, as much as I tried, I couldn’t stay away from here for the entire rest of the year. I just missed you all too much! And when these pictures of my completed media room came back, I also couldn’t stand waiting to share the final reveal. So without further ado, a 2016 bonus post – call it the year’s finale. Seems fitting that is should a room in my own home – this really has been my biggest project to date!

apt34_media_room

Now if you’ve been an Apt34 reader for awhile (and I hope some of you have been!) this space might look familiar. That’s not just because I gave a little sneak peek in my holiday cocktail post a couple of weeks back.

You might recognize this space as I actually featured it as part of the One Room Challenge in October 2015. Yes, I said 2015. Back then I still had renovation naiveté and actually thought there was a good chance of construction being complete in time to finish a room in six weeks. HA! It only took seven more months. Lesson learned. Since moving in earlier this year, it’s also taken a significant amount of time to make my original design vision come to life. Unlike with our lofts, I’ve been incredibly picky about every single piece that comes into this house. Thankfully, I discovered ATG Stores , a new online furnishings retailer that carries just about everything under the sun. I was able to find all the finishing touches I’d been waiting for that ultimately pulled this room together. And I think my patience has paid off. I managed to create a respite from what is otherwise a toddler play zone! What do you think?

apt34_media_room2

Being that this is our media room, I always knew I wanted this room to have a dramatic, dark color scheme with a very monochromatic palette. I’m obsessed with the black/blue that I found – it’s Benjamin Moore in Gravel Gray. We painted the entire space, including the crown molding and the ceiling in the same color with a flat finish. It gives the room the modern, masculine feel I was going for. Our light oak floors add just enough contrast to brighten the space. Having two oversized windows also flood the room with light so it feels chic rather than cave-like.

A point for the renovation geeks – I’m also obsessed with my outlets and light switches from the Adorne Collection by LeGrand – they come in a gray which compliments my color palette. Seriously awesome.

apt34_media_room8

Keeping accessories to a minimum helps give the space a calm feel.

apt34_media_room6 apt34_media_room9

I used brass accents to warm the room. I love the little cocktail table – perfect for resting my nightly glass of wine (or two!).

apt34_mediaroom7

A throw pillow with chartreuse and greens adds a touch of color to break up the monochromatic scheme.

apt34_media_room4apt34_media_room5

I can never resist having a few treasures sitting out that make me smile. A selection of my favorite design books, a little bowl I’ve had so long I can’t remember where it came from. A strand of wood beads from the flea market.

I’ve broken down how you can recreate this look shopping from ATG Stores below.

apt34_mediaroom_list

SHOP THE LOOK: cactus / pendant light / brass table lamps / black throw / sectional / coffee table / marble & wood bookend / pillow 1, pillow 2 / brass & marble cocktail table / wood tray


For all the design inspiration for this room CLICK HERE

For the latest about our renovations, CLICK HERE


original photography for apartment34 by aubrie pick

This post is in partnership with ATG Stores. All thoughts and opinions are 100% my own. Thanks for supporting collaborations that have kept apt34’s doors open!

Ok, I’ll admit it. In years past, I’ve been a decorate-for-Christmas-on-December-23 type of girl. The holidays just always seem to sneak up on me. But this year, having finally moved into our fixer-upper and having a 20-month-old on my hands, everything is different. Now I have a lot more incentive to make our house feel special, cozy and inviting. I really want the season to be extra merry and bright for my kiddo – but I’m embracing the spirit too. After everything 2016 has put us through, I’m very ready to revel in the ultimate yuletide feeling. You with me?

As in years past, I turned to the guru, one Ms. Martha Stewart, to help with my holiday decorating. This year, I decided to turn our entryway into a Christmas-y wonderland. Spoiler alert – this is also a major sneak peek of our house!

apt34-martha-8458

A dramatic entryway deserves some dramatic holiday decor, but achieving the look doesn’t have to be complicated. I used just a few key pieces to create the simple, sophisticated vibe I was going for; a garland, a wreath and a little mini tree.

To make it easy on myself, I had Ms. Martha help me out with a beautiful faux garland as well as a faux wreath from her Martha Stewart for the Home Depot collection. Going faux makes life so much easier. There’s no needles scattering everywhere and no worry about the entire thing turning brown and brittle. You’re guaranteed to have good looking greens until they go back into their boxes, ready for the next year.

But going faux doesn’t mean you can’t get creative. In fact, it just gives you a great base to work with – no extensive DIY skills required. To make my garland and wreath a bit more personal, I decided I wanted to add my own elements. Some additional fresh pine boughs scattered throughout the garland, along with sprigs of white berries helped to fill out the gaps and really amp up the unique factor. I love how the garland cascades down the newel post on the stairway. It adds a touch of extra drama.

apt34-martha-8396apt34holidaydecor2

Adding berry sprigs to the wreath (which already came frosted and adorned with its own pine cones), pulls the entire look together. Tszujing a store-bought garland or wreath doesn’t require a set plan nor any over thinking of the design. Simply stick in branches here and there until you start to get the look you’re going for. I intentionally added weight to one side of the wreath to make it a little more asymmetrical along with a jumob-sized pinecone as a final flourish.

apt34_holidaydecor5apt34holidaydecor3

A little potted pine tucked into our hallway corner adds some additional personality to the entryway – and it was just so cute I couldn’t resist him.

And there you have it. Just a few easy steps and my house feels celebratory the moment you set foot through the door. My kiddo really loves it. And I really really love that.


original photography for apartment 34 by michelle drewes / florals by lambert floral studio

This post in partnership with Martha Stewart for the Home Depot. All thoughts and opinions are my own. Thanks for supporting posts that have kept apt34’s doors open.

Older posts
Gimme More